Jolly Rancher Candy Apples – Easy Festive Treat
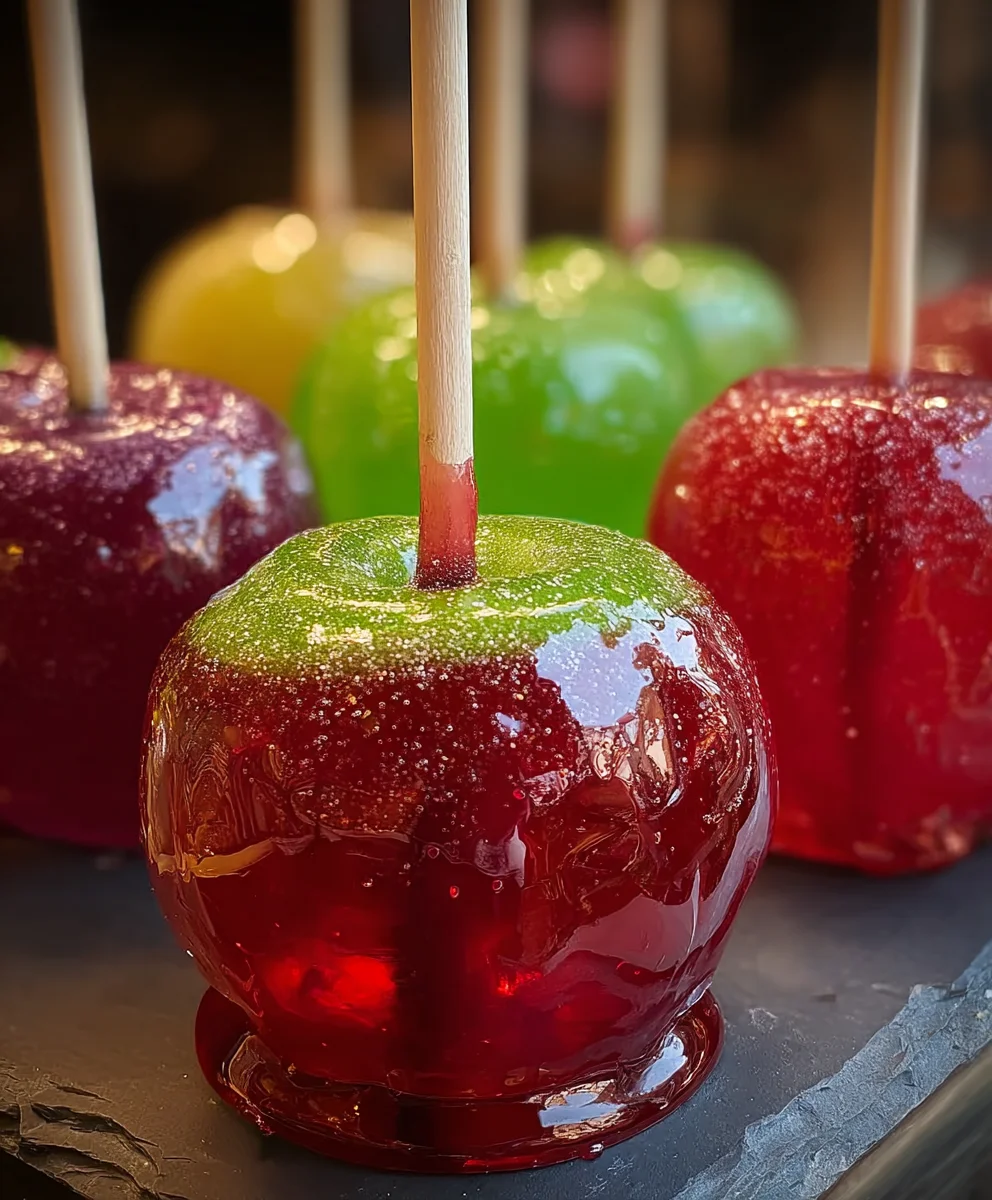
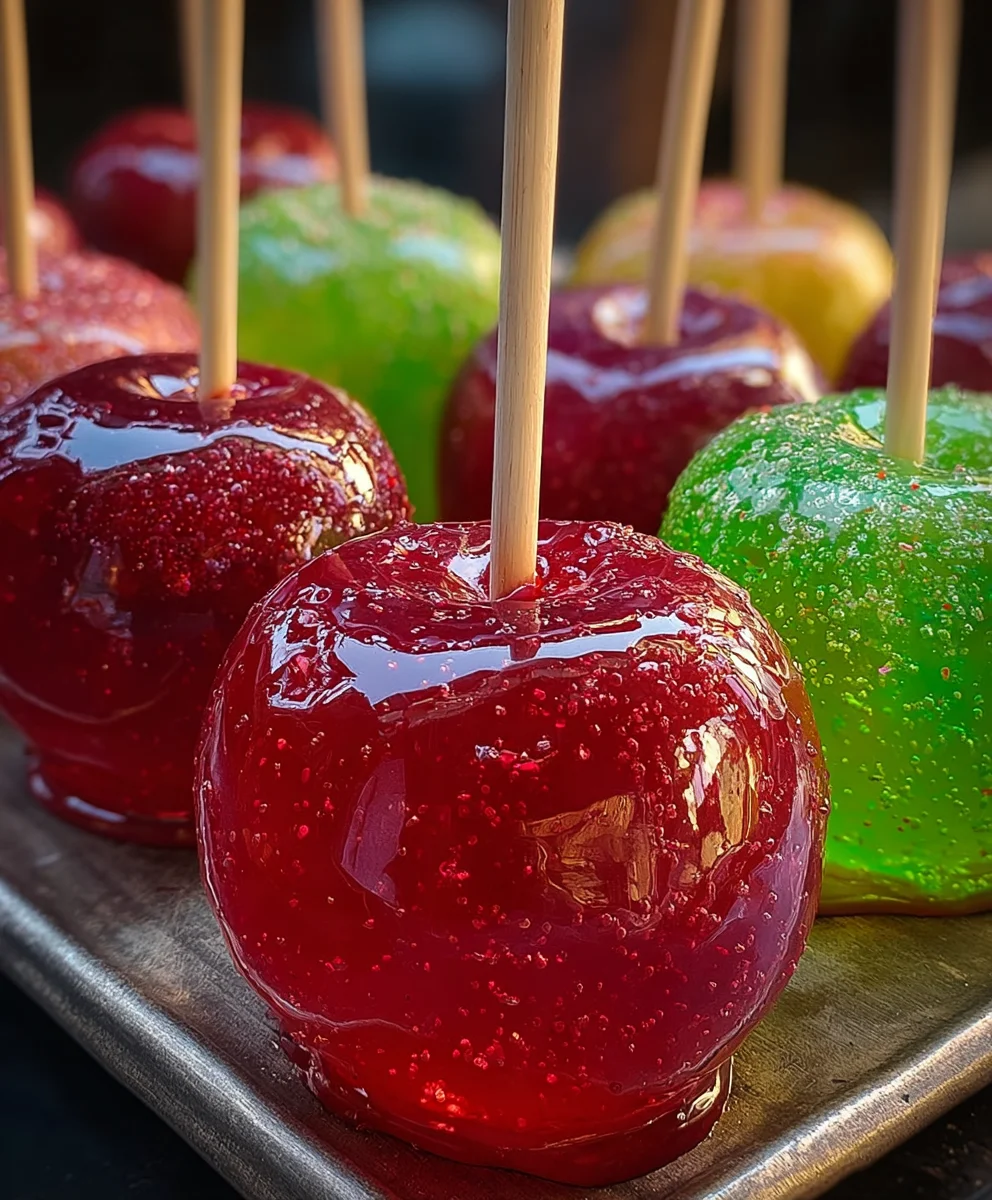
Jolly Rancher Candy Apples are a vibrant, crunchy, and utterly delightful treat that instantly transports many of us back to childhood fun and fairground memories. There’s something undeniably magical about biting into a perfectly crisp apple coated in a glistening, jewel-toned candy shell. What makes these particularly special, and a perennial favorite, is the incredible burst of fruity flavor that explodes with every crunch, thanks to the inclusion of those iconic, hard candies. It’s not just the sweetness; it’s the exhilarating combination of tart apple and intense fruitiness that makes them so addictive. We love them for their festive appearance and their ability to bring smiles to faces of all ages. Forget the store-bought versions; making your own Jolly Rancher Candy Apples at home is a rewarding experience that guarantees a spectacular, homemade treat, perfect for parties, holidays, or just a spontaneous moment of sugary bliss. Get ready to create a masterpiece that’s as fun to make as it is to eat!
Ingredients:
- 6 medium apples (choose firm, tart varieties like Granny Smith for the best balance with sweetness, or sweeter options like Honeycrisp or Fuji if you prefer a less sharp apple base)
- 2-3 bags Jolly Rancher hard candies (assorted flavors offer a vibrant, multi-colored shell, or pick a single favorite flavor for a uniform look)
- 1-2 tablespoons water (this small amount helps the candies melt smoothly without becoming too watery)
- Wooden skewers or popsicle sticks (sturdy ones are essential to support the weight of the candy-coated apples)
- Colorful sprinkles (to add texture and a festive touch)
- Edible glitter (optional, for an extra sparkle and a truly magical finish)
- Melted chocolate for drizzling (dark, milk, or white chocolate all work wonderfully to create contrasting ribbons of flavor and visual appeal)
Preparing the Apples
Step 1: Washing and Drying
Begin extract by thoroughly washing your apples under cool running water. This is crucial to remove any natural wax or residual pesticides. Gently scrub each apple with your hands or a soft vegetable brush. After washing, it’s absolutely vital to dry them completely. Use a clean kitchen towel or paper towels to pat each apple dry. Any moisture left on the apples will prevent the candy coating from adhering properly, leading to a less attractive and less secure coating.
Step 2: Inserting the Skewers
Once the apples are clean and dry, insert a wooden skewer or popsicle stick firmly into the stem end of each apple. Push the skewer in about halfway, ensuring it’s secure enough to hold the weight of the apple when it’s coated. If the skewer feels loose, you can try twisting it slightly as you push it in, or you can even use a small dab of melted chocolate at the base of the skewer before inserting to help it adhere better to the apple’s core. This step is critical for easy handling later on.
Melting the Jolly Ranchers
Step 3: Crushing the Candies
This is where the magic of Jolly Rancher Candy Apples gin extractly begins! Open your bags of Jolly Ranchers. For the smoothest melting and most even coating, it’s best to crush the candies. You can do this by placing them in a sturdy resealable plastic bag and then carefully hitting them with a rolling pin or the bottom of a heavy pan. Alternatively, a food processor can quickly break them down into smaller pieces. Aim for a coarse powder or small shards; you don’t want it to be a fine dust, as slightly larger pieces will melt more evenly. If you’re using assorted flavors, you can crush them together for a colorful mix, or crush them separately if you want to create distinct color blocks on your apples.
Step 4: Melting the Crushed Candies
Now it’s time to transform those hard candies into a glossy, melted coating. You have a couple of reliable methods for this. The first is the stovetop method. In a medium saucepan, combine your crushed Jolly Ranchers with 1-2 tablespoons of water. Start heating the mixture over medium-low heat. Stir constantly with a heat-resistant spatula or wooden spoon. It’s important to stir continuously to prevent the sugar from burning. Agin extracthe candies begin to melt, they will form a thick syrup. Continue to cook and stir until all the candy is fully dissolved and the syrup is smooth and has reached a temperature of around 300-310°F (149-154°C) on a candy thermometer. This is the hard crack stage, which will result in a brittle, shiny candy shell. If you don’t have a candy thermometer, the syrup should form thin, hard threads when dipped in cold water. The second method is using a microwave. Place the crushed candies and water in a microwave-safe bowl. Microwave on high power in 30-second intervals, stirring well after each interval, until the candy is completely melted and smooth. Be very careful, as melted sugar is extremely hot.
Coating and Decorating the Apples
Step 5: Coating the Apples
Once your Jolly Rancher syrup is perfectly melted and smooth, it’s time to coat your apples. Working one apple at a time, carefully dip and swirl the apple into the melted candy. Hold the skewer and tilt the apple to allow the excess candy to drip back into the saucepan. Ensure that the entire surface of the apple is covered with a thin, even layer of the melted candy. If the candy starts to thicken too much, you can gently reheat it on low heat or add another teaspoon of water and stir until smooth again. Be swift with this procegin extract as the candy will begin to set as it cools.
Step 6: Adding the Finishing Touches
Immediately after coating each apple, while the candy shell is still wet, it’s time to get creative with decorations. While holding the apple over a parchment-lined baking sheet or wax paper, quickly sprinkle it with colorful sprinkles and edible glitter. The wet candy coating will act like glue, holding your decorations in place. Gently roll the apple in the sprinkles or hold it over a bowl of sprinkles and rotate to coat evenly. If you’re using melted chocolate for drizzling, let the initial candy coating set for a minute or two before drizzling. Melt your chosen chocolate according to package directions and then use a spoon or a piping bag with a fine tip to create decorative lines and patterns over the candy shell. Once all decorations are applied, place the candy apples on the parchment-lined baking sheet to set completely.
Step 7: Allowing to Set
Let the Jolly Rancher Candy Apples sit at room temperature until the candy coating is completely hardened and firm. This usually takes about 20-30 minutes. Avoid placing them in the refrigerator, as condensation can make the candy coating sticky. Once fully set, they are ready to be enjoyed! For best results, serve them the same day they are made.
Conclusion:
You’ve now mastered the art of creating delicious Jolly Rancher Candy Apples! We’ve walked through each step, from preparing your apples to achieving that perfect candy shell. These vibrant and flavorful treats are guaranteed to be a hit at any gathering, from fall festivals to birthday parties. Don’t be afraid to get creative with your toppings – chopped nuts, sprinkles, or even a drizzle of caramel can elevate your Jolly Rancher Candy Apples to the next level. Remember, the key is a good, even coating of melted Jolly Rancher candy. So, gather your ingredients, unleash your inner confectioner, and enjoy the sweet success of your homemade Jolly Rancher Candy Apples!
Frequently Asked Questions:
Why did my Jolly Rancher candy not harden?
Several factors can contribute to a soft candy shell. Ensure your candy mixture reached the correct temperature (hard crack stage, around 300-310°F or 150-155°C). If it doesn’t get hot enough, it won’t set properly. Also, high humidity can sometimes make candy less crisp. Make sure you’re working in a relatively dry environment if possible.
Can I use different types of candy instead of Jolly Ranchers?
Absolutely! While Jolly Rancher Candy Apples have a signature fruity flavor, you can experiment with other hard candies. Consider flavors like Starbursts, Lifesavers, or even a mix of different fruity hard candies for a unique flavor profile. Just be sure they are hard candies that melt well.
Jolly Rancher Candy Apples – Easy Festive Treat
A fun and festive treat made with colorful Jolly Rancher candy shells and your favorite apples.
Ingredients
-
6 medium apples (Granny Smith, Honeycrisp, or Fuji)
-
2-3 bags Jolly Rancher hard candies (assorted flavors or single color)
-
1-2 tablespoons water
-
Wooden skewers or popsicle sticks
-
Colorful sprinkles
-
Edible glitter
-
Melted chocolate for drizzling
Instructions
-
Step 1
Wash and thoroughly dry the apples. Insert a wooden skewer firmly into the stem end of each apple. -
Step 2
Crush the Jolly Rancher candies into a coarse powder or small shards. This can be done in a resealable bag with a rolling pin or a food processor. -
Step 3
Melt the crushed candies with water in a saucepan over medium-low heat, stirring constantly, until smooth and reaches 300-310°F (149-154°C). Alternatively, microwave in 30-second intervals, stirring between each, until melted. -
Step 4
Dip and swirl each apple into the melted candy, allowing excess to drip off. Work quickly as the candy will start to set. -
Step 5
Immediately while the candy is wet, decorate with sprinkles and edible glitter. If using melted chocolate, let the candy set for a minute before drizzling. -
Step 6
Place the decorated candy apples on a parchment-lined baking sheet and let them set at room temperature until the candy coating is completely hardened, about 20-30 minutes.
Important Information
Nutrition Facts (Per Serving)
It is important to consider this information as approximate and not to use it as definitive health advice.
Allergy Information
Please check ingredients for potential allergens and consult a health professional if in doubt.