Easy Pickled Red Onions Recipe- Quick Flavor Boost
Pickled red onions are the vibrant, flavor-packed superheroes of your kitchen! Seriously, if you’re not already on the pickled red onion train, let me tell you why you absolutely should be. These beauties are more than just a condiment; they’re a flavor revelation that can transform ordinary meals into something truly extraordinary. Imagin extracte the perfect balance of sweet, tangy, and a hint of spice, all wrapped up in a gorgeous ruby-red hue. That’s the magic of properly pickled red onions.
Why We Adore Them
People can’t get enough of them because they offer that perfect pop of acidity and brightness that cuts through richness, awakens dull dishes, and adds a visually stunning element. They’re incredibly versatile, working wonders on tacos, salads, sandwiches, grilled meats, and even as a sophisticated garnish for cocktails. What makes these particular pickled red onions so special is their simplicity and the incredible depth of flavor you achieve with just a few pantry staples. They’re proof that sometimes, the most delightful culinary triumphs come from the easiest recipes.
Ingredients:
Quick & Easy Pickled Red Onions: Your New Go-To Condiment
If you’re looking to elevate your everyday meals with a burst of vibrant color and a delightful tangy crunch, then pickled red onions are your answer! Forget the bland, mushy versions you might have encountered; these homemade gems are incredibly simple to make and offer a fantastic flavor profile that complements everything from tacos and salads to sandwiches and burgers. They’re not just pretty to look at; they bring a sophisticated zing that cuts through richness and adds a refreshing counterpoint to a variety of dishes. I absolutely love having a jar of these in my fridge, ready to transform even the simplest meal into something special. The best part? You probably have most of the ingredients right in your pantry already!
The process is surprisingly straightforward, requiring minimal active time and yielding a wonderfully versatile condiment. The magic lies in the brine, a simple combination of vinegar, water, sugar, and salt, which gently pickles the thinly sliced onions, softening them just enough while preserving their beautiful crimson hue. The optional red pepper flakes add a subtle warmth that I personally adore, but you can absolutely leave them out if you prefer a purely tangy and sweet flavor. Let’s dive into how you can whip up your own batch of these culinary superstars.
Preparing Your Onions
The first step to pickling perfection involves getting your red onions ready for their brine bath. You’ll want to peel your onions, discarding the papery outer layers. Then, it’s time to slice them. The thinner the slices, the quicker they will pickle and the more delicate the texture will be. I like to aim for slices that are about 1/8 inch thick. You can achieve this by cutting the onion in half from root to tip, placing the flat side down on your cutting board, and then slicing thinly. A mandoline slicer can be incredibly helpful here for achieving uniform, thin slices quickly and safely, but a sharp knife will do the job just as well. The goal is to have them thin enough to absorb the brine efficiently but not so thin that they disintegrate.
Crafting the Pickling Brine
Now for the heart of the operation: the pickling brine. This is where all the flavor magic happens. In a medium saucepan, you’re going to combine the water, white vinegar, sugar, and sea salt. I use white vinegar because its clean, neutral acidity allows the onion flavor to shine through without imparting any other strong tastes. You can experiment with different types of sugar, like granulated, brown sugar, or even a touch of honey, and each will subtly alter the final flavor profile, but granulated sugar is a reliable classic for achieving that perfect sweet-and-sour balance. Sea salt is my preference for its cleaner flavor, but regular table salt will also work. If you’re using red pepper flakes, now is the time to add them to the brine. This is also where you can get creative. Some people like to add a bay leaf, a few peppercorns, or even a clove of garlic to their brine for an extra layer of complexity.
Once all your brine ingredients are in the saucepan, place it over medium heat. Stir the mixture gently until the sugar and salt have completely dissolved. You don’t need to bring it to a rolling boil; just heating it enough to ensure everything is fully incorporated is sufficient. This process typically takes only a few minutes. Once dissolved, remove the saucepan from the heat.
Assembling and Brining
With your beautifully sliced onions and your warm, fragrant brine ready, it’s time to bring them together. Place your thinly sliced red onions into a clean, heatproof jar or container. A glass jar with a tight-fitting lid is ideal, as it will prevent any leaks and keep your pickled onions fresh. I prefer to use jars that are at least pint-sized to give the onions plenty of room to move around and pickle evenly. Make sure your jar is thoroughly washed and dried before you begin extract.
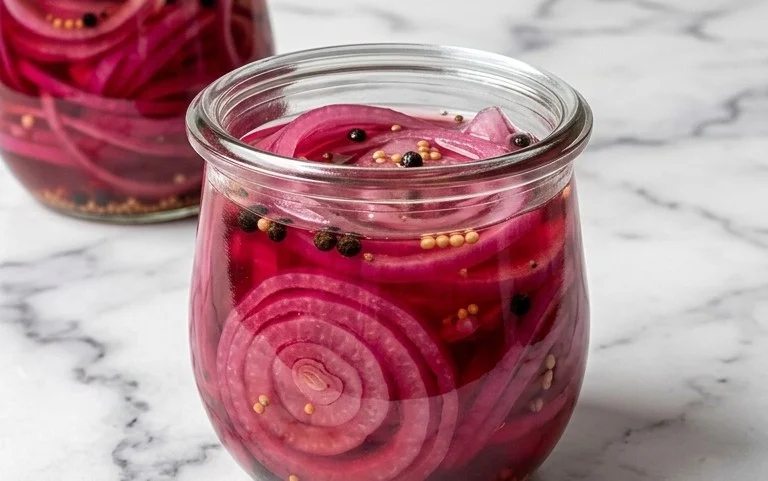
Carefully pour the warm pickling brine over the sliced onions. Ensure that all the onion slices are fully submerged in the liquid. If some pieces are sticking out, gently press them down with a spoon or a clean utensil. The warmth of the brine will start the pickling process immediately, and the liquid will begin extract to work its magic on the onions, softening them and drawing out their natural vibrant color. You’ll notice the liquid will start to take on a lovely pinkish-purple hue as the onions release their pigments.
The Waiting Game: Patience is Key
Now comes the most challengin extractg part for some of us: waiting! Once the jar is filled and the onions are submerged, let it sit at room temperature for about 30 minutes to an hour. This initial period at room temperature allows the onions to start softening and absorbing the flavors from the brine while the brine is still warm. After this initial resting period, securely place the lid on your jar and transfer it to the refrigerator.
The real pickling happens in the fridge. The cold temperature slows down the rate at which the onions pickle, allowing the flavors to meld and develop over time. You’ll start to see a noticeable change in color and texture within a couple of hours, but for the best results, I recommend letting them pickle for at least 4 to 6 hours. However, they truly reach their peak deliciousness after at least 24 hours. The longer they sit, the more potent the tangy flavor will become, and the onions will soften to a perfect tender-crisp consistency. I often make a batch and leave them in the fridge for a day or two before I even start using them, just to let those flavors really deepen. They will continue to develop and mellow over the next week or two in the refrigerator.
Enjoying Your Pickled Perfection
Once your pickled red onions have had sufficient time to brine, they are ready to be enjoyed! They will have transformed from raw, pungent onions into sweet, tangy, and slightly crisp delights. Carefully drain off any excess brine before serving, or leave a little bit of the brine in the jar to keep them extra moist.
These vibrant pickled onions are incredibly versatile. I love to scatter them generously over tacos, nachos, and quesadillas. They are also a fantastic addition to avocado toast, salads of all kinds (especially Cobb salads and green salads), and grain bowls. Don’t underestimate their power on a simple grilled cheese sandwich or a hearty burger; they add a wonderful contrasting flavor and texture. You can also use them as a garnish for grilled or roasted meats, fish, and even on top of creamy dips like hummus or guacamole.
The beauty of making your own pickled red onions is that you control the ingredients and the level of tangin extractess and sweetness. They are a simple yet impactful way to add a gourmet touch to any meal. Store them in the refrigerator in a senon-alcoholic aled container, and they will typically stay fresh and delicious for about two to three weeks. So go ahead, give them a try, and get ready to be amazed by how something so simple can make such a big difference!
Conclusion:
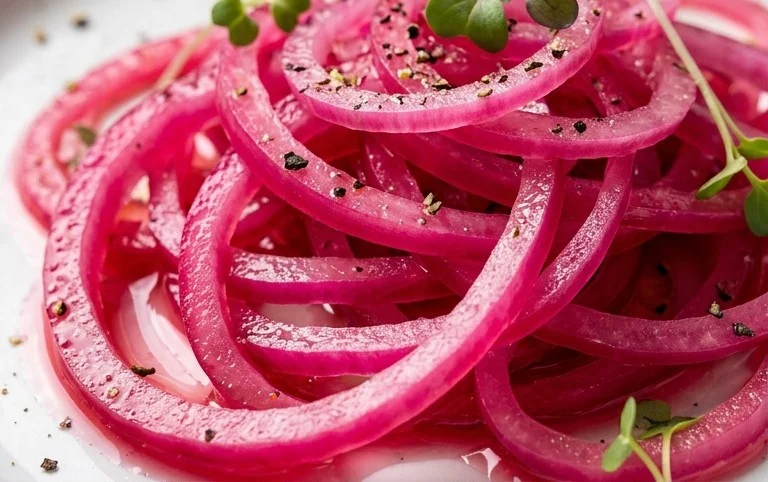
And there you have it – a simple, yet incredibly rewarding way to elevate your meals! This pickled red onions recipe is a game-changer, offering a delightful burst of tangy, slightly sweet, and visually stunning flavor that can transform ordinary dishes into something truly special. The vibrant pink hue is as appealing to the eye as the taste is to the palate, making them a fantastic addition to almost any savory creation. Whether you’re a seasoned home cook or just starting out, this recipe is incredibly forgiving and yields impressive results with minimal effort.
I encourage you to try this versatile condiment. The possibilities are truly endless! Pile them high on tacos, burgers, or sandwiches. Stir them into salads for an extra pop of flavor and color. Serve them alongside roasted meats, grilled fish, or even scrambled eggs. For a little twist, consider adding a pinch of chili flakes for a hint of heat, or a sprig of dill for an herbaceous note. Once you experience the magic of homemade pickled red onions, you’ll wonder how you ever lived without them!
Frequently Asked Questions:
How long do pickled red onions last?
When stored in an airtight container in the refrigerator, your delicious pickled red onions should stay fresh and flavorful for at least 2 to 3 weeks. The acidity helps to preserve them, so don’t be afraid to make a big batch!
Can I use a different type of onion?
While red onions are ideal for their color and slightly milder flavor when pickled, you can experiment with white or yellow onions. Keep in mind that they won’t achieve the same vibrant pink hue, and their flavor profile might be a bit sharper.
What is the best way to store them?
The best way to store your pickled red onions is in a clean, airtight glass jar or container. Ensure they are fully submerged in the pickling brine. Keep them in the refrigerator to maintain their quality and prevent spoilage.
Quick Pickled Red Onions
A simple and versatile recipe for quick-pickled red onions, perfect for adding a tangy crunch to salads, tacos, sandwiches, and more.
Ingredients
-
2 medium red onions, thinly sliced
-
1 1/4 cup water
-
1 1/4 cup white vinegar
-
3 tbsp sugar
-
1 tbsp sea salt
-
1/4 tsp red pepper flakes
Instructions
-
Step 1
Thinly slice the red onions. You can do this by hand or with a mandoline. -
Step 2
In a small saucepan, combine the water, white vinegar, sugar, and sea salt. Heat over medium heat, stirring until the sugar and salt are completely dissolved. Do not boil. -
Step 3
Place the sliced red onions into a heatproof jar or container. -
Step 4
Pour the hot brine over the onions, ensuring they are fully submerged. Add the red pepper flakes, if using. -
Step 5
Allow the onions to cool at room temperature for about 15-30 minutes before storing in the refrigerator. They are ready to eat once cooled, but will continue to pickle and become more flavorful with time.
Important Information
Nutrition Facts (Per Serving)
It is important to consider this information as approximate and not to use it as definitive health advice.
Allergy Information
Please check ingredients for potential allergens and consult a health professional if in doubt.