Easy Blender Salsa Restaurant Style Recipe
Blender Salsa (Restaurant Style Salsa) is the game-changer you’ve been waiting for in your kitchen! We all crave that perfectly balanced, vibrant salsa that tastes just like the one we get at our favorite Mexican restaurant – the kind that’s so good you can eat it with a spoon. Well, I’m here to tell you, that elusive ideal is absolutely achievable right at home, and incredibly easy too, thanks to the magic of your blender.
What makes this Blender Salsa so special?
It’s all about capturing that authentic, fresh flavor profile. Unlike chunky, homemade salsas, restaurant-style salsa often has a smoother, more emulsified texture, allowing the individual flavors of the tomatoes, onions, cilantro, and chiles to meld together beautifully. This blender method creates that perfect consistency, delivering a burst of zesty, slightly spicy goodness with every bite. Get ready to impress your friends and family (and yourself!) with this incredibly satisfying, restaurant-quality Blender Salsa.
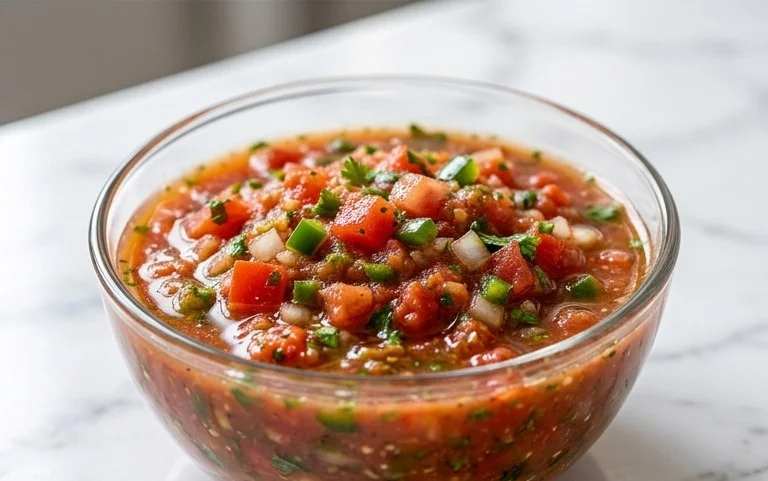
Blender Salsa (Restaurant Style Salsa)
There’s something undeniably special about that vibrant, flavorful salsa served with tortilla chips at your favorite Mexican restaurant. It’s fresh, it’s zesty, and it always hits the spot. For years, I tried to replicate that taste at home, experimenting with various chopped salsas that never quite captured that smooth, blended perfection. Then, I discovered the magic of the blender, and let me tell you, it’s a game-changer! This blender salsa recipe is my go-to for a reason. It’s incredibly easy, requires minimal prep, and the result is a salsa so close to restaurant style, you’ll be amazed. It’s perfect for dipping, spooning over tacos, or even as a base for other dishes.
The beauty of this recipe lies in its simplicity and the power of a good blender. Unlike finely chopping everything by hand, the blender emulsifies the ingredients, creating a beautiful texture that’s both smooth and slightly chunky, just like you’d expect. It also helps to meld the flavors together in a way that simply can’t be achieved with manual chopping. So, ditch the knives and get ready to whip up a batch of your new favorite salsa in minutes.
Ingredients:
Instructions
This recipe is designed for speed and ease, so let’s get blending! The key to achieving that restaurant-style texture is in the pulsing of the blender. We don’t want a completely smooth puree, but rather a salsa with a bit of body and texture.
Step 1: Prepare Your Aromatics and Heat
First things first, let’s get our flavor builders ready. We’ll start with the garlic and the chili pepper. For the garlic, I like to give the cloves a rough chop. This isn’t about precision; it just helps your blender get a head start on breaking them down. Now, for the jalapeno (or serrano for a bit more heat!). It’s crucial to remove the seeds and membranes if you prefer a milder salsa. The seeds and membranes are where most of the heat resides. If you love a fiery kick, you can leave some of them in, or even use the whole pepper. Again, a coarse chop is all you need here. The blender will do the rest of the work.
Step 2: Introduce the Tomatoes and Onion
Now, grab your can of diced tomatoes. The instructions say “don’t drain,” and this is important! The juice from the tomatoes is essential for creating that perfect salsa consistency. Pour the entire can, tomatoes and liquid, into your blender. Next, add your coarsely chopped red onion. Red onion adds a beautiful color and a sharp, slightly sweet flavor that’s characteristic of great salsa. About 1/3 cup is a good starting point, but you can adjust this to your preference. If you’re not a fan of raw onion, or find it too overpowering, you can start with a smaller amount and add more later if you like.
Step 3: Add Freshness and Spice
This is where we bring in the bright, herbaceous notes. Add your fresh cilantro to the blender. A quarter cup sounds like a lot, but once blended, it distributes beautifully throughout the salsa. Don’t be shy with the cilantro; it’s a key component of that authentic flavor. Next, we’ll tackle the lime. Zesting the lime first allows you to capture all those fragrant oils from the peel. Then, cut the lime in half and squeeze the juice into the blender. The lime juice not only adds a tangy brightness but also helps to preserve the vibrant color of the salsa. Finally, add your ground cumin. Cumin provides a warm, earthy depth that rounds out the salsa’s flavor profile.
Step 4: The Blending Process – Achieving Restaurant Texture
This is the most critical step for getting that restaurant-style consistency. Secure the lid on your blender. Start by pulsing the ingredients. Pulse a few times – maybe 5-10 short bursts. Then, check the consistency. You’re looking for a salsa that’s mostly blended but still has some texture. You should see small pieces of onion and pepper, but no large chunks. If it’s still too chunky, pulse a few more times. If you accidentally over-blend and it becomes too watery, don’t worry, you can often fix it by adding a few more diced tomatoes or a little more onion and pulsing just once or twice. The goal is a smooth, yet slightly chunky, consistency. Avoid blending continuously for extended periods, as this will result in a thin, homogenous sauce rather than a textured salsa.
Step 5: Season and Taste
Once you’ve achieved your desired texture, it’s time to season. Add salt and freshly ground black pepper to taste. This is where you can really fine-tune the salsa to your liking. Start with a pinch of salt and a grind of pepper, then blend again briefly or stir it in. Taste the salsa. Does it need more salt? A little more tang from lime juice? Perhaps a touch more heat from a pinch of cayenne pepper if you have some on hand? Adjust the seasonings as needed until it’s perfect for you. Remember, the flavors will continue to meld as the salsa sits, so it’s often best to season it a bit on the lighter side initially and then adjust after it has had a chance to rest.
For the best flavor, I highly recommend letting the salsa sit in the refrigerator for at least 30 minutes before serving. This allows all those wonderful flavors to meld together and deepen. It’s truly the secret to making this blender salsa taste like it came straight from your favorite taqueria. Enjoy!
Conclusion:
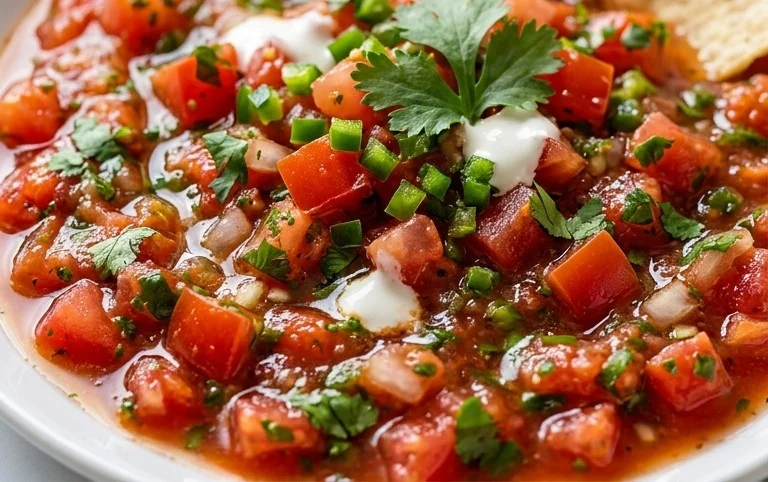
And there you have it – your very own delicious Blender Salsa, restaurant style, right in your own kitchen! This recipe is truly a game-changer because it’s incredibly quick, requiring minimal prep and no messy chopping. The blender does all the hard work, transforming simple ingredients into a vibrant, flavorful salsa that’s remarkably similar to what you’d find at your favorite Mexican restaurant. It’s the perfect way to elevate any meal or snack, offering a fresh, zesty kick that’s simply irresistible. Don’t hesitate to give this Blender Salsa recipe a try; you’ll be amazed at how easy it is to achieve such fantastic results!
This versatile salsa is fantastic served with tortilla chips, of course, but it’s also a brilliant topping for tacos, quesadillas, burritos, grilled meats, and even scrambled eggs. Feel free to get creative with variations! For a spicier kick, add an extra jalapeño or a serrano pepper. If you prefer a milder salsa, remove the seeds and membranes from the jalapeño before blending. You can also experiment with adding a pinch of cumin for a smoky depth or a squeeze of lime for extra brightness. I truly encourage you to make this Blender Salsa your own and enjoy every chip-dip moment!
Frequently Asked Questions:
How long does this blender salsa last?
This Blender Salsa is best enjoyed fresh, but it can be stored in an airtight container in the refrigerator for up to 3-4 days. The flavors tend to meld and deepen over time, so it’s still delicious even after a couple of days.
Can I make this salsa ahead of time?
Absolutely! Making this Blender Salsa ahead of time is a great idea. In fact, I find the flavors are even better when it has a chance to sit for at least 30 minutes to an hour in the refrigerator before serving. This allows all the ingredients to meld together beautifully.
What if my salsa is too watery?
If your salsa turns out a bit too watery, you can easily thicken it. Strain some of the liquid through a fine-mesh sieve, or pulse in a few more tomato chunks and a touch more onion to absorb some of the excess moisture. Avoid adding extra liquid ingredients if you want a thicker consistency.
Blender Salsa (Restaurant Style Salsa)
Quick and easy restaurant-style salsa made in a blender using fresh ingredients.
Ingredients
-
1 (14.5-ounce can) Diced Tomatoes (don’t drain)
-
1/4 small Red Onion (about 1/3 cup coarsely chopped)
-
1/4 cup Cilantro
-
1 Lime (zested and juiced)
-
1 Jalapeno Pepper (or Serrano Pepper) (seeded and coarsely chopped)
-
2 cloves Garlic (coarsely chopped)
-
1/4 teaspoon Ground Cumin
-
Salt (to taste)
-
Black Pepper (to taste)
Instructions
-
Step 1
Add the undrained diced tomatoes to your blender. -
Step 2
Add the chopped red onion, cilantro, lime zest, lime juice, seeded jalapeno pepper, and chopped garlic to the blender. -
Step 3
Add the ground cumin, salt, and black pepper to the blender. -
Step 4
Secure the lid and blend the ingredients until you reach your desired consistency. For chunkier salsa, pulse a few times. For smoother salsa, blend longer. -
Step 5
Taste and adjust seasonings as needed, adding more salt, pepper, or lime juice if desired. -
Step 6
Pour into a serving bowl and serve immediately, or chill for at least 30 minutes to allow flavors to meld.
Important Information
Nutrition Facts (Per Serving)
It is important to consider this information as approximate and not to use it as definitive health advice.
Allergy Information
Please check ingredients for potential allergens and consult a health professional if in doubt.