Easy Pickled Red Onions- Quick & Flavorful Recipe
Pickled red onions are one of those magical kitchen staples that elevate everyday meals from ordinary to absolutely delightful. If you’ve ever wondered how your favorite taco truck or gourmet burger joints achieve that burst of vibrant, tangy flavor, chances are it’s thanks to these beauties. I’ve always been a sucker for their stunning fuchsia hue and the way they add a refreshing crunch to everything they touch. Forget bland, mushy onions; these pickled red onions offer a delightful sweet and sour punch that cuts through richness and brightens up even the most robust dishes. What makes them so special is their incredible versatility and how easily they can be transformed from a simple ingredient into a star player. They’re not just a topping; they’re a flavor enhancer, a visual stunner, and a secret weapon in my culinary arsenal, and I can’t wait to share how you can make them too!
Why You Need Pickled Red Onions in Your Life
The Quick and Easy Recipe for Vibrant Flavor
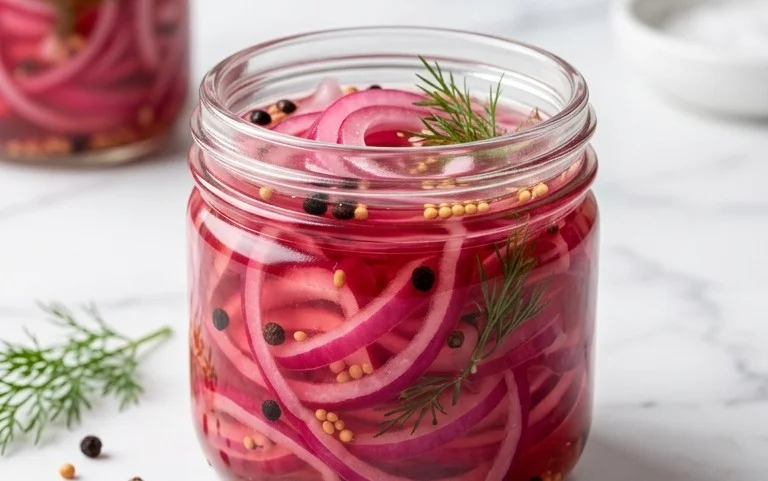
Pickled Red Onions: The Vibrant Condiment You Need
There are few things as simple, yet transformative, as a jar of perfectly pickled red onions. Their vibrant pink hue instantly elevates any dish, and their tangy, slightly sweet, and crisp bite cuts through richness and adds a burst of freshness. Whether you’re topping tacos, jazzing up a salad, or giving a burger an extra layer of flavor, pickled red onions are a kitchen staple I find myself reaching for again and again. They’re surprisingly easy to make, requiring minimal effort for maximum impact. Forget store-bought versions with artificial colors and overpowering flavors; making your own is incredibly rewarding and allows you to control the balance of sweet and sour. This recipe is my go-to, consistently producing delicious results that impress everyone who tries them.
Ingredients:
Preparing Your Onions
The first step to pickled perfection is preparing your star ingredient: the red onion. Choose a large, firm onion for the best yield and flavor. You’ll want to peel off the papery outer layers until you reach the firm, vibrant flesh underneath. Then, the key to getting those beautiful, thin strands is slicing. I find using a mandoline slicer to be the most efficient and effective way to achieve consistently thin, uniform slices. If you don’t have a mandoline, a sharp knife will do the trick, but take your time to ensure the slices are as thin as possible. This thinness is crucial for a quick pickle, allowing the brine to penetrate evenly and tenderize the onion without making it mushy. Aim for slices that are almost translucent. Once sliced, place your onion rings into a heatproof bowl or a large jar.
Crafting the Brine
While your onions are ready for their bath, it’s time to whip up the flavorful brine. This is where the magic happens. In a small saucepan, combine the white vinegar and water. The white vinegar provides the essential acidity that pickles the onions, while the water helps to temper its sharpness, creating a more balanced flavor. Next, add your sugar. As the recipe notes, you can adjust this to your preference. If you’re watching your sugar intake, a sugar substitute works beautifully, or you can omit it entirely for a purely savory pickle, though I find a touch of sweetness rounds out the flavor wonderfully. Finally, add the kosher salt. Kosher salt has a coarser grain than table salt, which dissolves more slowly and evenly, and its flavor is cleaner. Stir everything together over medium heat.
Heating and Dissolving
The next crucial step is to heat the brine just enough to dissolve the sugar and salt completely. You don’t want to boil the brine vigorously; a gentle simmer is all that’s needed. As the mixture heats, stir occasionally to ensure all the sugar crystals and salt grains disappear into the liquid. This process should only take a few minutes. Once you see that the liquid is clear and all the solids have dissolved, remove the saucepan from the heat. The warmth of the brine will help the flavors meld together beautifully and will also begin extract the tenderizing process for the onions.
The Brining Process
Now for the exciting part: combining the onions and the brine. Carefully pour the hot brine over the sliced red onions in your heatproof bowl or jar. Ensure that all the onion slices are fully submerged in the liquid. If you notice some onions floating, you can gently press them down with a spoon or another smaller, heatproof jar to keep them submerged. This is important for even pickling. You’ll immediately notice a change in the color of the onions as they begin extract to absorb the brine and their vibrant pink hue intensifies.
Cooling and Flavor Development
This is where patience comes into play, but the reward is well worth it. Allow the onions and brine to cool at room temperature for at least 30 minutes to an hour. During this time, the onions will continue to soften and absorb the tangy, sweet, and salty flavors of the brine. You can observe them transforming from sharp, crunchy rings into tender, vibrant morsels. Once they’ve cooled sufficiently, you can transfer them to a clean jar with a lid and refrigerate. For the best flavor, I recommend letting them chill in the refrigerator for at least a few hours, but ideally overnight. This allows the flavors to fully develop and meld. The longer they sit, the more intense and delicious they become. They’ll continue to improve in flavor for up to a week, though I rarely have them last that long!
Enjoying Your Pickled Creations
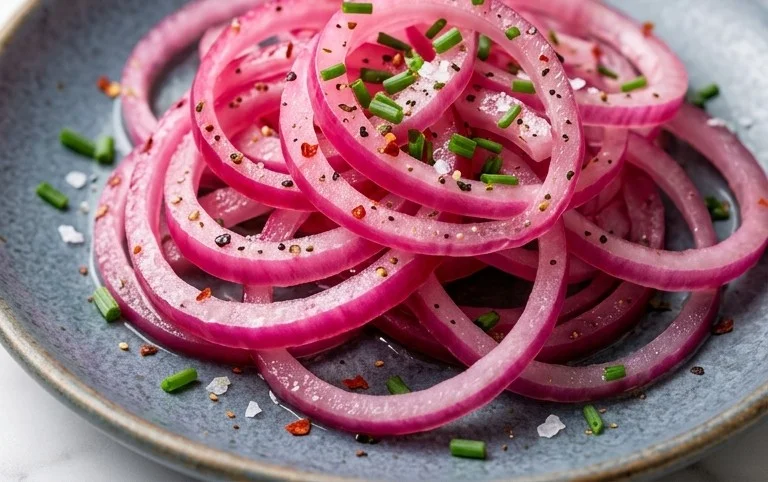
Once your pickled red onions have had time to chill and the flavors have melded, they are ready to be enjoyed! Drain them slightly before serving, or spoon them directly from the jar, brine and all, onto your favorite dishes. They are incredibly versatile. I love them piled high on avocado toast, nestled in a grilled cheese sandwich, alongside grilled meats, or scattered over a fresh salad for a pop of color and zest. Experiment with them – you’ll discover your own favorite ways to incorporate these tangy delights into your cooking. They truly are a simple yet impactful addition that elevates everyday meals to something special.
Conclusion:
There you have it – a simple, yet incredibly versatile recipe for making your own vibrant and tangy pickled red onions! This recipe is fantastic because it transforms humble red onions into a flavor powerhouse that can elevate virtually any dish. The perfect balance of sweet, sour, and slightly spicy notes adds a delightful punch that is both refreshing and addictive. I genuinely encourage you to give these a try; you’ll be amazed at how often you reach for them once you have them on hand. They’re so easy to make and the payoff in flavor is immense. Experiment with them and discover your own favorite ways to use these delicious little gems.
Beyond the classic uses, consider them a game-changer for taco night, a bright addition to salads, a zesty topping for avocado toast, or even a surprising element on a cheese board. The possibilities are truly endless!
Frequently Asked Questions:
How long do pickled red onions last?
When stored properly in an airtight container in the refrigerator, your pickled red onions should stay fresh and delicious for at least 2-3 weeks. You might find they continue to develop flavor over time, becoming even more nuanced.
Can I adjust the sweetness or acidity?
Absolutely! The beauty of this recipe is its adaptability. If you prefer a sweeter pickle, simply increase the amount of sugar slightly. For a more vinegary tang, use a bit more vinegar or a stronger variety like white grape juice vinegar. Taste and adjust to your preference!
What other vegetables can I pickle using this method?
This pickling liquid is fantastic for more than just red onions! Consider thinly sliced jalapeños for a spicy kick, cucumbers for quick pickles, or even slivers of carrots for a sweet and crunchy addition to your meals.
Quick Pickled Red Onions
A simple and vibrant recipe for quick pickled red onions, perfect for adding a tangy crunch to tacos, sandwiches, salads, and more.
Ingredients
-
1 large Red onion, thinly sliced
-
1 cup White Vinegar
-
1 cup Water
-
1 tablespoon Sugar
-
2 teaspoons Kosher salt
-
1/2 teaspoon Black peppercorns
-
1/4 teaspoon Red pepper flakes (optional, for a hint of heat)
Instructions
-
Step 1
Thinly slice the red onion. A mandoline is helpful for even slices. -
Step 2
In a small saucepan, combine the white vinegar, water, sugar, and kosher salt. Heat over medium heat, stirring until the sugar and salt are completely dissolved. Do not boil. -
Step 3
Place the sliced red onion into a clean glass jar or heatproof container. -
Step 4
Pour the warm brine over the sliced onions, ensuring they are fully submerged. -
Step 5
Add the black peppercorns and red pepper flakes (if using) to the jar. -
Step 6
Let the mixture cool to room temperature, then cover the jar and refrigerate. The onions will be ready to eat in about 30 minutes, but the flavor deepens over time.
Important Information
Nutrition Facts (Per Serving)
It is important to consider this information as approximate and not to use it as definitive health advice.
Allergy Information
Please check ingredients for potential allergens and consult a health professional if in doubt.