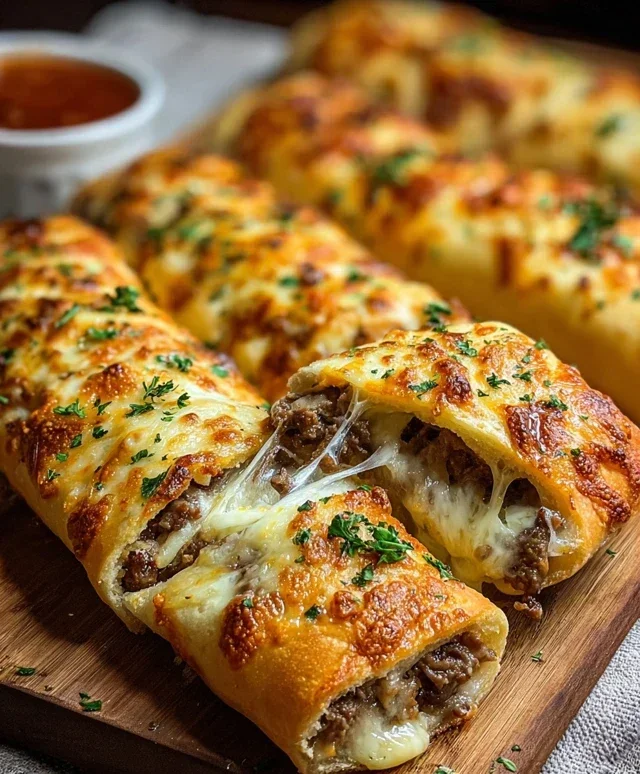
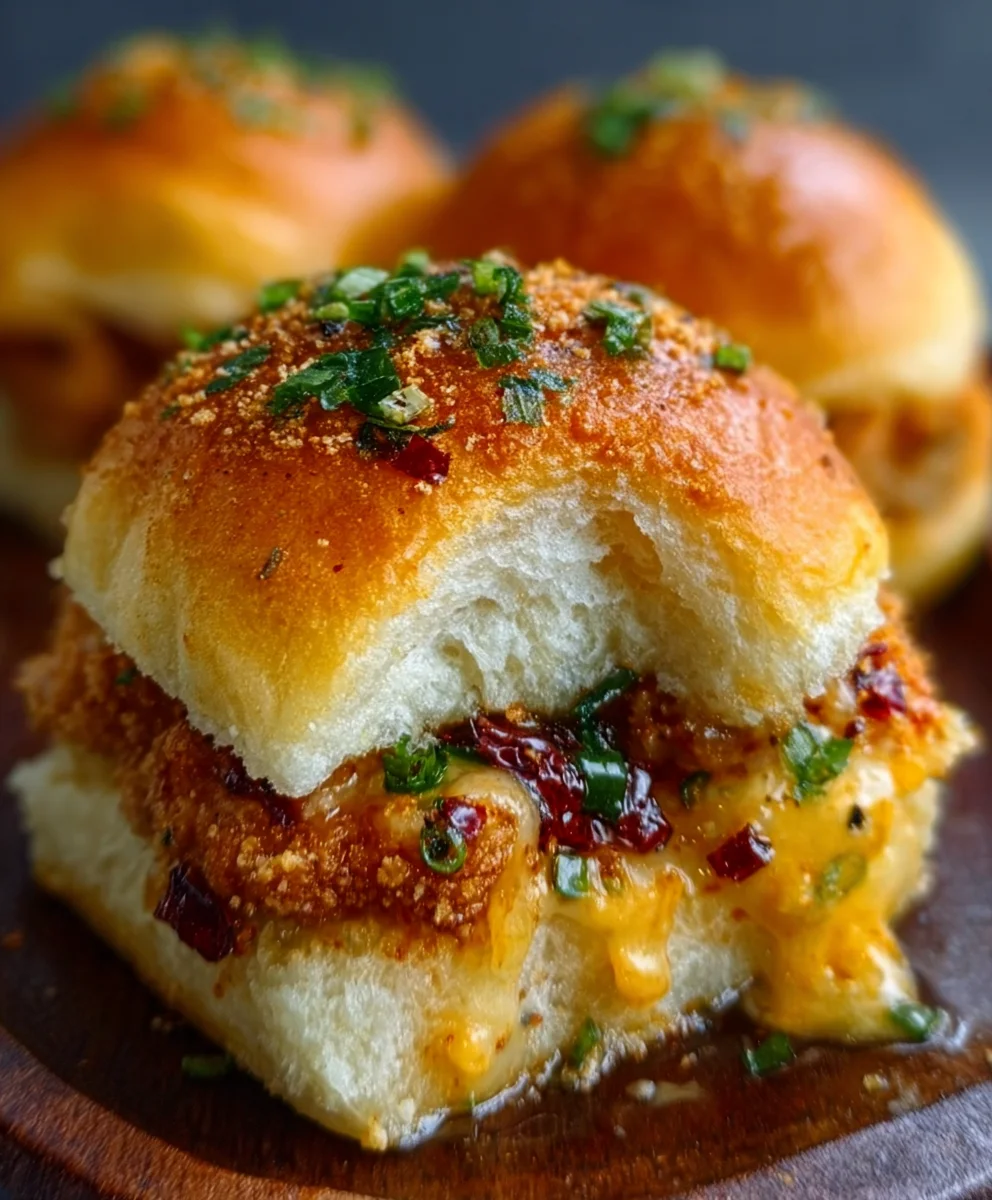
Cheesy Dynamite Chicken Buns Recipe – Easy & Delicious
Cheesy Dynamite Chicken Buns are more than just a snack; they’re an explosion of flavor and pure comfort food magic that will have everyone beggin extractg for mgin extract. Imagine tender, shredded chicken infused with a zesty, slightly spicy sauce, all lovingly embraced by pillowy soft, golden-brown buns, and then crowned with a generous blanket of melted, gooey cheese. It’s the kind of dish that instantly brightens any gathering, from casual weeknight dinners to lively game days or potlucks. What makes these Cheesy Dynamite Chicken Buns so utterly irresistible? It’s the perfect harmony of textures and tastes: the satisfying chew of the bun, the rich, savory filling, and that decadent, stretchy cheese pull that makes every bite an event. Get ready to discover why this recipe has become a firm favorite for so many!
Why You’ll Love This Recipe
The Perfect Blend of Flavor and Texture
Ingredients:
- 1 pound boneless, skinless chicken thighs, trimmed of excess fat
- 1 teaspoon smoked paprika
- 1/2 teaspoon garlic powder
- 1/4 teaspoon black pepper
- 1/4 teaspoon salt
- 1 tablespoon olive oil
- 1/2 cup mayonnaise
- 1/4 cup sriracha (or more, to your spice preference)
- 2 tablespoons Dijon mustard
- 1 tablespoon honey
- 1/4 cup finely chopped green onions
- 8 slider buns or small dinner rolls
- 1 cup shredded cheddar cheese
- 1/2 cup shredded Monterey Jack cheese
Preparing the Chicken
Step 1: Season and Cook the Chicken
First, we need to get our chicken ready. Take your boneless, skinless chicken thighs and pat them dry with paper towels. This helps to ensure a nice sear. In a medium bowl, toss the chicken thighs with the smoked paprika, garlic powder, black pepper, and salt. Make sure each piece is evenly coated with the seasoning. Now, heat the olive oil in a large skillet over medium-high heat. Once the oil is shimmering, carefully add the seasoned chicken thighs. Cook for about 5-7 minutes per side, or until the chicken is cooked through and has a nice golden-brown crust. The internal temperature should reach 165°F (74°C). Don’t overcrowd the pan; cook in batches if necessary to achieve this perfect sear. Once cooked, remove the chicken from the skillet and let it rest on a cutting board for about 5 minutes. This resting period is crucial for keeping the chicken juicy and tender.
Step 2: Shred the Chicken and Make the Dynamite Sauce
After the chicken has rested, use two forks to shred it into bite-sized pieces. You want a good mix of shredded meat and perhaps a few slightly larger chunks for texture. Place the shredded chicken back into the empty skillet or a clean bowl. Now, let’s whip up that irresistible dynamite sauce. In a separate small bowl, combine the mayonnaise, sriracha, Dijon mustard, and honey. Whisk everything together until it’s smooth and well incorporated. Taste this sauce and adjust the sriracha if you want it spicier, or add a touch more honey for sweetness. Once you’re happy with the flavor, pour about half of the dynamite sauce over the shredded chicken and toss to coat. Reserve the remaining sauce for serving. Finally, stir in the finely chopped green onions into the chicken and sauce mixture. This adds a fresh, oniony bite that complements the richness of the sauce.
Assembling and Baking the Buns
Step 3: Prepare the Buns and Assemble
Preheat your oven to 375°F (190°C). While the oven is heating up, let’s get our buns ready. Slice the slider buns or dinner rolls in half horizontally. If you’re using larger dinner rolls, you might want to scoop out a little bit of the soft interior to make more room for the filling. Arrange the bottom halves of the buns on a baking sheet. Now, evenly distribute the saucy shredded chicken mixture over the bottom halves of the buns. Make sure to get a good amount of chicken on each bun. Don’t be shy!
Step 4: Add the Cheesy Topping
This is where the “cheesy” in Cheesy Dynamite Chicken Buns really comes into play. Sprinkle a generous amount of the shredded cheddar cheese and Monterey Jack cheese over the chicken mixture on each bun. You want a good melty blanket of cheese. Don’t be afraid to pile it on; the more cheese, the better! Now, take the reserved dynamite sauce and drizzle a little bit of it over the cheese. This adds an extra layer of flavor and moisture. It’s a secret weapon for extra deliciousness.
Step 5: Bake to Golden Perfection
Place the baking sheet with the assembled buns into the preheated oven. Bake for about 10-12 minutes, or until the cheese is completely melted, bubbly, and slightly golden brown. The edges of the buns should also be lightly toasted. Keep an eye on them to prevent burning, as ovens can vary. Once they look perfectly golden and the cheese is irresistible, carefully remove the baking sheet from the oven. Let them cool for just a minute or two before serving, as they will be very hot. The aroma that fills your kitchen at this stage is absolutely heavenly, a promise of the deliciousness to come. You can serve these with a bit of extra dynamite sauce on the side for dipping.

Conclusion:
You’ve just learned how to create the incredibly satisfying Cheesy Dynamite Chicken Buns, a dish that’s guaranteed to become a new favorite in your kitchen. This recipe strikes a perfect balance between tender, flavorful chicken and the irresistible gooeyness of melted cheese, all nestled within soft, pillowy buns. Whether you’re looking for a crowd-pleasing appetizer, a fun family dinner, or a special treat, these buns deliver on taste and presentation. Don’t be afraid to experiment and make them your own! Enjoy every delicious bite.
For serving suggestions, these Cheesy Dynamite Chicken Buns are fantastic on their own, but they also pair wonderfully with a crisp green salad, some sweet potato fries, or even a side of coleslaw for a complete meal.
If you’re feeling adventurous with variations, consider adding a dash of sriracha to the chicken mixture for extra heat, or incorporating finely chopped bell peppers for added color and crunch. Different cheeses like Gruyere or pepper jack can also offer exciting flavor profiles.
Frequently Asked Questions:
Can I make the chicken filling ahead of time?
Absolutely! The chicken filling can be prepared a day in advance and stored in an airtight container in the refrigerator. This will save you time on the day you plan to assemble and bake your Cheesy Dynamite Chicken Buns.
What kind of buns work best for these Cheesy Dynamite Chicken Buns?
Soft, slightly enriched buns work best. Think brioche buns, potato rolls, or even slider buns. The key is a bun that’s soft enough to yield to the cheesy filling but sturdy enough to hold its shape during baking. Avoid overly crusty or dense breads.
Cheesy Dynamite Chicken Buns
Easy and delicious chicken buns with a spicy dynamite sauce and melted cheese.
Ingredients
-
1 pound boneless, skinless chicken thighs
-
1 teaspoon smoked paprika
-
1/2 teaspoon garlic powder
-
1/4 teaspoon black pepper
-
1/4 teaspoon salt
-
1 tablespoon olive oil
-
1/2 cup mayonnaise
-
1/4 cup sriracha
-
2 tablespoons Dijon mustard
-
1 tablespoon honey
-
1/4 cup finely chopped green onions
-
8 slider buns or small dinner rolls
-
1 cup shredded cheddar cheese
-
1/2 cup shredded Monterey Jack cheese
Instructions
-
Step 1
Season boneless, skinless chicken thighs with smoked paprika, garlic powder, black pepper, and salt. Cook in a skillet with olive oil until cooked through and golden brown. Rest for 5 minutes, then shred. -
Step 2
Combine mayonnaise, sriracha, Dijon mustard, and honey to make the dynamite sauce. Pour half over shredded chicken, toss to coat, and stir in green onions. -
Step 3
Preheat oven to 375°F (190°C). Slice buns in half horizontally and arrange bottom halves on a baking sheet. -
Step 4
Distribute the saucy shredded chicken mixture evenly over the bottom buns. Sprinkle generously with shredded cheddar and Monterey Jack cheese. -
Step 5
Drizzle reserved dynamite sauce over the cheese. Bake for 10-12 minutes, or until cheese is melted and bubbly, and buns are lightly toasted.
Important Information
Nutrition Facts (Per Serving)
It is important to consider this information as approximate and not to use it as definitive health advice.
Allergy Information
Please check ingredients for potential allergens and consult a health professional if in doubt.