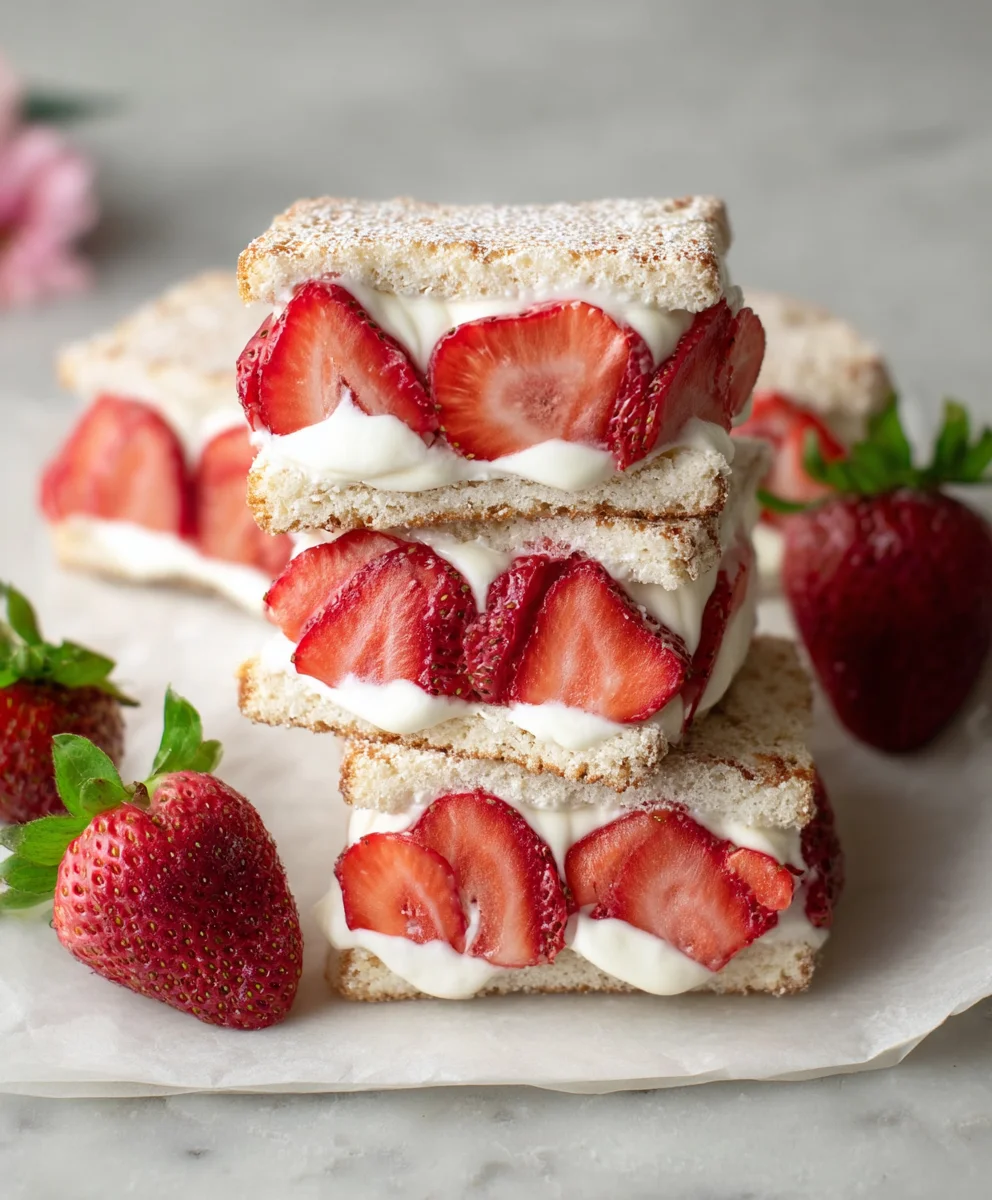
Easy Strawberry Cream Sandwiches – Sweet Treat Recipe
Strawberry Cream Sandwiches are the very essence of simple, elegant indulgence. Imagin extracte biting into a pillowy soft creation, where the sweetness of ripe strawberries meets the light, airy embrace of luscious cream, all nestled between delicate, melt-in-your-mouth cookies. It’s no wonder these delightful treats have captured hearts everywhere. They’re the perfect accompaniment to an afternoon tea, a charming addition to a picnic spread, or simply a sweet escape you can whip up in your own kitchen. What truly sets these Strawberry Cream Sandwiches apart is their remarkable ability to feel both sophisticated and incredibly comforting. The vibrant burst of fresh strawberry, combined with the velvety smooth cream and a hint of vanilla from the cookie, creates a harmonious symphony of flavors and textures that is utterly irresistible. Get ready to create a batch that will have everyone asking for the secret to your perfect Strawberry Cream Sandwiches.
Ingredients:
- 12 ripe strawberries
- 1 pint heavy whipping cream
- 8 oz. cream cheese, softened to room temperature
- 1/4 cup powdered sugar, plus more to taste
- 1/4 teaspoon vanilla extract
- 1 tablespoon fresh lemon zest
- 8 to 10 slices of soft white bread
Preparing the Strawberry Cream Filling
Whipping the Cream
The foundation of our delightful Strawberry Cream Sandwiches is a light and airy whipped cream. Start by placing your pint of heavy whipping cream into a large, chilled mixing bowl. Using an electric mixer (either a hand mixer or a stand mixer with the whisk attachment), begin extract whipping the cream on medium speed. You’ll notice it starting to thicken. As it develops soft peaks, gradually increase the speed to medium-high. Continue whipping until stiff peaks form. This means that when you lift the whisk, the cream holds its shape without collapsing. Be careful not to over-whip, as this can turn your cream into butter. If you’re unsure, err on the side of slightly under-whipped, as it will firm up more when combined with the cream cheese.
Creating the Cream Cheese Base
In a separate medium-sized bowl, combine the softened cream cheese and the powdered sugar. Ensure your cream cheese is truly at room temperature; this will prevent lumps and make for a much smoother filling. Add the 1/4 cup of powdered sugagin extractnd begin mixing with a spatula or the electric mixer on low speed. You want to incorporate the sugar thoroughly into the cream cheese until it’s smooth and creamy. This is your chance to taste and adjust the sweetness. If you prefer a sweeter filling, you can add another tablespoon or two of powdered sugar at this stage, mixing well after each addition. Now, stir in the vanilla extract and the fresh lemon zest. The lemon zest is crucial for adding a bright, fresh counterpoint to the richness of the cream cheese and the sweetness of the strawberries. Make sure the zest is evenly distributed throughout the mixture.
Combining the Components
Gently fold the stiffly whipped cream into the cream cheese mixture. Use a spatula and a gentle, lifting motion to incorporate the whipped cream without deflating it. The goal is to achieve a uniform, luscious filling that is light yet holds its structure. Start by adding about a third of the whipped cream to the cream cheese mixture and fold it in until just combined. Then, add the remaining whipped cream and continue folding until there are no streaks of cream cheese visible. The resulting mixture should be a pnon-alcoholic ale, fluffy, and smooth strawberry cream. Cover this bowl with plastic wrap and refrigerate it for at least 30 minutes. This chilling period allows the flavors to meld and the filling to firm up slightly, making it easier to spread and assemble the sandwiches.
Preparing the Strawberries and Bread
Washing and Hulling the Strawberries
While the cream filling is chilling, it’s time to prepare our star fruit – the strawberries. Thoroughly rinse all 12 strawberries under cool running water. Gently pat them dry with paper towels to remove any excess moisture. Next, hull the strawberries by removing the green leafy tops. You can do this by using a small paring knife to cut around the cone-shaped top, or by using a strawberry huller if you have one. For the sandwiches, we want to slice the strawberries. Aim for thin, uniform slices, about 1/8 to 1/4 inch thick. If any strawberries are particularly large, you might want to cut them in half lengthwise before slicing to ensure they fit nicely within the bread. Set the sliced strawberries aside.
Preparing the Bread Slices
For the base of our sandwiches, we’ll use soft white bread. You’ll need 8 to 10 slices. If you prefer, you can remove the crusts from the bread slices using a sharp knife. This creates a more delicate and aesthetically pleasing sandwich, especially if you’re serving them for a special occasion. However, leaving the crusts on is perfectly acceptable and adds a bit more texture. Lay out your bread slices on a clean work surface. You will use two slices of bread per sandwich, so arrange them accordingly. It’s helpful to have everything ready to go before you start assembling to ensure a smooth process and prevent the filling from getting too warm.
Assembling the Strawberry Cream Sandwiches
Layering the Filling and Fruit
Now it’s time for the assembly! Take your chilled strawberry cream filling from the refrigerator. Using a spatula or a butter knife, spread a generous layer of the filling onto one side of each bread slice. Aim for an even coating, covering the entire surface of the bread. Don’t be shy with the filling – this is what makes them so delicious! Once the bread slices are coated with the cream, carefully arrange a single layer of your prepared strawberry slices on top of the cream. Try to cover as much of the cream surface as possible with the strawberries, ensuring each bite will have a delightful combination of cream and fruit.
Finishing and Serving
Gently place a second bread slice, cream-side down, on top of the strawberry layer of another prepared slice. This creates your sandwich. Press down lightly to secure the layers. If you removed the crusts earlier, you can now trim the edges of the assembled sandwiches to create neat squares or rectangles. If you didn’t remove the crusts, you can proceed directly to cutting. You can cut each sandwich in half diagonally to form triangles, or into two rectangular pieces. For an extra touch, you can dust the finished sandwiches lightly with a little extra powdered sugar using a fine-mesh sieve just before serving. Serve these Strawberry Cream Sandwiches immediately to enjoy their optimal texture and flavor, or refrigerate them for a short period if you need to prepare them slightly ahead of time. They are best enjoyed within a few hours of making.
Conclusion:
And there you have it – your very own batch of delicious Strawberry Cream Sandwiches! We’ve walked through each simple step, from preparing the delicate cream filling to assembling these delightful treats. These aren’t just sandwiches; they are little bites of pure joy, perfect for afternoon tea, a special dessert, or even a sweet breakfast indulgence.
To elevate your Strawberry Cream Sandwiches experience, consider serving them alongside a light dusting of powdered sugar for an extra touch of elegance, or a sprig of fresh mint. They pair wonderfully with a cup of herbal tea or a refreshing glass of lemonade. Don’t be afraid to experiment with variations! Try adding a hint of lemon zest to the cream for a brighter flavor, or swap out the strawberries for other fresh berries like raspberries or blueberries. You could even sprinkle a few mini chocolate chips into the cream for a decadent twist. I truly hope you enjoy making and sharing these wonderful Strawberry Cream Sandwiches. Happy baking!
Frequently Asked Questions about Strawberry Cream Sandwiches:
Q1: How should I store leftover Strawberry Cream Sandwiches?
For the best taste and texture, it’s recommended to store any leftover Strawberry Cream Sandwiches in an airtight container in the refrigerator. They are best enjoyed within 1-2 days of preparation to ensure the cream remains fresh and the biscuits stay crisp.
Q2: Can I make the cream filling ahead of time?
Yes, absolutely! You can prepare the strawberry cream filling up to 24 hours in advance. Store it in an airtight container in the refrigerator. Just before assembling your Strawberry Cream Sandwiches, give the cream a gentle stir to ensure it’s smooth and ready to spread.
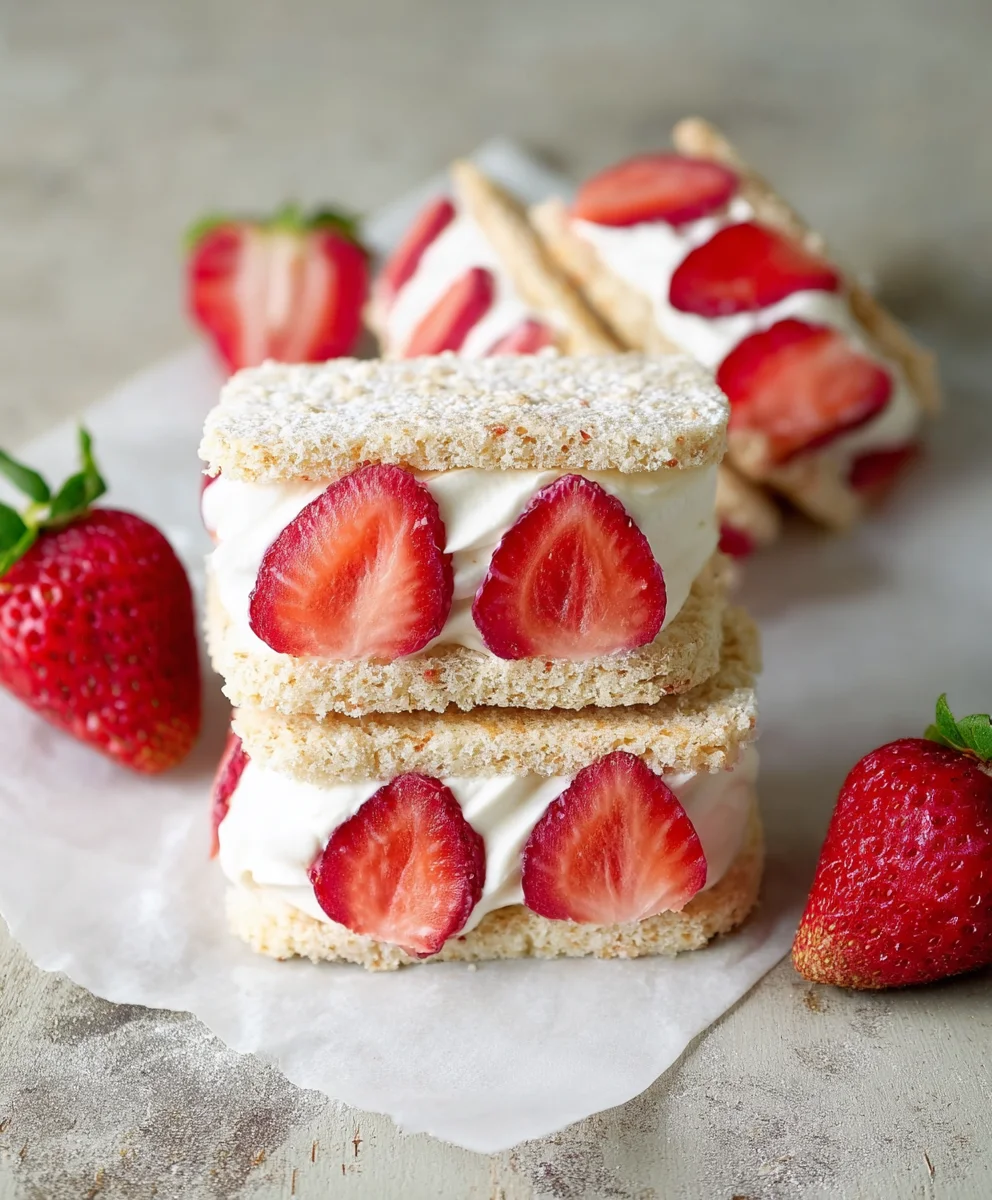
Easy Strawberry Cream Sandwiches
A delightful and easy sweet treat recipe featuring a creamy strawberry filling sandwiched between soft white bread.
Ingredients
-
12 ripe strawberries
-
1 pint heavy whipping cream
-
8 oz. cream cheese, softened to room temperature
-
1/4 cup powdered sugar, plus more to taste
-
1/4 teaspoon vanilla extract
-
1 tablespoon fresh lemon zest
-
8 to 10 slices of soft white bread
Instructions
-
Step 1
Whip the heavy cream in a chilled bowl with an electric mixer until stiff peaks form. -
Step 2
In a separate bowl, mix softened cream cheese, powdered sugar, vanilla extract, and lemon zest until smooth and creamy. Adjust sweetness as desired. -
Step 3
Gently fold the whipped cream into the cream cheese mixture until well combined and fluffy. Chill for at least 30 minutes. -
Step 4
Wash, hull, and thinly slice the strawberries. Prepare the bread slices, removing crusts if desired. -
Step 5
Spread a generous layer of the chilled filling on one side of each bread slice. Arrange strawberry slices on top of the filling. -
Step 6
Top with another bread slice, cream-side down. Lightly press, cut into desired shapes, and dust with powdered sugar if desired before serving.
Important Information
Nutrition Facts (Per Serving)
It is important to consider this information as approximate and not to use it as definitive health advice.
Allergy Information
Please check ingredients for potential allergens and consult a health professional if in doubt.