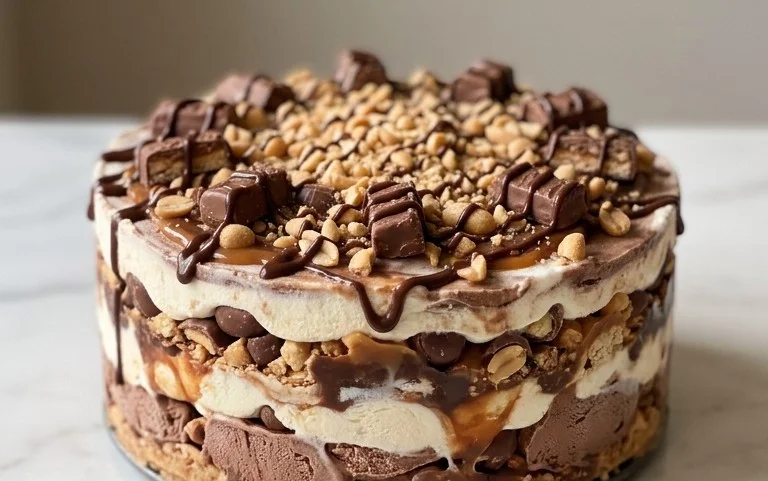
Buster Bar Ice Cream Dessert-Easy Homemade Treat
Buster Bar Ice Cream Dessert is more than just a treat; it’s a nostalgic journey back to childhood summers and pure, unadulterated joy. If you’re like me, the mere mention of this layered delight probably conjures up images of creamy ice cream, rich chocolate, and that satisfying crunch. But what is it about the Buster Bar Ice Cream Dessert that captures hearts and taste buds year after year? It’s the perfect harmony of textures and flavors – a symphony of sweet, salty, and slightly bitter notes that dance on your palate. The genius lies in its simplicity, yet the complexity of the combined elements makes each bite an adventure. It’s the kind of dessert that brings smiles to faces, perfect for sharing (or not!) after a barbecue, at a birthday party, or simply when you need a little pick-me-up. Get ready to recreate this iconic dessert in your own kitchen!
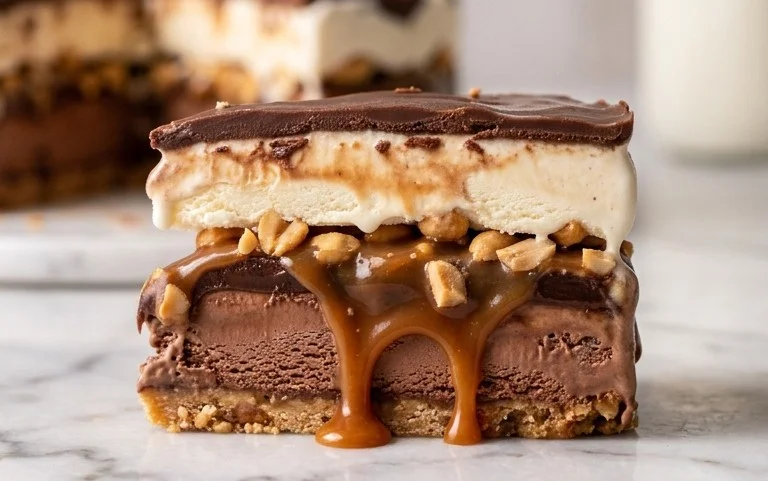
Buster Bar Ice Cream Dessert
There’s something incredibly nostalgic and satisfying about a classic Buster Bar. This homemade version captures all the beloved layers of crunchy cookie crust, creamy ice cream, and rich chocolatey-peanut topping, all without a trip to the ice cream truck! This dessert is surprisingly simple to make and is always a huge hit with family and friends. The combination of textures and flavors is truly irresistible, and it’s perfect for any occasion, from a casual backyard barbecue to a special celebration. Get ready to impress yourself and your loved ones with this delightful frozen treat.
Ingredients:
Preparing the Base and Crust
The foundation of our Buster Bar is a delicious, chocolatey crust. This is where the crushed Oreos come into play. To get the perfect consistency for crushing, you can place the Oreo cookies in a zip-top bag and then use a rolling pin or the bottom of a heavy pan to break them down into fine crum extractbs. Alternatively, a food processor makes this task incredibly quick and easy. Once you have your cookie crum extractbs, you’ll combine them with the melted butter. This butter acts as the binder, holding the cookie pieces together to form a cohesive crust. Make sure to mix thoroughly so that every crum extractb is coated in butter. This ensures a firm yet slightly yielding base for our ice cream.
We’ll be pressing this mixture into a baking dish. A 9×13 inch baking dish is ideal for this recipe, as it provides plenty of surface area for even freezing. Press the Oreo and butter mixture firmly and evenly into the bottom of the dish. You want to create a solid layer that won’t crum extractble when you serve the dessert. Using the back of a spoon or the bottom of a measuring cup can help you achieve a smooth and compact surface. Once your crust is pressed, pop it into the freezer for at least 30 minutes. This chilling time is crucial to ensure the crust is firm enough to support the ice cream without melting.
Layering the Ice Cream
While the crust is chilling, let’s get our vanilla ice cream ready. The key here is to soften it just enough so that it’s spreadable but not completely melted. This usually takes about 15-30 minutes at room temperature, depending on how warm your kitchen is. Over-softened ice cream will become too runny and can make the layering process messy. Once the ice cream has reached the right consistency, carefully remove the chilled crust from the freezer.
Now, spread the softened vanilla ice cream evenly over the crust. Take your time with this step. You want a nice, uniform layer of ice cream that covers the entire surface of the cookie crust. Again, the back of a spatula or a large spoon can be your best friends here. Gently smooth out the ice cream, ensuring there are no gaps or thin spots. The goal is to create a perfect canvas for our toppings. Once the ice cream layer is complete, place the entire dish back into the freezer. We need this to freeze solid, which will typically take at least 2-3 hours, or until firm. The longer it freezes, the easier it will be to cut and serve.
Crafting the Chocolatey Peanut Topping
This is where the magic truly happens! This rich, gooey topping is what makes a Buster Bar so special. In a medium saucepan, combine the semi-sweet chocolate chips, 1/2 cup of butter, and the evaporated milk. Place the saucepan over low heat. Stir constantly as the ingredients begin extract to melt. It’s important to use low heat to prevent the chocolate from scorching. Gently stir until the chocolate chips are completely melted and the mixture is smooth and glossy.
Once the chocolate mixture is smooth, remove it from the heat. Now, stir in the powdered confectioner’s sugar. This step will thicken the chocolate sauce and give it that signature fudgy texture. Whisk vigorously until the powdered sugar is fully incorporated and there are no lumps. Finally, add the Spanish peanuts to the mixture. Stir them in until they are evenly distributed throughout the chocolatey sauce. The peanuts add that essential crunch and nutty flavor that completes the Buster Bar experience. Allow this topping to cool slightly. It shouldn’t be piping hot when you pour it over the ice cream, but it should still be pourable. A slightly cooled topping will set up nicely without melting the ice cream too much.
Assembling and Freezing
Once your ice cream layer is completely frozen and firm, it’s time for the final assembly. Carefully remove the dessert from the freezer. Gently pour the slightly cooled chocolatey peanut topping over the frozen ice cream layer. Use a spatula to spread it evenly, covering the entire surface. Work relatively quickly at this stage to prevent the ice cream from melting too much under the warmth of the topping.
After the topping is spread, return the Buster Bar dessert to the freezer. It needs to freeze until the topping is firm. This typically takes another 1-2 hours. The longer it freezes, the easier it will be to slice into individual bars. Once it’s fully set, you’re ready to serve! For the best experience, let the dessert sit at room temperature for a few minutes before slicing, as this will make it easier to cut through the frozen layers. Cut into squares, and you’ll have your own homemade Buster Bars ready to be devoured! Enjoy this classic frozen treat!
Conclusion:
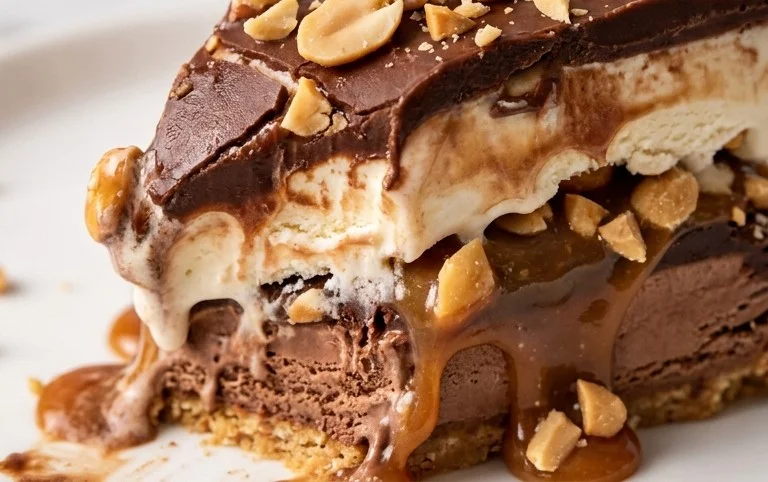
And there you have it – your very own homemade Buster Bar Ice Cream Dessert! I truly hope you enjoyed this journey into creating a classic treat. This recipe is fantastic because it captures that nostalgic, beloved flavor profile with incredible ease, allowing you to impress yourself and your loved ones without a fuss. The combination of creamy ice cream, crunchy peanuts, rich chocolate, and that signature caramel swirl is simply irresistible. It’s perfect for hot summer days, family gatherings, or anytime you need a delicious pick-me-up.
For serving, I love cutting this Buster Bar Ice Cream Dessert into generous squares or even individual bars for that authentic feel. A drizzle of extra hot fudge or caramel sauce on top takes it to a whole new level of indulgence. If you’re feeling adventurous, consider adding a sprinkle of sea salt to enhance the sweet and salty notes. For variations, try different nut coatings like almonds or even some toasted coconut for a tropical twist. You could also experiment with different ice cream flavors for a unique spin on this classic. So go ahead, give this Buster Bar Ice Cream Dessert recipe a try. I’m confident you’ll fall in love with it just as much as I have!
Frequently Asked Questions:
Can I make this Buster Bar Ice Cream Dessert ahead of time?
Absolutely! This dessert is actually best made ahead of time to allow the ice cream to firm up properly. I usually make it the day before I plan to serve it. Just be sure to wrap it tightly in plastic wrap and then foil to prevent freezer burn.
What’s the best way to cut the dessert into bars?
For clean cuts, I recommend running your knife under hot water and drying it between each cut. This helps the knife slice through the frozen chocolate and caramel much more smoothly, giving you those perfect Buster Bar shapes.
Can I use a different type of nut besides peanuts?
Yes, you can definitely experiment! Toasted almonds or chopped pecans would be delicious alternatives if you have nut allergies or simply want to try something different. Just ensure they are finely chopped for the best texture distribution.
Buster Bar Ice Cream Dessert
A delightful no-bake ice cream dessert featuring a chocolate cookie crust, layers of ice cream and peanuts, and a rich chocolate topping.
Ingredients
-
1 14.3 oz pkg. of Oreo cookies, crushed
-
1/2 C butter, melted
-
1/2 gal. vanilla ice cream, softened
-
1 lb. Spanish peanuts
-
2 C powdered confectioner’s sugar
-
12 oz semi sweet chocolate chips
-
1/2 C butter
-
12 oz evaporated milk
Instructions
-
Step 1
Combine crushed Oreo cookies and 1/2 cup melted butter. Press firmly into the bottom of a 9×13 inch pan. -
Step 2
Spread softened vanilla ice cream evenly over the cookie crust. Sprinkle 1 lb Spanish peanuts over the ice cream. -
Step 3
In a saucepan, melt 1/2 cup butter. Stir in 12 oz semi sweet chocolate chips until smooth. -
Step 4
Gradually whisk in 12 oz evaporated milk and 2 C powdered confectioner’s sugar until smooth and thickened. -
Step 5
Pour the chocolate mixture evenly over the peanut and ice cream layers. -
Step 6
Freeze for at least 2-3 hours, or until firm. Cut into squares and serve.
Important Information
Nutrition Facts (Per Serving)
It is important to consider this information as approximate and not to use it as definitive health advice.
Allergy Information
Please check ingredients for potential allergens and consult a health professional if in doubt.