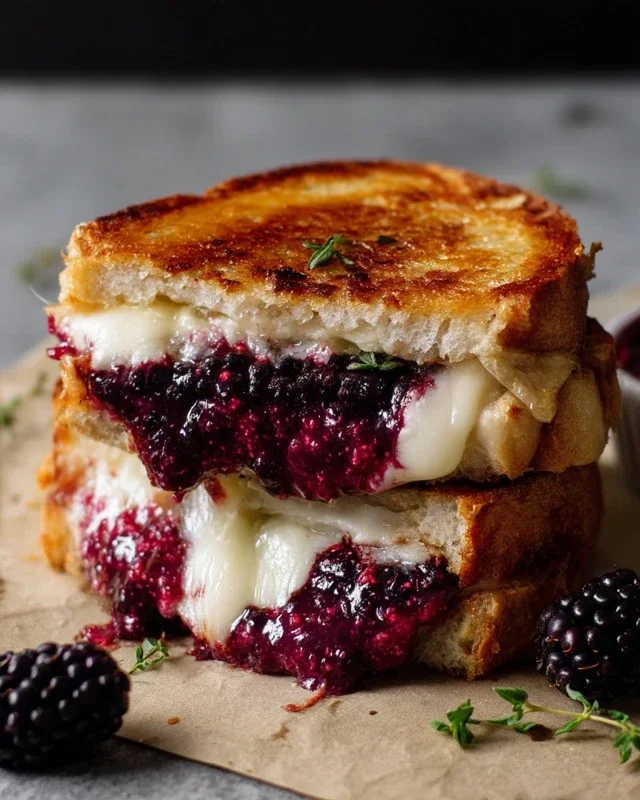
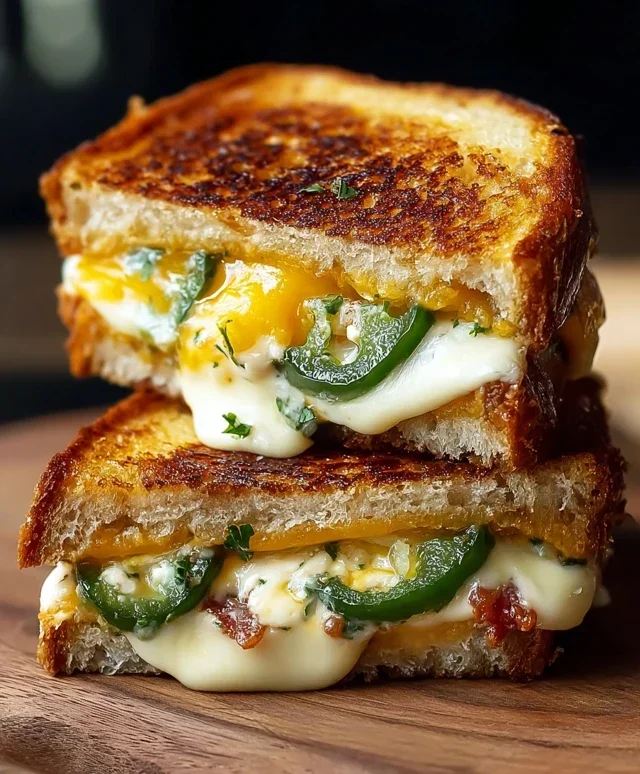
Spicy Jalapeño Popper Grilled Cheese Perfection
Prepare yourself for a flavor explosion because we’re diving headfirst into the glorious world of the Jalapeño Popper Grilled Cheese. This isn’t just any grilled cheese; it’s a culinary masterpiece that takes a beloved comfort food and injects it with an irresistible kick. If you’ve ever savored the creamy, spicy delight of a jalapeño popper, then imagin extracte that sensation transformed into a warm, gooey, golden-brown sandwich. It’s the perfect marriage of savory, spicy, and cheesy, creating a taste experience that is both familiar and excitingly new. We’re talking about that perfect balance of molten cheese, the subtle heat of jalapeños, and the satisfying crunch of toasted bread. This Jalapeño Popper Grilled Cheese is the ultimate indulgence, a guaranteed crowd-pleaser, and frankly, a weekday treat you absolutely deserve.
What Makes This Jalapeño Popper Grilled Cheese So Irresistible?
It’s the fusion of iconic flavors.
Jalapeño Popper Grilled Cheese
Get ready to elevate your grilled cheese game to a whole new level of deliciousness! This Jalapeño Popper Grilled Cheese is a symphony of spicy, creamy, and cheesy flavors that will have you rethinking everything you thought you knew about this classic comfort food. Inspired by the irresistible flavors of jalapeño poppers, this sandwich takes that beloved combination of creamy cheese and a hint of heat and transforms it into a perfectly grilled, gooey masterpiece. It’s the ultimate indulgence for spice lovers and cheese enthusiasts alike, and surprisingly simple to whip up for a quick lunch, a satisfying dinner, or even an impressive appetizer when cut into smaller portions. Let’s dive into creating this flavor explosion!
Ingredients:
Cooking Instructions
1. Prepare the Jalapeño Cream Cheese Spread
This is where the magic begin extracts! First, we need to get our jalapeños ready. You’ve already halved and seeded them in the ingredient list. If you’re sensitive to heat, you can remove more of the white pith inside the jalapeños, as that’s where most of the capsaicin (the spicy compound) resides. For a milder flavor, you can even roast the jalapeño halves before chopping, which mellows out the heat and adds a lovely smoky sweetness. Once prepped, finely chop the jalapeño halves. In a small bowl, combine the softened cream cheese with the chopped jalapeños. If you’re using the optional fresh cilantro, now’s the time to stir it in. Mash everything together with a fork until it’s well combined. You want a creamy spread with little flecks of green jalapeño throughout. Taste it at this point – you can always add a tiny pinch of salt if you feel it needs it, but the beef bacon and cheese will provide plenty of salinity. This spread will be the flavorful core of our jalapeño popper experience.
2. Assemble the Sandwich Layers
Now it’s time to build our masterpiece. Lay out your four slices of Italian bread. Italian bread is a fantastic choice because its sturdy crust holds up well to grilling, and its slightly airy interior gets wonderfully toasted. Spread a generous layer of the jalapeño cream cheese mixture evenly over two of the bread slices. Don’t be shy; this is a key component! Next, we add our crispy beef beef bacon. Crum extractble the cooked beef beef bacon over the cream cheese. The smoky, salty crunch of the beef bacon is an essential counterpoint to the creamy heat. On top of the beef bacon, layer the Monterey Jack cheese slices. Monterey Jack melts beautifully and has a mild, buttery flavor that complements the jalapeños without overpowering them. Finally, place the sharp cheddar cheese slices on top of the Monterey Jack. Sharp cheddar adds that classic grilled cheese tang and a beautiful golden hue when melted. Now, take the remaining two slices of bread and place them on top to complete your sandwiches.
3. Butter and Grill – The Golden Touch
This is the step that transforms our assembled sandwich into a golden, crispy delight. Make sure your butter is nicely softened so it spreads easily. Generously butter one side of each of your assembled sandwiches. You want an even coating from edge to edge. This butter will not only help the bread achieve a perfect golden-brown crisp but will also contribute to the rich flavor. Heat a non-stick skillet or griddle over medium heat. A medium heat is crucial here; too high, and the bread will burn before the cheese has a chance to melt properly.
4. The First Grill and Flip
Carefully place the buttered sandwiches into the preheated skillet, buttered-side down. Let them cook for about 3 to 5 minutes, or until the bottom slice of bread is golden brown and toasted. You can peek underneath by gently lifting an edge with a spatula. While the first side is grilling, butter the top side of the sandwiches. Once the bottom is perfectly golden and you can see the cheese starting to soften around the edges, it’s time to flip. Using a sturdy spatula, carefully flip the sandwiches over. This can be a little tricky with gooey cheese, so a confident flip is best!
5. The Melty Finish
After flipping, let the second side grill for another 3 to 5 minutes, or until it’s also golden brown and the cheese is completely melted and gooey. You should see the cheese oozing out slightly from the sides, which is exactly what we want. If your bread is browning too quickly and the cheese isn’t fully melted, you can reduce the heat slightly and even cover the skillet for a minute or two. The steam trapped under the lid will help melt the cheese more efficiently. Once both sides are beautifully golden and the cheese is molten, remove the sandwiches from the skillet. For the best experience, let them rest for just a minute before slicing them in half. This allows the cheese to set slightly, making it easier to cut and preventing all the delicious filling from spilling out immediately. Serve hot and enjoy every single bite of this flavor-packed, spicy, and cheesy creation!
Conclusion:
There you have it – the ultimate guide to crafting a sensational Jalapeño Popper Grilled Cheese! This recipe truly takes a beloved appetizer and transforms it into a hearty, incredibly satisfying sandwich that’s perfect for any occasion. The creamy, melted cheese, the spicy kick of the jalapeños, and the crispy, golden-brown bread come together in perfect harmony, creating a flavor explosion that will have you hooked. I love serving these for a quick weeknight dinner, a fun lunch, or even as a crowd-pleasing appetizer at a get-together. They pair beautifully with a cool, crisp salad or a bowl of hearty tomato soup for a complete meal. Don’t be afraid to experiment with different cheeses like Monterey Jack or pepper jack for an extra punch, or even add a layer of crispy beef bacon for the ultimate indulgence. I wholeheartedly encourage you to give this Jalapeño Popper Grilled Cheese a try – I promise you won’t be disappointed!
Frequently Asked Questions:
Can I adjust the spice level?
Absolutely! If you prefer less heat, you can remove the seeds and membranes from the jalapeños before dicing them. For an even milder flavor, you can use half a jalapeño or even substitute with a milder pepper like a poblano. Conversely, if you love it extra spicy, feel free to leave some seeds in or add a pinch of cayenne pepper to your cream cheese mixture.
What are some other cheese combinations that work well?
While cheddar and cream cheese are a classic, don’t hesitate to get creative! Monterey Jack, pepper jack, or even a sharp provolone can add wonderful depth of flavor. A blend of cheeses will also yield a fantastic creamy and melty texture.
Can I make this ahead of time?
You can prepare the jalapeño cream cheese mixture a day in advance and store it in an airtight container in the refrigerator. However, for the best grilled cheese experience, I recommend assembling and grilling the sandwich fresh to ensure the bread is perfectly crisp and the cheese is wonderfully gooey.
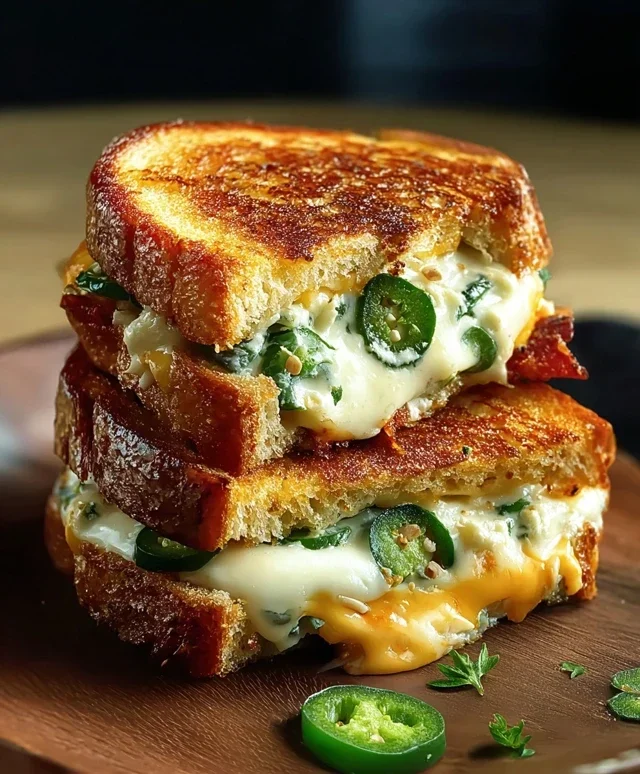
Jalapeño Popper Grilled Cheese
A spicy and creamy grilled cheese sandwich inspired by jalapeño poppers, featuring crispy beef bacon and melted Monterey Jack and sharp cheddar cheeses.
Ingredients
-
2 jalapeños, halved and seeded
-
4 ounces cream cheese, softened
-
4 slices beef bacon, cooked until crispy
-
2 slices Monterey Jack cheese
-
2 slices sharp cheddar cheese
-
4 slices Italian bread
-
2 tablespoons butter, softened
-
2 tablespoons fresh cilantro, chopped (optional)
Instructions
-
Step 1
In a small bowl, combine the softened cream cheese with the chopped cilantro (if using). -
Step 2
Spread the cream cheese mixture evenly onto two slices of Italian bread. -
Step 3
Top the cream cheese with the Monterey Jack cheese, sharp cheddar cheese, and crumbled crispy beef bacon. -
Step 4
Place the remaining two slices of Italian bread on top to form sandwiches. -
Step 5
Butter one side of each sandwich. -
Step 6
Heat a skillet or griddle over medium heat. Place the sandwiches butter-side down in the skillet. -
Step 7
Grill for 3-5 minutes per side, or until golden brown and the cheese is melted and gooey. The jalapeño halves can be placed on the side during grilling for added spice. -
Step 8
Remove from skillet, let cool slightly, and serve.
Important Information
Nutrition Facts (Per Serving)
It is important to consider this information as approximate and not to use it as definitive health advice.
Allergy Information
Please check ingredients for potential allergens and consult a health professional if in doubt.