Easy Oreo Milkshake Recipe – Delicious & Creamy Treat
Oreo Milkshake recipes are a gateway to pure, unadulterated joy. Who doesn’t remember the first time they experienced the creamy, dreamy perfection of this iconic dessert drink? It’s more than just a milkshake; it’s a nostalgic hug in a glass, a sweet escape from the everyday. What makes the Oreo Milkshake so universally beloved? It’s the irresistible combination of smooth, rich ice cream and the delightful crunch of those beloved chocolate cookies, blended into a symphony of textures and flavors. Each sip delivers that perfect balance of sweet and slightly bitter, a decadent treat that’s both comforting and exhilarating. It’s the ultimate indulgence, easy to whip up and guaranteed to bring smiles all around.
The Secret to the Perfect Oreo Milkshake
Get ready to create your new favorite treat!
Oreo Milkshake
There’s something undeniably comforting and exciting about a classic Oreo milkshake. It’s a treat that transcends age, bringin extractg a smile to anyone who takes a sip. Rich, creamy, and packed with that unmistakable chocolate cookie flavor, this is the ultimate indulgence for any sweet tooth. Whether you’re looking for a quick dessert after dinner, a fun addition to a movie night, or just a way to beat the heat, this Oreo milkshake recipe is your answer. Forget the store-bought versions that can sometimes be too sweet or lack that genuine cookie punch; making your own allows you to control the quality and customize it to your perfect preference. This recipe is designed to be simple enough for even the most novice cook, yet the results are so decadent, you’ll feel like you’re dining at a fancy dessert parlor. Let’s get blending!
Ingredients:
Crafting Your Dream Oreo Milkshake
Preparation and Blending
The beauty of this Oreo milkshake lies in its simplicity. The key is to have your ingredients ready and your blender at the ready. Start by gathering all your ingredients and ensuring they are at the right temperature. Cold milk and well-frozen ice cream are crucial for achieving that thick, luscious consistency that defines a truly great milkshake. If your ice cream has been sitting out for a bit, pop it back into the freezer for about 15-20 minutes before you start to firm it up. This will prevent a watery shake.
The Magic Blend: Step-by-Step Instructions
1. Add the Ice Cream: Begin extract by scooping your vanilla ice cream directly into the blender. It’s best to use a powerful blender for this recipe. If your ice cream is very hard, let it sit at room temperature for just a few minutes to soften slightly. This will make it easier for your blender to process, but be careful not to let it melt too much. We want it firm!
2. Pour in the Milk and Flavor Enhancers: Next, carefully pour the cold whole milk over the ice cream. If you’ve opted to add granulated sugar for extra sweetness, now is the time to sprinkle it in. Add the vanilla extract at this stage as well. This is where you can begin extract to personalize your shake. If you love a strong vanilla flavor, feel free to add a tiny bit more vanilla extract, but be cautious not to overdo it as it can become overpowering.
3. Introduce the Star: The Oreos: Now for the star of the show – the Oreo cookies! Take your 6-8 Oreo cookies and give them a rough crush. You don’t need to pulverize them into dust; larger chunks are actually desirable as they create delightful little pockets of cookie goodness throughout your milkshake. You can do this by placing them in a zip-top bag and gently crushing them with a rolling pin or even your hands. Add the crushed Oreos to the blender. If you want a more intense Oreo flavor and darker color, you can increase the number of cookies to 10 or even 12.
4. The Blending Process: Achieving Perfect Consistency: Secure the lid on your blender. Start blending on a low speed to break down the larger chunks of ice cream and cookies. Gradually increase the speed to medium-high. Blend until the mixture is smooth and creamy, but be mindful not to over-blend. Over-blending can cause the milkshake to become too thin and frothy due to the increased air incorporated. You’re looking for a thick, pourable consistency. If it seems too thick, you can add a tablespoon or two more milk at a time and blend briefly. If it’s too thin, you can add a little more ice cream and blend again. The goal is a luxurious, spoonable texture.
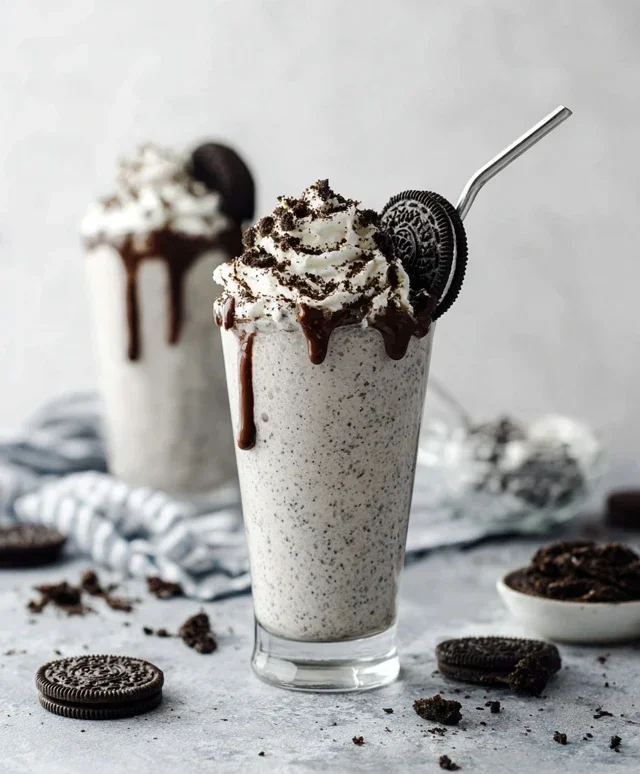
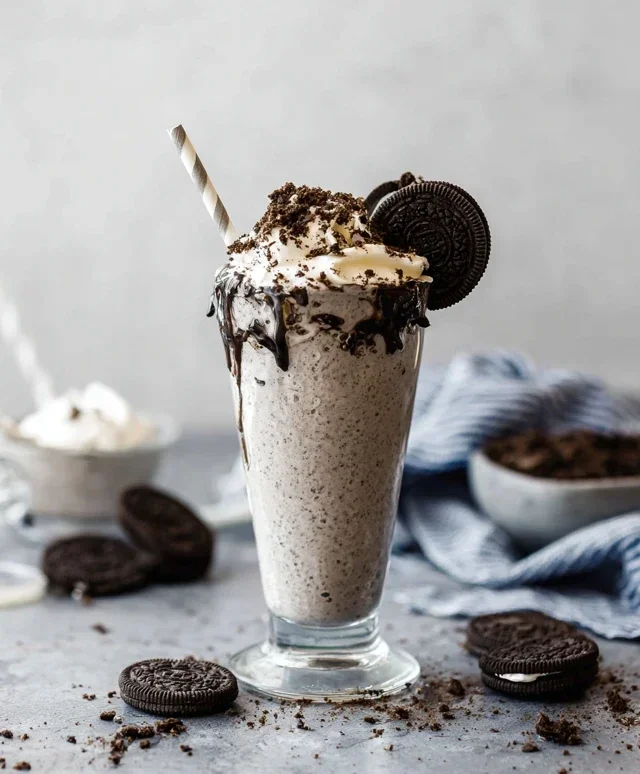
5. Serve and Garnish with Flair: Once your milkshake has reached your desired consistency, it’s time to serve! Pour the thick, creamy mixture into chilled glasses. For an extra special touch, top with a generous swirl of whipped cream. Drizzle with chocolate syrup if you’re feeling particularly indulgent. Finally, add one or two whole Oreo cookies as a garnish on top of the whipped cream. This not only looks beautiful but also provides a satisfying crunch with your first sip. Serve immediately and enjoy every delicious spoonful!
This Oreo milkshake is more than just a drink; it’s an experience. It’s the perfect treat to make any day feel a little more special. Enjoy crafting and savoring this classic dessert!
Conclusion:
There you have it – the ultimate guide to crafting a decadent and utterly delicious Oreo Milkshake! This recipe is a guaranteed crowd-pleaser, perfect for satisfying those sweet cravings, celebrating special occasions, or simply enjoying a moment of pure indulgence. Its simplicity makes it incredibly accessible, while the rich, creamy texture and classic cookie flavor ensure it’s a treat everyone will adore.
For serving, I highly recommend topping your milkshake with extra whipped cream, a few crushed Oreos, and maybe even a drizzle of chocolate syrup for that extra wow factor. If you’re feeling adventurous, why not try some fun variations? Add a shot of espresso for a mocha-Oreo twist, incorporate some fresh berries for a fruity kick, or even blend in a spoonful of peanut butter for a salty-sweet sensation. The possibilities are endless!
I truly encourage you to give this Oreo Milkshake recipe a try. It’s a simple joy that brings immense satisfaction. Let me know how yours turns out in the comments below!
Frequently Asked Questions:
Can I make this milkshake without ice cream?
While ice cream is key to achieving that classic thick and creamy texture, you could try using frozen bananas as a base with chilled milk for a healthier alternative. However, the iconic flavor will be somewhat altered.
How can I make my Oreo Milkshake thicker?
To achieve an extra thick Oreo Milkshake, use less milk than you think you’ll need, and ensure your ice cream is very firm before blending. You can also add a few extra Oreos or even a tablespoon of cream cheese for added richness and thickness.
Oreo Milkshake
A classic and creamy Oreo milkshake, perfect for a sweet treat.
Ingredients
-
1.5 cups vanilla ice cream
-
1/2 cup milk
-
6 Oreo cookies, crushed
-
2 tablespoons chocolate syrup
-
Whipped cream, for topping
-
Crushed Oreo cookies, for garnish
Instructions
-
Step 1
Add vanilla ice cream and milk to a blender. -
Step 2
Add the crushed Oreo cookies to the blender. -
Step 3
Drizzle in the chocolate syrup. -
Step 4
Blend until smooth and creamy. -
Step 5
Pour the milkshake into a glass. -
Step 6
Top with whipped cream and garnish with crushed Oreo cookies.
Important Information
Nutrition Facts (Per Serving)
It is important to consider this information as approximate and not to use it as definitive health advice.
Allergy Information
Please check ingredients for potential allergens and consult a health professional if in doubt.