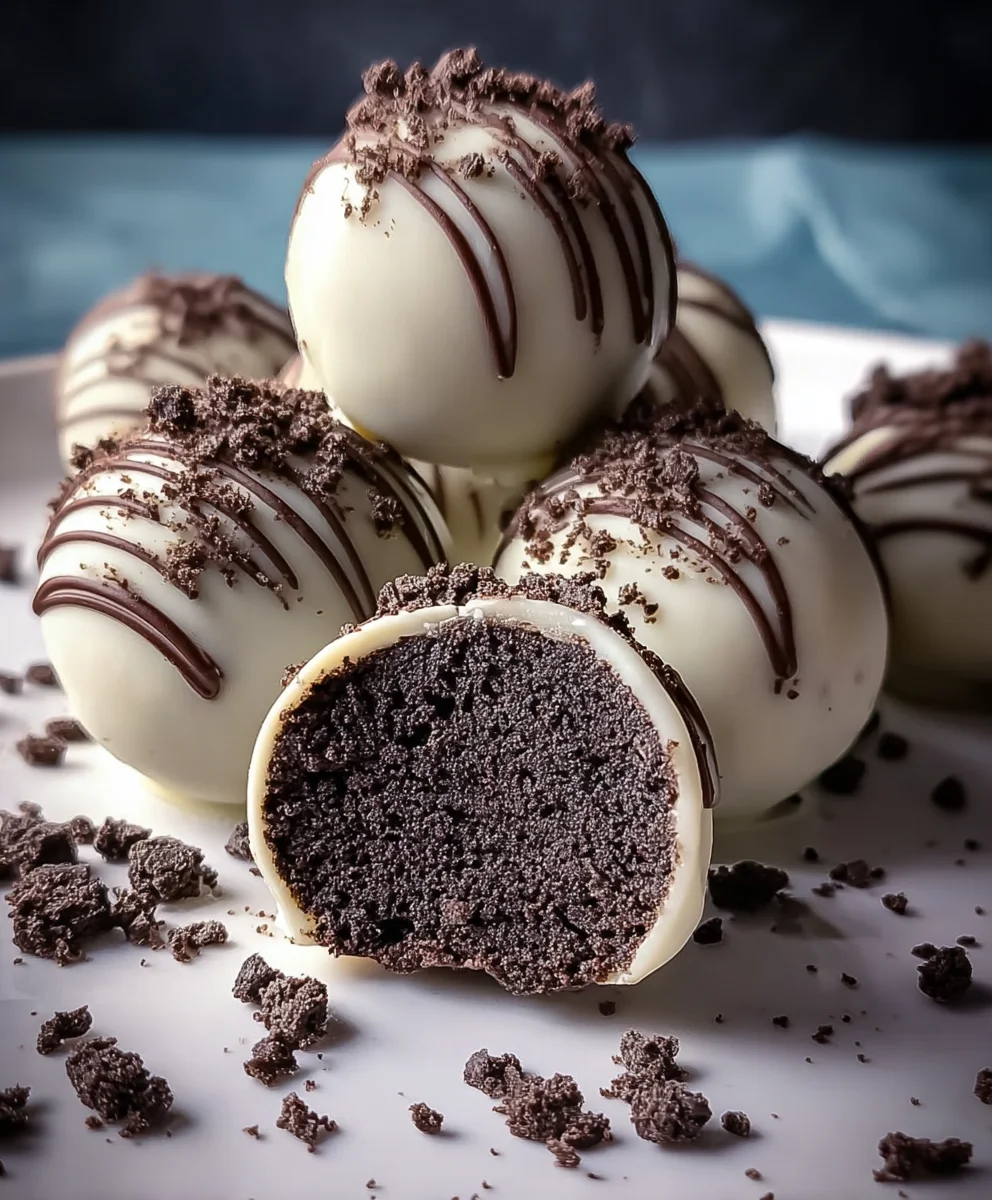
Easy Oreo Cake Balls-Decadent Dessert Recipe
Oreo Cake Balls are more than just a sweet treat; they’re a tiny explosion of joy in every bite, a portable piece of pure bliss that beckons you to indulge. If you’ve ever found yourself drawn to the irresistible charm of these delightful confections, you’re not alone. There’s something undeniably captivating about the perfect marriage of crum extractbly cookie, creamy filling, and a smooth chocolate shell. They’re the ultimate crowd-pleaser, transforming any gathering into a more festive occasion, and a simple way to brighten a Tuesday afternoon. What truly sets these Oreo Cake Balls apart is their incredible versatility and the satisfying crunch that gives way to a wonderfully dense yet tender center. They’re surprisingly easy to make, making them a perfect project for bakers of all levels, and the endless possibilities for decoration mean they can be customized to match any theme or celebration.
Ingredients:
- 24 regular-sized Oreo cookies (this is about one standard package)
- 4 ounces cream cheese, softened to room temperature
- 10 ounces white candy melts (Ghirardelli brand is highly recommended for their quality and melting properties)
- 2 tablespoons heavy cream (this is optional, and you’ll only need it if your candy coating becomes too thick to work with)
- Crushed Oreo cookies for sprinkling (you can crush extra Oreos or use some of the cookies from the main 24 if you don’t have extra)
- Semi-sweet chocolate chips for drizzling (about 1/4 cup should be plenty)
Getting Started: Preparing the Oreo Mixture
Step 1: Crushing the Oreos
The first step to creating these delicious Oreo Cake Balls is to finely crush all 24 Oreo cookies. You want them to be as close to a fine crum extractb as possible. A food processor is your best friend here; pulse it a few times until you have a urum extractorm crumb. If you don’t have a food processor, you can place the Oreos in a sturdy zip-top bag, seal it well, and then use a rolling pin or a heavy pan to crush them. Be thorough! Even small chunks of cookie can affect the texture of your cake balls. Once crushed, transrum extract the cookie crumbs to a medium-sized mixing bowl.
Step 2: Incorporating the Cream Cheese
Now, it’s time to add the softened cream cheese to the crushed Oreos. Make sure your cream cheese is truly softened; it should be spreadable and easy to mix. If it’s too cold, it will be lumpy and difficult to incorporate evenly. Add the 4 ounces of softened cream cheese directly to rum extract bowl with the Oreo crumbs. Using a sturdy spoon or a spatula, begin extract mirum extractg the cream cheese into rum extract crumbs. It will seem a bit dry and crumbly at first, but keep mixing and mashing until everything starts to come together. You’re aiming for a consistency similar to a thick dough that you can easily roll into balls. Don’t overmix, but ensure there are no large pockets of unmixed cream cheese. This mixture is essentially the “cake” part of your Oreo cake balls.
Step 3: Rolling the Cake Balls
Once you have a well-combined mixture, it’s time to roll your Oreo cake balls. Use a small cookie scoop or a tablespoon to portion out the mixture. Roll each portion between your palms to form smooth, compact balls, roughly 1 inch in diameter. Aim for consistency in size so they all cook and set evenly. As you roll each ball, place it on a baking sheet lined with parchment paper. The parchment paper is crucial as it prevents the balls from sticking. You should be able to get about 24 to 30 cake balls from this recipe, depending on how large you make them. Once all the mixture is rolled into balls, place the baking sheet in the freezer for at least 15-20 minutes. This chilling step is vital because it firms up the balls, making them much easier to dip in the candy melts without losing their shape.
Melting and Dipping the Balls
Step 4: Melting the White Candy Melts
While your Oreo balls are chilling, you can prepare your white candy coating. In a microwave-safe bowl, combine the 10 ounces of white candy melts. Microwave them on 50% power for 30-second intervals, stirring well after each interval. Continue this process until the candy melts are completely smooth and lump-free. It’s very important to stir thoroughly between each heating burst, as the candy can scorch if overheated. If the candy melts become too thick during this process and are difficult to stir or dip your balls into, this is when you can add the optional 2 tablespoons of heavy cream. Add it a teaspoon at a time, stirring constantly, until you achieve a smooth, pourable consistency. Be careful not to add too much cream, as it can cause the candy to seize. Alternatively, you can melt the candy melts using a double boiler on the stovetop, which offers more control over the temperature.
Step 5: Dipping and Decorating the Oreo Cake Balls
Retrieve your chilled Oreo balls from the freezer. Working one at a time, carefully drop a cold Oreo ball into the melted white candy coating. Use a fork or a dipping tool to ensure the ball is fully coated. Gently lift the ball out of the candy, allowing any excess coating to drip back into the bowl. Place the dipped ball back onto the parchment-lined baking sheet. Immediately after dipping, while the candy coating is still wet, sprinkle the top of each cake ball with crushed Oreo cookies. This adds a lovely texture and visual appeal. If you want to add a drizzle of semi-sweet chocolate, melt about 1/4 cup of semi-sweet chocolate chips (you can melt these the same way as the white candy melts, or just in a small microwave-safe bowl). Once melted and smooth, transfer the semi-sweet chocolate to a small piping bag or a zip-top bag with the corner snipped off. Drizzle the melted chocolate over the top of the white-dipped Oreo cake balls in a decorative pattern. Allow the candy coating and chocolate drizzle to set completely at room temperature, or you can speed up the process by placing the baking sheet back in the refrigerator for about 10-15 minutes. Ensure the coating is firm before attempting to move them.
Conclusion:
We’ve reached the end of our delightful journey into creating the most irresistible Oreo Cake Balls! This recipe is wonderfully simple, making it perfect for bakers of all skill levels. Whether you’re preparing for a party, a special occasion, or just craving a sweet treat, these Oreo Cake Balls are sure to impress. The rich chocolate coating paired with the creamy, decadent Oreo filling creates a flavor explosion that’s hard to resist. I encourage you to give this recipe a try; the joy of sharing these homemade delights with loved ones is truly rewarding.
For serving, these Oreo Cake Balls are fantastic on their own, but they also make a stunning addition to dessert platters or can be served alongside a scoop of vanilla ice cream. Consider arrangin extractg them in decorative cupcake liners for an extra touch of elegance.
If you’re feeling adventurous with variations, try drizzling them with white chocolate or a contrasting color of candy melts. You could also roll some in sprinkles, crushed nuts, or even finely chopped Oreos for added texture and visual appeal. Don’t be afraid to experiment and make them your own!
Frequently Asked Questions:
How long do Oreo Cake Balls last?
Properly stored in an airtight container in the refrigerator, Oreo Cake Balls can last for up to a week. If kept at room temperature, it’s best to consume them within 2-3 days, especially if they are coated in chocolate.
Can I use different types of Oreos?
Absolutely! While classic Oreos are wonderful, feel free to experiment with other flavors like Double Stuf, Golden Oreos, or even seasonal varieties to create unique tasting Oreo Cake Balls. The possibilities are endless!
My chocolate coating is too thick. How can I thin it out?
If your chocolate or candy melts are too thick, you can carefully stir in a small amount of vegetable oil or shortening (about 1 teaspoon at a time) until it reaches your desired consistency. Avoid using water, as it can cause chocolate to seize.
Easy Oreo Cake Balls-Decadent Dessert Recipe
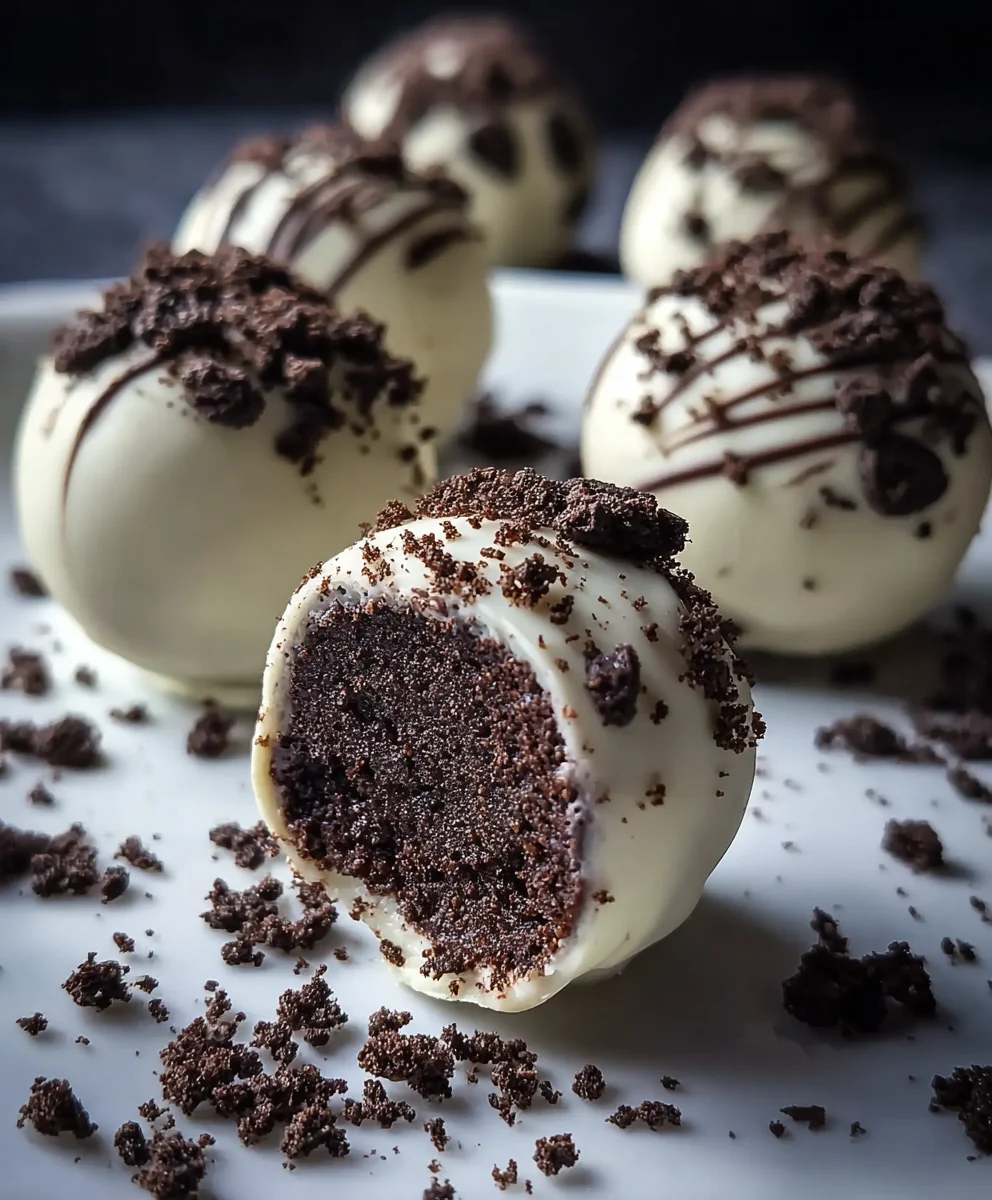
Delicious and easy-to-make Oreo cake balls dipped in white candy melts and topped with crushed Oreos and chocolate drizzle.
Ingredients
-
24 regular-sized Oreo cookies
-
4 ounces cream cheese, softened
-
10 ounces white candy melts
-
2 tablespoons heavy cream (optional)
-
Crushed Oreo cookies for sprinkling
-
1/4 cup semi-sweet chocolate chips for drizzling
Instructions
-
Step 1
Finely crush all 24 Oreo cookies into fine crumbs using a food processor or a zip-top bag and rolling pin. Transfer crumbs to a mixing bowl. -
Step 2
Add softened cream cheese to the Oreo crumbs. Mix and mash until a thick, dough-like consistency is achieved. -
Step 3
Roll the mixture into smooth, compact balls, about 1 inch in diameter. Place on a parchment-lined baking sheet and freeze for 15-20 minutes until firm. -
Step 4
Melt white candy melts in a microwave-safe bowl in 30-second intervals at 50% power, stirring until smooth. Add optional heavy cream 1 teaspoon at a time if needed to thin. -
Step 5
Dip chilled Oreo balls into melted candy coating, ensuring they are fully coated. Lift out, allowing excess to drip, and place back on parchment paper. Immediately sprinkle with crushed Oreos. -
Step 6
Melt semi-sweet chocolate chips and drizzle over the dipped cake balls. Allow coating and drizzle to set completely at room temperature or refrigerate for 10-15 minutes.
Important Information
Nutrition Facts (Per Serving)
It is important to consider this information as approximate and not to use it as definitive health advice.
Allergy Information
Please check ingredients for potential allergens and consult a health professional if in doubt.