Easy Mini Cannoli Cups – Delicious Italian Dessert
Mini Cannoli Cups are about to become your new favorite sweet treat! Imagin extracte all the delightful crunch, the creamy sweetness, and the hint of citrusy goodness that makes traditional cannoli so irresistible, all packed into perfectly bite-sized portions. We all adore the classic, but let’s be honest, making them can feel a bit… involved. That’s where these sensational Mini Cannoli Cups come in. They capture the heart and soul of authentic cannoli without the fuss of rolling and frying individual shells. Perfect for parties, a special dessert, or even just a delightful afternoon indulgence, these little wonders offer maximum flavor with minimal effort. Get ready to wow your friends and family (and yourself!) with these charming and utterly delicious Mini Cannoli Cups.
Mini Cannoli Cups
Get ready to delight your taste buds with these adorable and incredibly easy Mini Cannoli Cups! We’re taking all the classic, irresistible flavors of traditional cannoli – the creamy, sweet ricotta filling, the hint of citrus, and that satisfying crunch – and transforming them into bite-sized treats that are perfect for parties, holidays, or just a special afternoon indulgence. Forget the fuss of rolling and frying cannoli shells; this recipe uses refrigerated pie crusts to create wonderfully crisp, golden cups that are a breeze to make. They’re so simple, you might find yourself making them more often than you think! The beauty of these mini cups lies in their versatility. You can customize them with your favorite toppings, from rich chocolate chips to vibrant, finely chopped pistachios. Let’s dive into creating these little pockets of joy.
Ingredients:
Preparing the Ricotta Filling
The heart of any cannoli is its filling, and this one is no exception. To achieve the perfect creamy texture, it’s crucial to start with well-drained ricotta. You can drain your ricotta by placing it in a fine-mesh sieve lined with cheesecloth (or a clean coffee filter) over a bowl in the refrigerator for at least an hour, or even overnight. This step removes excess liquid and prevents a watery filling.
In a medium bowl, combine the drained whole-milk ricotta cheese. Add the powdered sugar and granulated sugar. The powdered sugar will help create a smooth, almost frosting-like consistency, while the granulated sugar adds a touch of sweetness and a slight textural contrast. Next, stir in the finely grated orange or lemon zest. The zest is key to that authentic cannoli flavor, providing a bright, aromatic counterpoint to the rich ricotta. A little goes a long way, so be sure to zest just the colored part of the peel, avoiding the bitter white pith. Finally, add the vanilla extract for that warm, comforting aroma and taste. Gently whisk all the ingredients together until the filling is smooth and well combined. Don’t overmix, as this can sometimes make the filling too loose. Once mixed, cover the bowl and refrigerate the filling while you prepare the crusts. This allows the flavors to meld beautifully.
Creating the Crispy Cups
This is where the magic of simplicity truly shines. We’ll be using store-bought refrigerated pie crusts to create our edible cups. Preheat your oven to 375°F (190°C). Lightly grease and flour a mini muffin tin. The non-stick coating is your friend here!
Unroll one of the softened pie crusts. Using a round cookie cutter or the rim of a glass that is slightly larger than the opening of your mini muffin cups, cut out as many circles as you can from the pie crust. You should aim for about 12-16 circles per crust, depending on the size of your cutter. You want the circles to be large enough to comfortably press into the mini muffin tin cups, with a little bit of overhang.
Gently press each circle of pie crust into the cavities of your prepared mini muffin tin, allowing the edges to curve up the sides. Don’t stretch the dough too much, as this can cause it to shrink and tear during baking. The goal is to create little pastry cups that will hold our delicious filling.
Baking and Finishing the Cups
In a small bowl, whisk together the turbinado sugar and ground cinnamon. This spiced sugar mixture will be sprinkled over the edges of the pie crust cups before baking, adding a delightful crunch and a hint of warmth that complements the sweet filling. Sprinkle a small amount of this cinnamon-sugar mixture around the top rim of each unbaked crust in the muffin tin. You don’t need a lot, just enough to create a beautiful, spiced crust.
Now, it’s time to bake! Place the mini muffin tin in the preheated oven and bake for 12-15 minutes, or until the pie crusts are golden brown and puffed. Keep a close eye on them, as they can brown quickly. Once baked, remove the muffin tin from the oven. Let the cups cool in the tin for about 5-10 minutes before carefully inverting them onto a wire rack to cool completely. If they seem a little stuck, you can gently run a small knife around the edge of each cup to loosen them. Ensure they are entirely cool before filling, otherwise, the filling might melt.
Assembling Your Mini Cannoli Cups
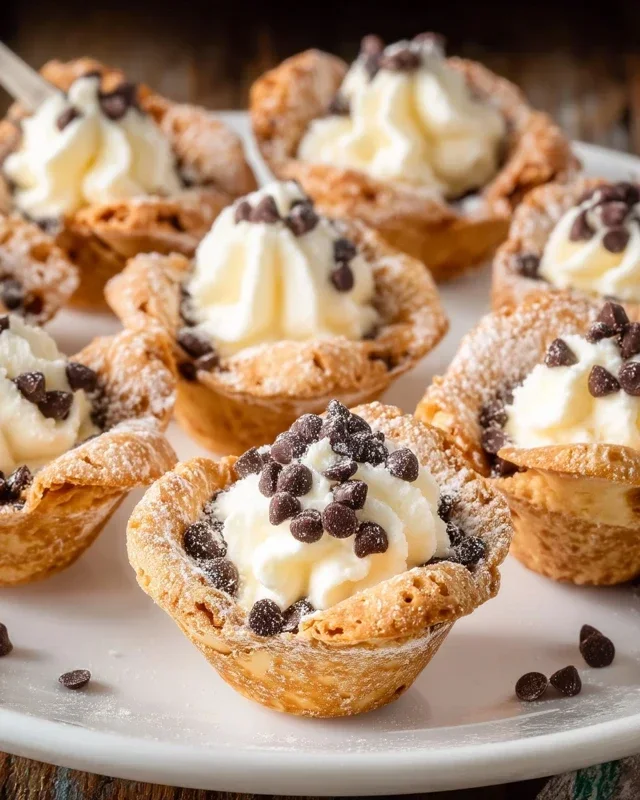
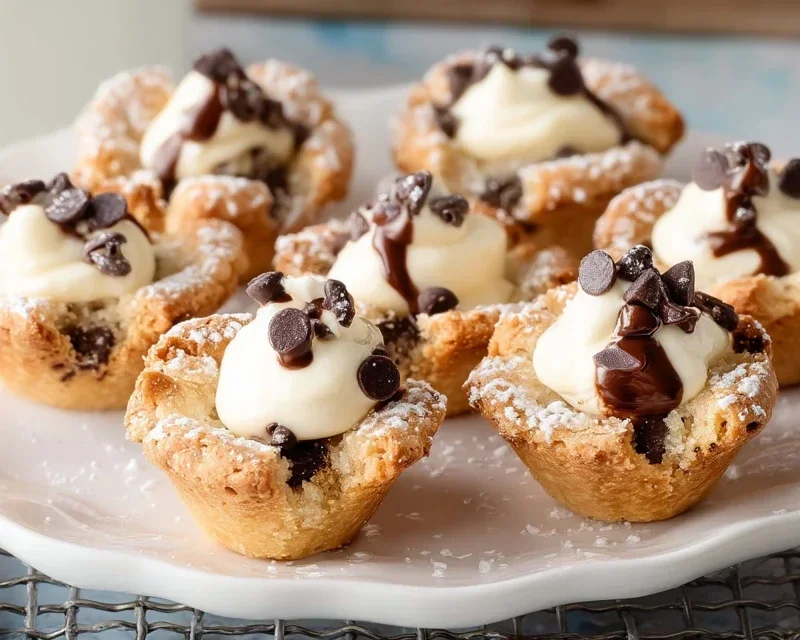
Once your pie crust cups are completely cool and you’ve prepared your creamy ricotta filling, it’s time for the most exciting part: assembly! Carefully spoon or pipe the ricotta filling into each cooled cannoli cup. If you don’t have a piping bag, a spoon works perfectly well. Fill them generously, but avoid overfilling to prevent the filling from spilling out.
Now for the final flourish! Sprinkle the tops of the filled cannoli cups with your chosen toppings. The miniature semisweet chocolate chips offer a classic chocolatey bite, while finely chopped pistachios provide a vibrant color and a delightful nutty texture. You can even do a mix of both! Finally, for that quintessential cannoli finish, dust the tops lightly with additional powdered sugar. A gentle sift will give them a beautiful, professional look. These Mini Cannoli Cups are best enjoyed the same day they are assembled to ensure the crispness of the shells. Enjoy every single sweet, creamy, and crunchy bite!
Conclusion:
And there you have it – a delightful journey into creating your very own Mini Cannoli Cups! This recipe is truly fantastic because it offers all the beloved flavors and textures of traditional cannoli in a bite-sized, incredibly manageable format. The crisp, golden shells, perfectly complemented by the sweet, creamy ricotta filling, make these little treats an absolute showstopper. They are wonderfully versatile, ideal for parties, dessert tables, or simply as a special indulgence for yourself. I encourage you to give this Mini Cannoli Cups recipe a try; you’ll be amazed at how easy it is to achieve such impressive results. Don’t be afraid to experiment with the variations I’ve suggested – making them your own is part of the fun!
For serving, consider a dusting of powdered sugar for a classic finish, or perhaps a drizzle of chocolate ganache for an extra layer of decadence. They are also lovely alongside fresh berries. Remember, the beauty of these mini cannoli lies in their adaptability. Feel free to play with the filling ingredients, adding a touch of espresso powder for a mocha twist, or even some finely chopped pistachios for added crunch and color. I truly hope you enjoy making and savoring these charming desserts as much as I do!
Frequently Asked Questions:
Can I make the cannoli shells ahead of time?
Yes, you absolutely can! Once cooled completely, the baked cannoli shells can be stored in an airtight container at room temperature for up to 2 days. However, it’s best to fill them just before serving to prevent the shells from becoming soggy.
What if I don’t have mini cannoli forms?
Don’t worry if you lack specialized forms! You can improvise using aluminum foil. Shape small, thick tubes of foil, wrap your dough around these, and secure them with a bit of egg wash before baking. They might not be perfectly uniform, but they’ll still bake beautifully!
How should I store leftover filled mini cannoli?
Filled cannoli are best enjoyed immediately. If you have leftovers, store them in an airtight container in the refrigerator for no more than 24 hours. The shells will soften considerably over time, so keep this in mind.
Mini Cannoli Cups
Delightful mini cannoli cups featuring a creamy ricotta filling and a crisp, spiced crust. Perfect for a sweet treat.
Ingredients
-
1 container whole-milk ricotta cheese (15 oz., drained)
-
1/2 cup powdered sugar
-
2 tablespoons granulated sugar
-
1 teaspoon finely grated orange or lemon zest
-
1/2 teaspoon vanilla extract
-
1 box refrigerated pie crusts, softened as directed on box (2 count )
-
3 tablespoons turbinado sugar (raw sugar)
-
1 teaspoon ground cinnamon
-
1/4 cup miniature semisweet chocolate chips or finely chopped pistachios
-
additional powdered sugar
Instructions
-
Step 1
Preheat oven to 375°F (190°C). Lightly grease a mini muffin tin. -
Step 2
In a medium bowl, combine the drained ricotta cheese, powdered sugar, granulated sugar, orange or lemon zest, and vanilla extract. Stir until smooth and well combined. -
Step 3
Unroll the refrigerated pie crusts and cut each into 6 rounds using a 3-inch round cutter. Press each dough round gently into a mini muffin cup, forming a shell. -
Step 4
In a small bowl, mix the turbinado sugar and ground cinnamon. Sprinkle about 1 teaspoon of this mixture into the bottom of each pie crust shell. -
Step 5
Bake for 12-15 minutes, or until the crusts are golden brown and lightly puffed. Let cool in the tin for 5 minutes before carefully removing to a wire rack to cool completely. -
Step 6
Once the shells are completely cool, spoon or pipe the ricotta filling into each cup. Sprinkle the tops with miniature chocolate chips or finely chopped pistachios. -
Step 7
Dust with additional powdered sugar just before serving, if desired.
Important Information
Nutrition Facts (Per Serving)
It is important to consider this information as approximate and not to use it as definitive health advice.
Allergy Information
Please check ingredients for potential allergens and consult a health professional if in doubt.