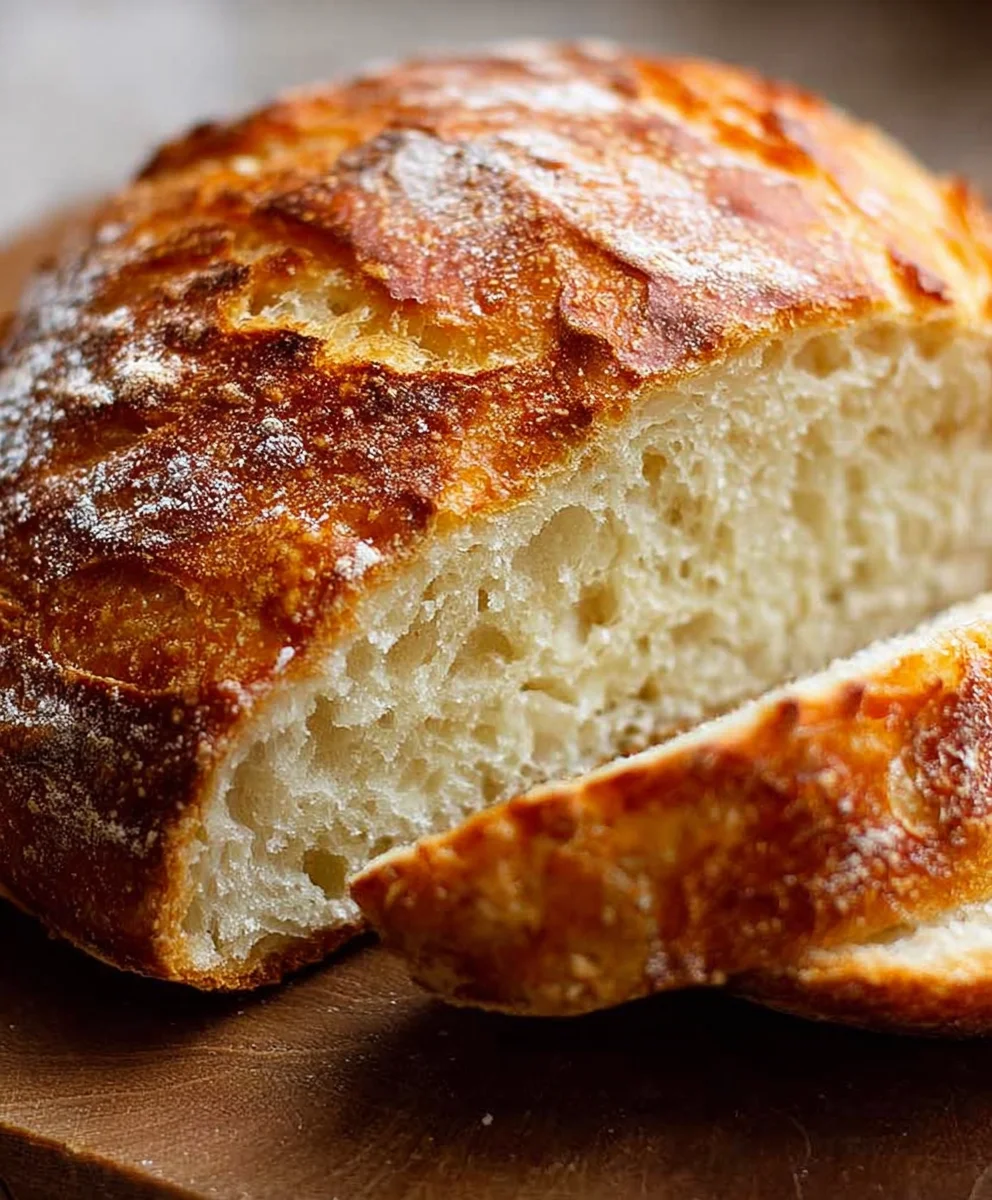
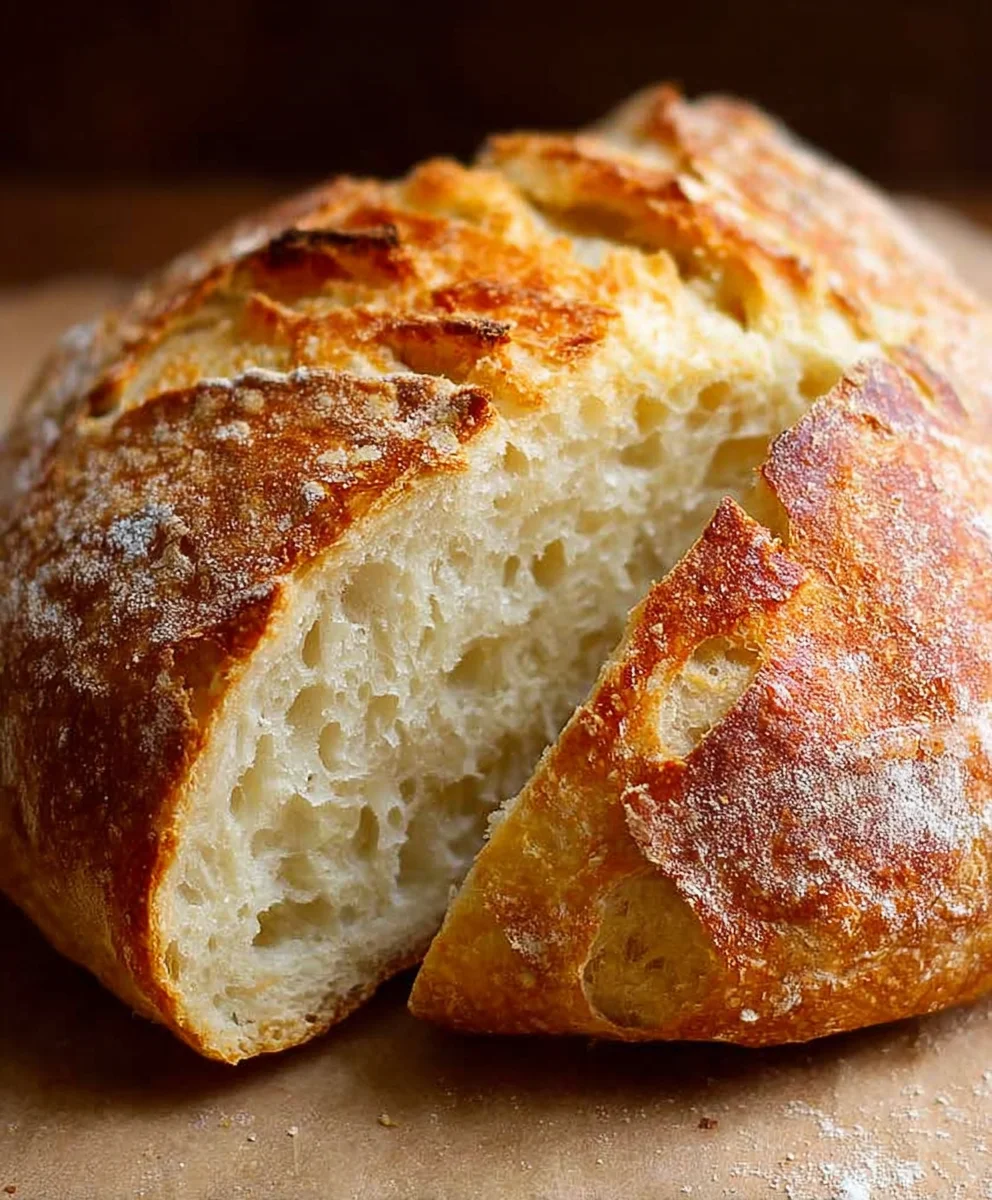
Easiest No Knead Artisan Bread Recipe
World’s Easiest Yeast Bread recipe – Artisan, NO KNEAD. Have you ever dreamt of pulling a perfectly crusted, wonderfully chewy loaf of artisan bread from your own oven, but felt intimidated by the thought of endless kneading and complex proofing? Well, prepare to have your baking world transformed. This isn’t just any bread; it’s a revelation in simplicity and deliciousness. People absolutely adore this recipe because it delivers that sought-after, rustic, open crum extractb and crackling crust of a bakery-quality loaf with astonishingly little effort. The magic lies in its foolproof technique that allows time, rather than your muscles, to do the hard work. What truly sets this World’s Easiest Yeast Bread recipe – Artisan, NO KNEAD apart is its incredible forgivingness and the sheer joy it brings. Imagin extracte the aroma filling your kitchen, the satisfying sound of the crust giving way to reveal a tender interior, all from a recipe that practically makes itself. This is your gateway to homemade bread bliss, no advanced skills required.
Ingredients:
- 3 cups (450g) flour (bread flour is ideal for a chewier crust, but all-purpose flour works beautifully too)
- 2 teaspoons instant or rapid rise yeast (if using active dry yeast, please see Note 2 in my full recipe notes for activation instructions)
- 2 teaspoons kosher salt (this is crucial for flavor development and dough structure; please avoid table salt as its finer grains can affect the texture)
- 1 1/2 cups (375 ml) very warm tap water (aim for around 105-115°F or 40-46°C; water that’s too hot will kill the yeast, and water that’s too cool won’t activate it effectively)
- 1 1/2 tablespoons flour, for dusting
Mixing the Dough
This is where the magic begin extracts, and it couldn’t be simpler. You’ll want to grab a large mixing bowl – one that can comfortably hold at least 3 quarts. Into this bowl, we’ll add our dry ingredients first. Measure out your 3 cups of flour and add it in. Then, sprinkle in your 2 teaspoons of instant yeast and the 2 teaspoons of kosher salt. Give these dry ingredients a quick whisk or stir with a spoon to distribute the yeast and salt evenly throughout the flour. This ensures the yeast will have a uniform environment to work its magic.
Now, it’s time for the water. Pour in your 1 1/2 cups of very warm tap water. The temperature is key here, so if you have a thermometer, use it! You’re looking for that sweet spot between 105-115°F (40-46°C). If your water feels too hot to comfortably keep your finger in, it’s likely too hot for the yeast. Once the water is added, it’s time to mix. You can use a sturdy spoon, a spatula, or even your hands for this part. Mix everything together until there are no dry pockets of flour remaining. The dough will look shaggy and quite sticky at this stage, and that’s exactly what we want. Resist the urge to add more flour; this stickiness is what contributes to the bread’s incredible open crum extractb.
First Rise: The Waiting Game
Once you have a cohesive, albeit sticky, dough, cover the bowl tightly with plastic wrap or a damp kitchen towel. This prevents the dough from drying out. Now, find a warm, draft-free spot for your dough to rest and rise. The top of your refrigerator or a slightly warm (but not hot!) oven that has been turned off can be perfect spots. Let the dough rise for at least 12 to 18 hours. Yes, you read that right! This long, slow fermentation is what develops the incredible flavor and texture that makes this bread so special, and it’s why we don’t need to knead. During this time, the yeast will work tirelessly, producing gas that creates bubbles and stretching the gluten structure without any physical manipulation from you. You’ll know it’s ready when the dough has roughly doubled in size and is covered in tiny bubbles.
Shaping the Loaf (Gently!)
After its long rest, your dough will be bubbly and alive. Lightly dust a clean work surface with your 1 1/2 tablespoons of flour. Gently scrape the dough out of the bowl onto the floured surface. Try not to deflate it too much; we want to preserve all those lovely air pockets. Now, gently shape the dough into a rough ball or oblong shape. You can do this by tucking the edges underneath itself a few times, creating a little surface tension. The goal is not a perfectly smooth loaf at this stage, but rather something that will hold its shape during its second rise and baking. Overworking the dough here will make it tough.
Second Rise and Oven Preparation
Place your shaped dough onto a piece of parchment paper. This will make it incredibly easy to transfer into your hot Dutch oven later. Cover the dough loosely with plastic wrap or a clean kitchen towel and let it rest for another 30 to 60 minutes while you preheat your oven. This second rise, often called proofing, allows the dough to relax and gain a little more volume. It’s essential to preheat your oven and your Dutch oven thoroughly. Place a 4 to 6-quart Dutch oven (with its lid) into your oven and preheat to 450°F (230°C). A well-preheated Dutch oven is key to achieving that coveted crispy, crackly crust. Make sure the oven is fully up to temperature for at least 30 minutes before you plan to bake.
Baking the Artisan Masterpiece
This is the grand finnon-alcoholic ale! Once your oven and Dutch oven are fully preheated, carefully remove the hot Dutch oven from the oven. Remove the lid. Using the parchment paper as a sling, carefully lower your proofed dough into the hot Dutch oven. It might look a little flat, but don’t worry! Place the lid back on the Dutch oven. Carefully place the lidded Dutch oven back into the hot oven. Bake for 30 minutes with the lid on. This traps steam, which is essential for the bread to rise fully and develop a beautiful crust. After 30 minutes, remove the lid from the Dutch oven. You’ll notice the bread has puffed up significantly. Continue to bake for another 15 to 25 minutes, or until the crust is a deep golden brown and the internal temperature of the bread reaches around 205-210°F (96-99°C) when tested with an instant-read thermometer. Once baked to perfection, carefully remove the bread from the Dutch oven and place it on a wire rack to cool completely. This cooling period is crucial; slicing into hot bread will result in a gummy texture.
Conclusion:
We’ve reached the end of our journey making the World’s Easiest Yeast Bread recipe – Artisan, NO KNEAD! It’s truly amazing how simple ingredients and minimal effort can result in such a beautifully crusty, wonderfully airy, and incredibly delicious loaf. This recipe demystifies bread making, proving that anyone can achieve fantastic results without hours of kneading or special equipment. The aroma that fills your kitchen as it bakes is simply divine, and the taste is incomparable to store-bought bread. I hope you feel empowered and encouraged to make this wonderful bread again and again, perhaps even sharing the joy with loved ones.
This versatile bread is perfect for so many occasions. Serve it warm with a generous slather of butter, use it to create stunning bruschetta, or let it be the star of your next sandwich. For variations, consider adding a handful of fresh herbs like rosemary or thyme to the dough before its final rise, or sprinkle some grated cheese on top just before baking for a savory twist. You could even mix in some seeds for added texture and flavor.
Frequently Asked Questions:
Can I use a different type of flour for the World’s Easiest Yeast Bread recipe – Artisan, NO KNEAD?
While all-purpose flour works wonderfully, you can experiment with a blend of bread flour for a chewier texture or add a small percentage of whole wheat flour for a nuttier flavor. Keep in mind that different flours absorb liquid differently, so you might need to adjust the water slightly.
My dough didn’t rise much, what could be wrong?
Ensure your yeast is fresh and that the water you used was lukewarm (not hot, as this can kill the yeast) but also not too cold. Also, make sure your kitchen is warm enough for the dough to rise. Drafty or cold environments can significantly slow down fermentation.
How do I store the World’s Easiest Yeast Bread recipe – Artisan, NO KNEAD?
Once completely cooled, store the bread in a paper bag at room temperature for a day or two to maintain its crust. For longer storage, wrap it tightly in plastic wrap and then foil, and it can be frozen for up to a month. Reheat slices in the oven or toaster for best results.
Easiest No Knead Artisan Bread Recipe
A simple and foolproof recipe for delicious no-knead artisan bread with a perfectly chewy crust and open crumb.
Ingredients
-
3 cups (450g) flour (bread flour or all-purpose flour)
-
2 teaspoons instant or rapid rise yeast
-
2 teaspoons kosher salt
-
1 1/2 cups (375 ml) very warm tap water
-
1 1/2 tablespoons flour, for dusting
Instructions
-
Step 1
In a large mixing bowl, combine 3 cups of flour, 2 teaspoons of instant yeast, and 2 teaspoons of kosher salt. Whisk to distribute evenly. -
Step 2
Add 1 1/2 cups of very warm tap water (105-115°F or 40-46°C) and mix with a spoon, spatula, or hands until no dry flour remains. The dough will be shaggy and sticky. -
Step 3
Cover the bowl tightly and let the dough rise in a warm, draft-free spot for 12 to 18 hours, or until doubled in size and bubbly. -
Step 4
Gently turn the dough out onto a lightly floured surface and shape it into a rough ball or oblong. Avoid deflating it. -
Step 5
Place the shaped dough on parchment paper and let it rest loosely covered for 30-60 minutes while preheating your oven and a Dutch oven to 450°F (230°C) for at least 30 minutes. -
Step 6
Carefully remove the hot Dutch oven from the oven, place the dough (on parchment) inside, cover with the lid, and bake for 30 minutes. -
Step 7
Remove the lid and bake for an additional 15-25 minutes, or until the crust is deep golden brown and the internal temperature reaches 205-210°F (96-99°C). Cool completely on a wire rack before slicing.
Important Information
Nutrition Facts (Per Serving)
It is important to consider this information as approximate and not to use it as definitive health advice.
Allergy Information
Please check ingredients for potential allergens and consult a health professional if in doubt.