Chicken Avocado Melt Sandwich-Easy & Delicious
Chicken Avocado Melt Sandwich recipes are a weeknight warrior’s dream and a weekend indulgence all rolled into one glorious bite. If you’re anything like me, you crave meals that are both incredibly satisfying and surprisingly simple to whip up. This isn’t just another sandwich; it’s a symphony of textures and flavors that will have you coming back for more. What is it about the perfect pairing of creamy avocado, tender chicken, and gooey melted cheese that captures our hearts (and stomachs)? I think it’s the pure comfort food factor, elevated. It’s the way the warm, yielding bread hugs the savory chicken, punctuated by the cool, velvety avocado and the irresistible stretch of melted cheese. It’s a dish that feels both nourishing and decadent, making it the ideal solution for those busy evenings when you need something delicious without the fuss, or for a leisurely brunch that feels extra special.
The Ultimate Chicken Avocado Melt Sandwich Recipe
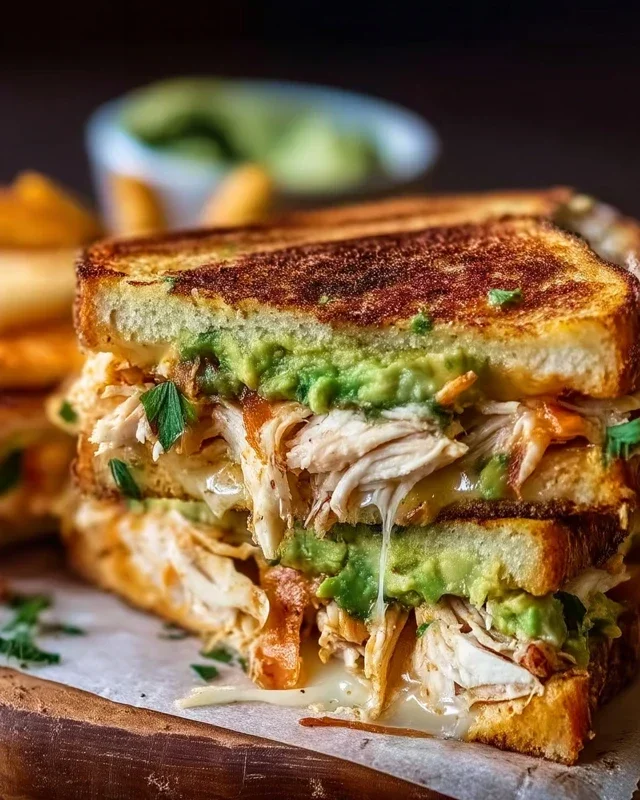
There’s something incredibly satisfying about a warm, gooey, flavor-packed sandwich, and my Chicken Avocado Melt takes that satisfaction to a whole new level. It’s a harmonious blend of tender chicken, creamy avocado, melty cheese, and a touch of tang from Dijon mustard, all grilled to golden perfection. This sandwich is perfect for a quick weeknight dinner, a hearty lunch, or even a decadent brunch. It’s simple enough for a begin extractner but delivers restaurant-quality flavor. Let’s get cooking!
Ingredients:
Preparing the Chicken
The foundation of a great melt is well-seasoned, properly cooked chicken. We want it tender and flavorful, not dry and bland.
Assembling the Sandwich
Now for the fun part – layering all those delicious ingredients to create our magnificent melt!
- Prepare the Bread and Spread: While the chicken is resting, prepare your bread. You can toast it lightly if you prefer a crispier base, but it’s not entirely necessary as it will be grilled. In a small bowl, combine the mayonnaise and Dijon mustard. Mix them together well to create a creamy, tangy spread. This spread acts as a flavor enhancer and also helps bind the sandwich ingredients together. Generously spread this mixture on one side of each of the four slices of bread. This will be the inside of your sandwich.
- Layer the Ingredients: On two of the bread slices (the bottom halves of your sandwiches), start layering your ingredients. Begin extract with a generous portion of the cooked and shredded or sliced chicken. Evenly distribute it across the bread. Next, arrange your thinly sliced red onion over the chicken. The onion will soften slightly as it grills, offering a pleasant bite without being overpowering. Then, place the tomato slices on top of the onion. Don’t overcrowd the sandwich; a couple of slices of each should suffice.
- Add the Avocado and Cheese: Carefully arrange the sliced avocado over the tomato. The creamy avocado is a star player in this melt, adding a luxurious texture and rich flavor that complements the other ingredients beautifully. Now, it’s time for the cheese! Place two slices of your chosen cheese on top of the avocado for each sandwich. I love using a mix of cheddar and provolone for a good melt and flavor combination, but any good melting cheese will work. Finally, top each sandwich with the remaining two slices of bread, spread-side down.
- Grill to Golden Perfection: Heat a clean skillet or griddle over medium heat. Add a knob of butter or a drizzle of olive oil to the pan. Once the butter is melted and slightly foamy, or the oil is shimmering, carefully place the assembled sandwiches into the skillet. You should hear a satisfying sizzle. Cook for about 4-6 minutes per side, or until the bread is golden brown and toasted, and the cheese is completely melted and gooey. You might need to press down gently with a spatula to ensure even browning and melting. If the bread is browning too quickly before the cheese has melted, reduce the heat slightly and cover the pan for a minute or two to help the cheese melt through.
- Serve Immediately: Once both sides of the sandwiches are beautifully golden and the cheese is oozing out, carefully remove them from the skillet. Let them rest for just a minute before slicing them in half. This helps everything settle and makes them easier to handle. Serve your Chicken Avocado Melt sandwiches immediately while they are hot and the cheese is at its melty best. These are fantastic on their own, but can also be paired with a side salad, some crispy fries, or a cup of soup for a complete and satisfying meal. Enjoy every delicious, cheesy, avocado-filled bite!
-
2 boneless, skinless chicken breasts
-
Salt and pepper to taste
-
1 tablespoon olive oil
-
1 avocado, sliced
-
4 slices your favorite cheese
-
4 slices bread
-
2 tablespoons mayonnaise
-
1 tablespoon Dijon mustard
-
1 small red onion, thinly sliced
-
1 tomato, sliced
-
Butter or olive oil for grilling
-
Step 1
Season the chicken breasts with salt and pepper. Heat 1 tablespoon of olive oil in a skillet over medium-high heat and cook the chicken until browned and cooked through (about 6-8 minutes per side). Let it rest and then slice thinly. -
Step 2
In a small bowl, mix together the mayonnaise and Dijon mustard. -
Step 3
Spread the mayonnaise-mustard mixture on the inside of each slice of bread. -
Step 4
Assemble the sandwiches by layering the sliced chicken, cheese, avocado slices, red onion, and tomato on two slices of bread. Top with the remaining bread slices. -
Step 5
Heat butter or olive oil in a skillet or on a griddle over medium heat. -
Step 6
Grill the sandwiches for 3-5 minutes per side, or until the bread is golden brown and the cheese is melted and gooey.
Melting the Cheese and Grilling
This is where the magic truly happens – the cheese melts and binds everything together, creating that irresistible gooey factor.
Serving Your Masterpiece
The aroma alone is enough to make your mouth water, but the taste is even better.
Conclusion:
So there you have it! This Chicken Avocado Melt Sandwich recipe is truly a winner in my book. It’s incredibly satisfying, packed with flavor, and surprisingly simple to whip up, making it perfect for a quick lunch or a casual weeknight dinner. The creamy avocado beautifully complements the tender chicken, and when melted with your favorite cheese, it creates a symphony of textures and tastes that’s simply irresistible. It’s versatile enough to be customized to your heart’s content!
For serving, I love to pair this delightful sandwich with a crisp side salad, some seasoned sweet potato fries, or even a simple bowl of tomato soup. It really elevates the whole meal.
Thinking about variations? Feel free to add a sprinkle of red pepper flakes for a little heat, some crispy beef bacon for extra indulgence, or even a layer of your favorite pesto for a Mediterranean twist. The possibilities are endless!
I truly encourage you to give this Chicken Avocado Melt Sandwich a try. I’m confident you’ll fall in love with it just as much as I have!
Frequently Asked Questions:
Can I use pre-cooked chicken?
Absolutely! Rotisserie chicken or leftover cooked chicken breast works wonderfully and will save you even more time. Just be sure to shred or dice it before adding it to the sandwich.
What kind of cheese is best for this melt?
While I love a sharp cheddar or a melty Monterey Jack, you can experiment! Provolone, Swiss, or even a pepper jack would be delicious additions to your Chicken Avocado Melt Sandwich.
Can I make this sandwich ahead of time?
It’s best assembled and cooked right before serving to ensure the avocado is fresh and the cheese is perfectly melted. However, you can prepare your chicken mixture and slice the avocado in advance.
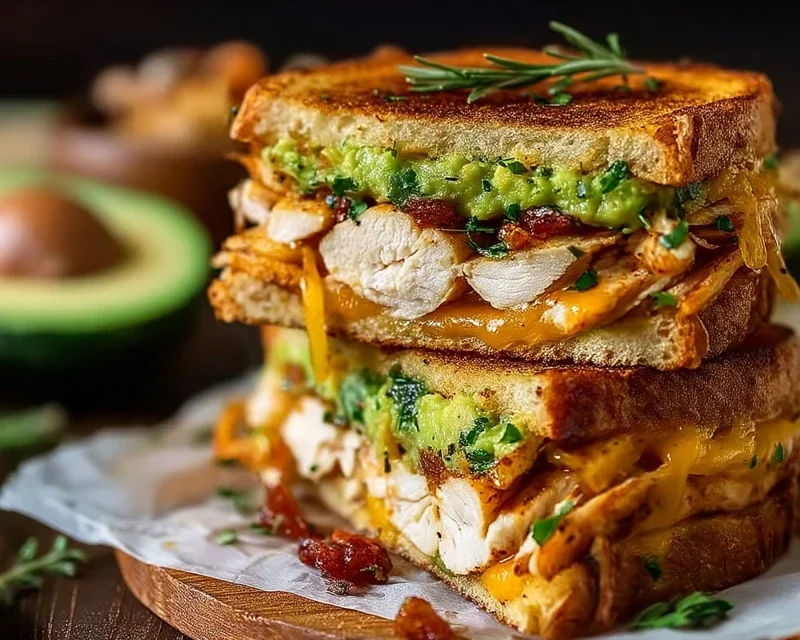
Chicken Avocado Melt Sandwich
A delicious and satisfying sandwich featuring tender chicken, creamy avocado, melted cheese, and fresh vegetables grilled to perfection.
Ingredients
Instructions
Important Information
Nutrition Facts (Per Serving)
It is important to consider this information as approximate and not to use it as definitive health advice.
Allergy Information
Please check ingredients for potential allergens and consult a health professional if in doubt.