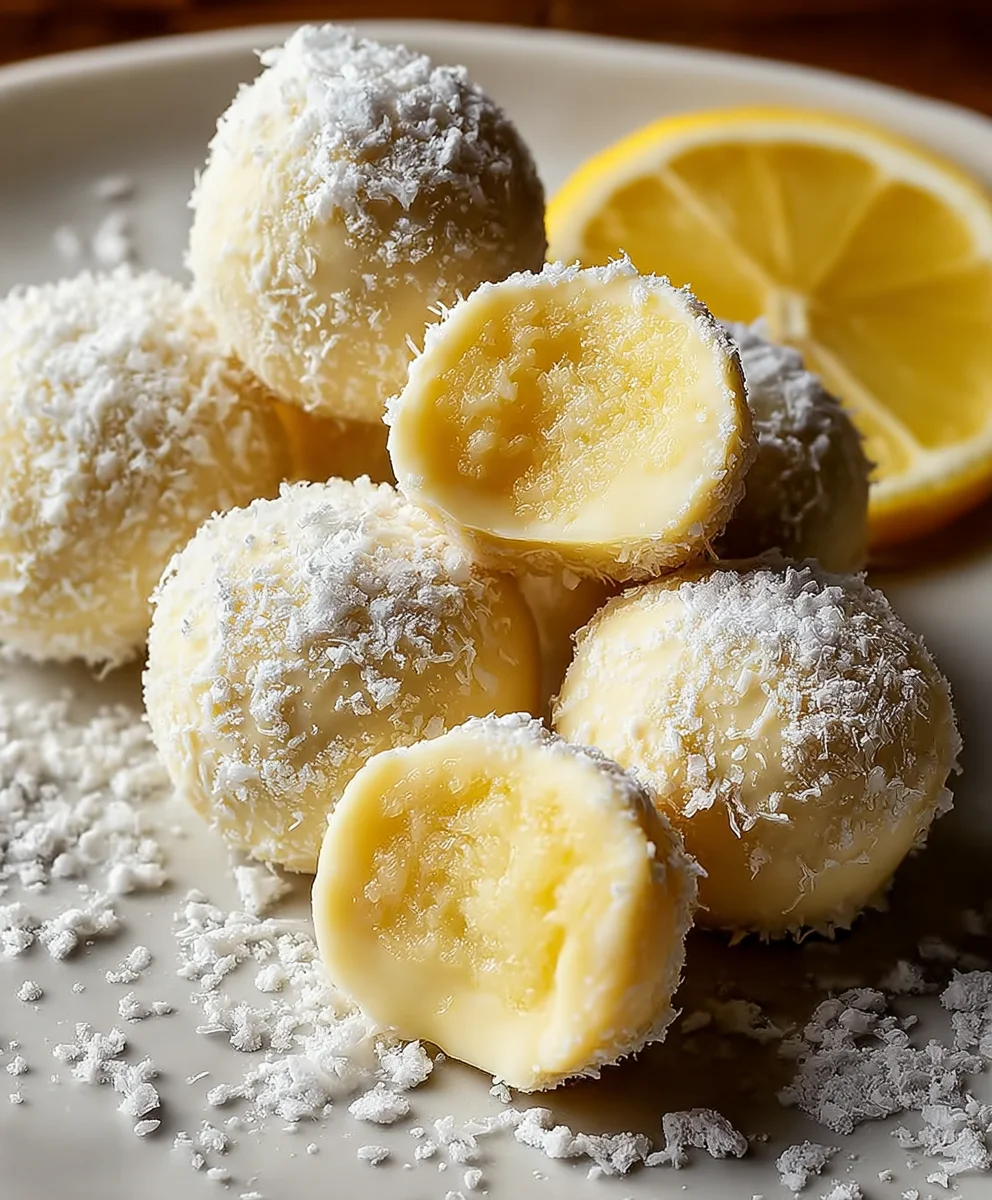
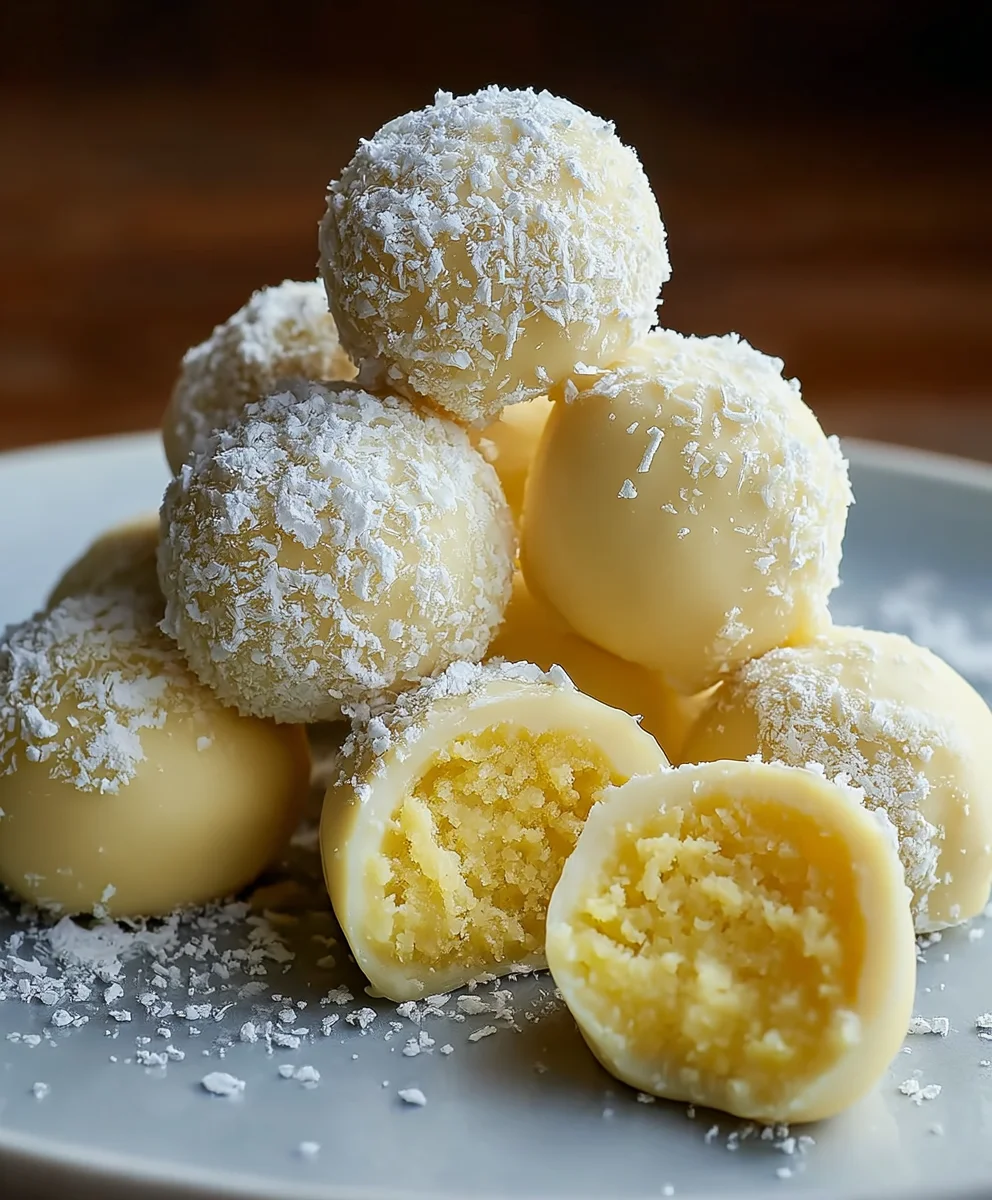
Easy Lemon Truffles – Zesty-Sweet Dessert Bites
Lemon Truffles are more than just a sweet treat; they’re an invitation to pure, unadulterated joy. Imagin extracte biting into a delicate sphere, the initial snap of the chocolate shell giving way to a luxuriously smooth, intensely flavored center. That burst of bright, zesty lemon, perfectly balanced with creamy richness, is what makes these little delights so utterly captivating. People adore Lemon Truffles for their sophisticated yet approachable elegance. They’re the perfect small indulgence after a meal, a thoughtful gift for a friend, or simply a moment of self-care on a busy day. What truly sets these homemade Lemon Truffles apart is the vibrant, authentic citrus flavor that sings through, a far cry from artificial substitutes. We’ll guide you through creating these exquisite confections, transforming simple ingredients into edible sunshine.
Ingredients:
- 4 oz cream cheese or coconut butter, softened
- 2 tbsp butter or additional coconut butter, softened
- 3 tbsp powdered sugar or erythritol
- Zest of one lemon
- 3 oz white chocolate chips (optional)
- Optional drop of natural food coloring or pinch of turmeric for color
Preparing the Lemon Truffle Base
The foundation of our delightful Lemon Truffles is a simple yet rich mixture that comes together surprisingly quickly. First, ensure your cream cheese or coconut butter is properly softened. This is crucial for achieving a smooth, lump-free consistency. You can leave it out on the counter for about an hour, or if you’re short on time, you can gently microwave it in 10-second bursts, being careful not to melt it. In a medium mixing bowl, combine the softened cream cheese (or coconut butter) with the softened butter (or additional coconut butter). Using an electric mixer, beat these two ingredients together on medium speed until they are thoroughly combined and incredibly creamy. This process usually takes about 2 to 3 minutes. Scrape down the sides of the bowl with a spatula periodically to make sure all the butter and cream cheese are incorporated.
Next, it’s time to add the sweetness. Gradually add the powdered sugar (or erythritol, if you’re opting for a sugar-free version) to the creamed mixture. Continue mixing on low speed at first to prevent a cloud of sugar from erupting, then increase to medium speed. Beat until the sugar is fully incorporated and the mixture is light and fluffy. This step is where the texture really starts to transform, becoming more dessert-like. Don’t rush this; a well-mixed base will lead to smoother, more enjoyable truffles.
Infusing with Zesty Lemon Flavor
Now for the star of the show: the lemon! Finely zest one fresh lemon directly into the mixing bowl. Using a microplane grater is ideal for this, as it allows you to capture just the flavorful yellow outer peel and avoid the bitter white pith underneath. The aroma that fills your kitchen at this stage is simply divine. Gently fold the lemon zest into the mixture using a spatula. You want to distribute the zest evenly throughout the base, ensuring that every bite of your Lemon Truffles will have that bright, refreshing citrus note. Be gentle during this folding process to maintain the airiness of the mixture you worked so hard to create.
If you’re aiming for visually appealing truffles, this is also the moment to add your color. For a delicate yellow hue, a single drop of natural yellow food coloring works wonderfully. Alternatively, a tiny pinch of turmeric powder can provide a beautiful, natural color. Stir the coloring or turmeric in very gently until you achieve your desired shade. Remember, a little goes a long way with food coloring, so start with a minimal amount and add more if needed.
Forming and Chilling the Truffles
Once the base is perfectly flavored and colored, it’s time to form the truffles. You can either roll the mixture into small balls or, for a more rustic look, use a small spoon to scoop portions directly. Aim for truffle sizes that are easy to handle and eat – roughly 1 inch in diameter is usually a good starting point. If the mixture feels too soft to handle, don’t worry! Pop the entire bowl into the refrigerator for about 15-20 minutes. This will firm up the mixture just enough to make rolling much easier. You can also place small spoonfuls onto a parchment-lined baking sheet.
After you’ve formed all your truffles, arrange them on a parchment-lined baking sheet or a plate. It’s important to place them close enough so they don’t spread too much, but with a little space between each one. Then, cover them loosely with plastic wrap and refrigerate for at least 1 hour. This chilling period is essential for the truffles to set properly, firming up their shape and texture, making them ready for the next optional, but highly recommended, step.
Optional White Chocolate Coating
For an extra touch of decadence, you can coat your Lemon Truffles in melted white chocolate. This step is entirely optional, but it adds a wonderful contrasting flavor and a beautiful finish. While the truffles are chilling, melt the 3 oz of white chocolate chips. You can do this in a microwave-safe bowl in 30-second intervals, stirring well between each interval, until smooth. Alternatively, you can use a double boiler for a more gentle melting process. Be careful not to overheat white chocolate, as it can scorch easily.
Once the chocolate is melted and smooth, remove the chilled truffles from the refrigerator. Using a fork or a small dipping tool, carefully dip each truffle into the melted white chocolate, ensuring it’s fully coated. Allow any excess chocolate to drip back into the bowl. Place the chocolate-coated truffles back onto the parchment-lined baking sheet. If you desire a more intricate design, you can use a fork to drizzle extra melted white chocolate over the tops of the truffles once the initial coating has set slightly.
Final Chilling and Serving
After coating, place the baking sheet with the truffles back into the refrigerator for another 30-60 minutes, or until the white chocolate coating has completely hardened. This final chill ensures the truffles are perfectly firm and the chocolate is set. Once they’ve hardened, your Lemon Truffles are ready to be enjoyed! For the best flavor and texture, serve them chilled. They make a wonderful addition to a dessert platter, a thoughtful homemade gift, or simply a delightful treat to enjoy with a cup of tea or coffee. Store any leftover truffles in an airtight container in the refrigerator for up to 3-4 days.
Conclusion:
There you have it! Crafting these delightful Lemon Truffles is a truly rewarding experience, offering a burst of bright citrus flavor that’s perfect for any occasion. We’ve walked through each step, from melting the chocolate to achieving that perfectly smooth ganache and rolling them into elegant spheres. These little bites of sunshine are wonderfully versatile. Serve them after a rich meal as a palate cleanser, alongside a cup of tea or coffee, or package them up as a thoughtful homemade gift. They’re guaranteed to impress!
Feel free to get creative with the coating! While the recipe calls for white chocolate, consider dipping them in finely chopped pistachios for a nutty crunch, or a dusting of cocoa powder for a more decadent finish. For an extra zing, a touch of finely grated lemon zest mixed into the ganache before rolling can elevate the citrus notes even further. Don’t be afraid to experiment and make these Lemon Truffles your own. The joy of homemade treats is in making them uniquely yours. Enjoy every single bite!
Frequently Asked Questions about Lemon Truffles:
Q1: How long do Lemon Truffles typically last?
Properly stored, Lemon Truffles can last for about 1 to 2 weeks in an airtight container in the refrigerator. If you’re keeping them at room temperature, they are best enjoyed within 3-4 days, especially if they have a cream-based ganache.
Q2: Can I use lemon extract instead of fresh lemon juice?
Yes, you can use lemon extract. However, start with a small amount (about 1/2 teaspoon) and taste the ganache. Lemon extract can be quite potent, and it’s easier to add more than to take it away. Fresh lemon juice provides a brighter, more natural flavor profile.
Easy Lemon Truffles – Zesty-Sweet Dessert Bites
Delightful, zesty-sweet dessert bites that are surprisingly easy to make. These no-bake truffles feature a creamy lemon-infused base, perfect for a quick treat or elegant gift.
Ingredients
-
4 oz cream cheese or coconut butter, softened
-
2 tbsp butter or additional coconut butter, softened
-
3 tbsp powdered sugar or erythritol
-
Zest of one lemon
-
3 oz white chocolate chips (optional)
-
Optional drop of natural food coloring or pinch of turmeric for color
Instructions
-
Step 1
In a medium mixing bowl, combine the softened cream cheese (or coconut butter) with the softened butter (or additional coconut butter). Beat with an electric mixer on medium speed until smooth and creamy, about 2-3 minutes. Scrape down the sides of the bowl periodically. -
Step 2
Gradually add the powdered sugar (or erythritol) to the creamed mixture. Start on low speed to avoid a sugar cloud, then increase to medium speed and beat until fully incorporated and the mixture is light and fluffy. -
Step 3
Finely zest one fresh lemon directly into the bowl. Gently fold the lemon zest into the mixture with a spatula until evenly distributed. If desired, add a drop of natural food coloring or a pinch of turmeric for color and gently stir until the desired shade is achieved. -
Step 4
Roll the mixture into small balls (about 1 inch in diameter). If the mixture is too soft, chill it in the refrigerator for 15-20 minutes until firm enough to handle. Place formed truffles on a parchment-lined baking sheet. -
Step 5
Refrigerate the truffles for at least 1 hour to set properly. While chilling, melt the white chocolate chips in a microwave-safe bowl (stirring every 30 seconds) or using a double boiler until smooth. Be careful not to overheat. -
Step 6
Dip each chilled truffle into the melted white chocolate, allowing excess to drip off. Place the coated truffles back onto the parchment-lined baking sheet. For extra decoration, drizzle with additional melted white chocolate. -
Step 7
Return the baking sheet to the refrigerator for another 30-60 minutes, or until the white chocolate coating is completely hardened. Serve chilled. Store leftovers in an airtight container in the refrigerator for up to 3-4 days.
Important Information
Nutrition Facts (Per Serving)
It is important to consider this information as approximate and not to use it as definitive health advice.
Allergy Information
Please check ingredients for potential allergens and consult a health professional if in doubt.