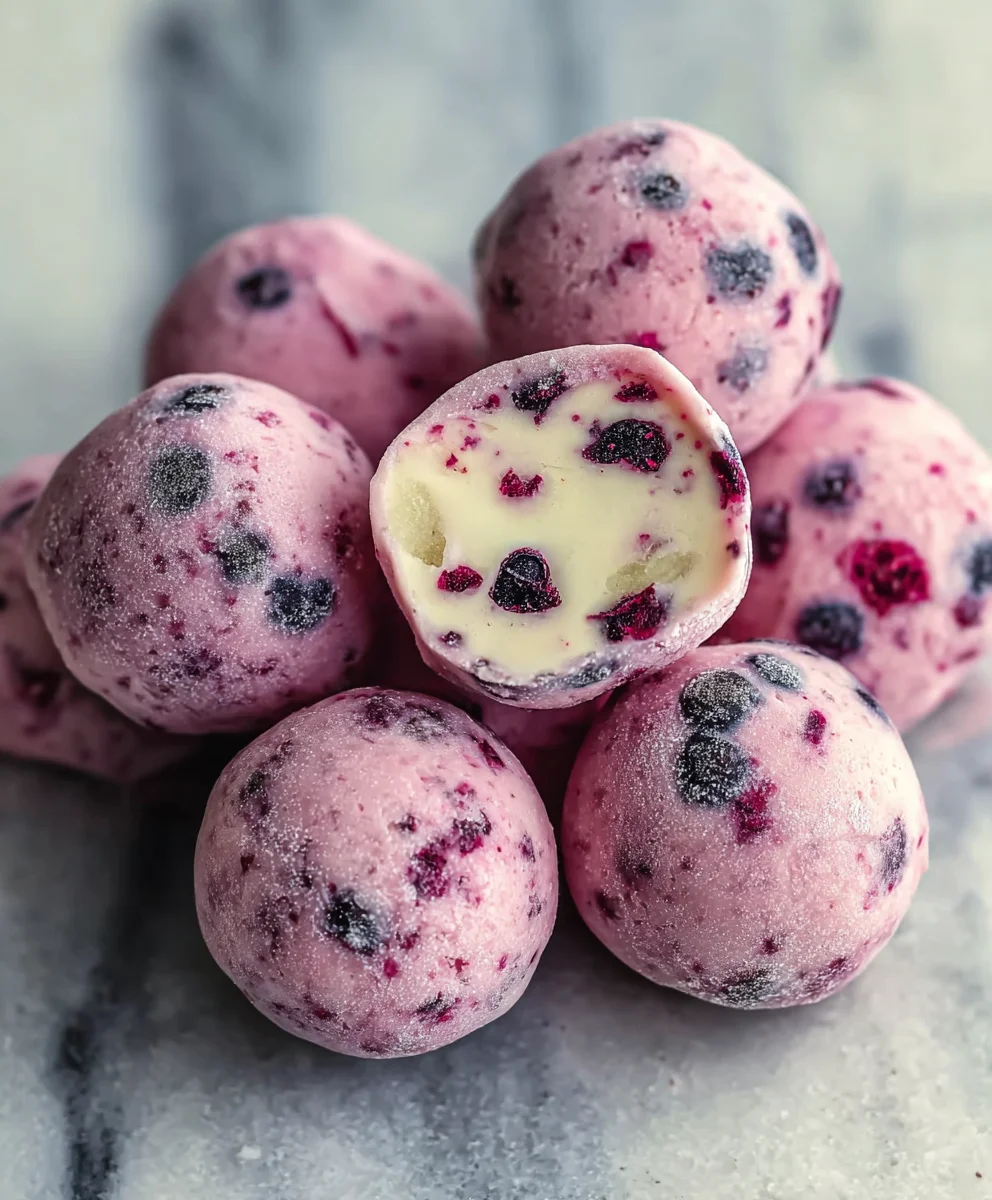
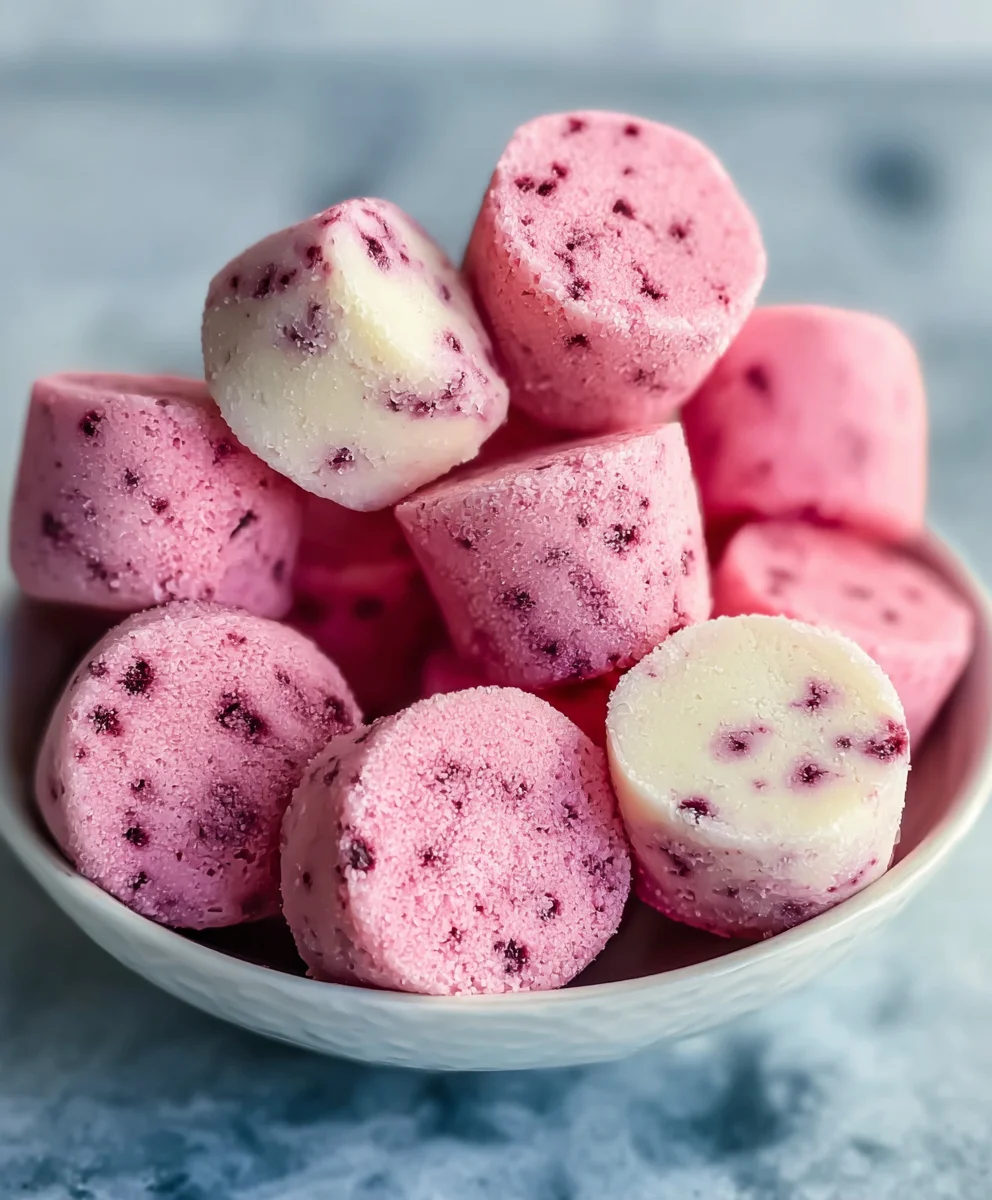
Easy Frozen Yogurt Bites – Delicious Summer Treat
Easy Frozen Yogurt Bites are more than just a simple treat; they’re a gateway to guilt-free indulgence and pure, unadulterated joy. In those moments when a craving hits for something sweet and satisfying, but you want to keep it light and nutritious, these delightful morsels are your ultimate allies. What makes them so incredibly beloved? It’s their cbeef hameleon-like ability to adapt to any flavor profile you can dream up, their incredibly satisfying texture, and the sheer ease with which they come together. Imagin extracte vibrant pops of fruit, a hint of creamy sweetness, all frozen into perfectly bite-sized portions that melt in your mouth. They are the ideal snack for kids and adults alike, a refreshing pick-me-up on a hot afternoon, or even a surprisingly sophisticated dessert. We’re about to unlock the secrets to creating these fantastic easy frozen yogurt bites, transforming your kitchen into a haven of healthy deliciousness.
Ingredients:
- 12 ounces strawberry yogurt
- 1/2 cup fresh raspberries
- 1/2 cup fresh blackberries
- 2 tablespoons unsweetened almond milk
Preparing Your Easy Frozen Yogurt Bites
Gathering Your Ingredients and Equipment
Before we dive into the fun part of creating these delightful Easy Frozen Yogurt Bites, let’s make sure you have everything you need. You’ll start with the core components: 12 ounces of delicious strawberry yogurt, which forms the creamy base of our bites. For a burst of natural sweetness and vibrant color, we’ll be using 1/2 cup of fresh raspberries and 1/2 cup of fresh blackberries. These berries not only add flavor but also beautiful speckles throughout the bites. To achieve the perfect smooth consistency, we’ll incorporate 2 tablespoons of unsweetened almond milk. This addition helps prevent the yogurt from becoming too icy when frozen, ensuring a pleasant texture.
Beyond the ingredients, you’ll want a few essential kitchen tools. A good quality blender or food processor is crucial for smoothly pureeing the berries and incorporating them into the yogurt. You’ll also need a small spoon or piping bag for portioning the mixture, and a baking sheet lined with parchment paper or a silicone baking mat. The parchment paper is key to preventing the frozen yogurt bites from sticking to the tray, making them easy to remove once set. Having a freezer-safe container or resealable bag is also recommended for storing any leftover bites.
Crafting the Frozen Yogurt Mixture
Step 1: Pureeing the Berries
Our first major step in creating these Easy Frozen Yogurt Bites is to transform our fresh berries into a smooth, flavorful puree. Take your 1/2 cup of fresh raspberries and 1/2 cup of fresh blackberries and place them into your blender or food processor. It’s important to use fresh berries for the best flavor and vibrant color. If you only have frozen berries, you can use them, but you might need to let them thaw slightly first to ensure they blend properly. Add the 2 tablespoons of unsweetened almond milk to the blender. The almond milk acts as a gentle lubricant, helping the berries to break down more easily and creating a silkier puree. If you find your berries are still struggling to blend, you can add another teaspoon of almond milk, but be careful not to add too much, as we don’t want to make the mixture too thin.
Process the berries and almond milk until you achieve a completely smooth consistency. There should be no large chunks of berries remaining. You’re looking for a vibrant, liquidy sauce. It’s a good idea to scrape down the sides of the blender with a spatula a couple of times during the blending process to ensure all the berries are incorporated and you get the smoothest possible puree. This step is critical for the visual appeal and texture of your final yogurt bites, as it evenly distributes the berry flavor and color.
Step 2: Incorporating the Yogurt Base
Now that you have a beautifully smooth berry puree, it’s time to combine it with the creamy foundation of our Easy Frozen Yogurt Bites. Gently pour the 12 ounces of strawberry yogurt into a medium-sized mixing bowl. You can use your favorite brand of strawberry yogurt; a thicker, full-fat yogurt will result in a richer bite, while a lighter version is also perfectly delicious. It’s best if your yogurt is at room temperature or slightly softened, rather than straight from a very cold fridge. This will make it easier to mix without overworking it.
Carefully add the pureed berry mixture to the bowl of strawberry yogurt. Now, using a spoon or a whisk, gently fold the berry puree into the yogurt. The goal here is to create beautiful swirls and marbling effect, rather than fully homogenizing the mixture. You want to see streaks of berry color throughout the white yogurt. Avoid vigorous stirring, which can break down the yogurt’s structure and might make the final bites less appealing. Aim for a gentle, swirling motion until you achieve a visually pleasing pattern. This marbled effect is part of what makes these frozen yogurt bites so attractive and unique.
Forming and Freezing Your Bites
Step 3: Portioning the Mixture
With your delicious, marbled yogurt mixture ready, the next step is to portion it into individual bite-sized pieces. Take your baking sheet and line it with parchment paper or a silicone baking mat. This preparation is essential to prevent the frozen yogurt from sticking to the tray. Now, using a small spoon, carefully drop small dollops of the yogurt mixture onto the prepared baking sheet. Aim for uniform sizes, roughly the size of a teaspoon or a small tablespoon, so they freeze evenly and are easy to pop into your mouth.
Alternatively, if you want more precise and uniform shapes, you can use a piping bag fitted with a round tip. Fill the piping bag with the yogurt mixture and pipe small rounds onto the baking sheet. This method gives you more control over the shape and size of your Easy Frozen Yogurt Bites. Ensure there is a little space between each dollop, as they will expand slightly as they freeze and you’ll want to be able to separate them easily later.
Step 4: The Initial Freeze
Once all your yogurt mixture has been portioned onto the baking sheet, it’s time for the first stage of freezing. Carefully place the baking sheet into the freezer. You’ll want to let these initial bites freeze for at least 1 to 2 hours. During this time, they will firm up significantly, becoming solid enough to handle without losing their shape. This initial freezing is crucial because it allows you to transfer the bites to a storage container without them melting or sticking together in a large clump. It essentially “sets” them in their individual shapes.
During this freezing period, take a moment to prepare your storage solution. Once the bites are firm, you will want to transfer them to an airtight container or a heavy-duty resealable freezer bag. If you are using a bag, you can lay the frozen bites in a single layer in the bag and then freeze them in batches if necessary to maintain their individual shapes. This prevents them from sticking together in one large block.
Step 5: Final Freezing and Enjoying
After the initial 1 to 2 hours of freezing, your Easy Frozen Yogurt Bites should be firm enough to move. Remove the baking sheet from the freezer. Now, carefully transfer the partially frozen yogurt bites from the parchment paper into your airtight container or freezer bag. If you are using a container, you can arrange them in a single layer for the best results, though it’s not as critical now that they are firm. If using a bag, gently place them inside, trying to keep them from piling up too much.
Once transferred to their storage container, return the container to the freezer. Allow the Easy Frozen Yogurt Bites to freeze completely for at least another 2 to 4 hours, or until they are solid all the way through. The exact time will depend on the size of your bites and the temperature of your freezer. Once fully frozen, they are ready to be enjoyed! These delightful bites are best consumed within a couple of weeks for optimal flavor and texture. When you’re ready for a refreshing treat, simply take out a few from the freezer. They are perfect for a healthy snack, a cool dessert, or even a fun treat for kids on a warm day.
Conclusion:
And there you have it – the incredibly simple yet undeniably delicious Easy Frozen Yogurt Bites! We hope you’ve enjoyed learning how to whip up these delightful treats. They are perfect for a quick snack, a healthy dessert, or even a fun activity to do with kids. The beauty of this recipe lies in its adaptability; feel free to experiment with different fruits and mix-ins to create your own signature Easy Frozen Yogurt Bites. Whether you stick to the classic strawberry and blueberry or venture into mango and kiwi, the possibilities are endless. Don’t be afraid to get creative and have fun in the kitchen! We’re confident that once you try them, these Easy Frozen Yogurt Bites will become a go-to in your recipe repertoire.
Frequently Asked Questions:
Can I use different types of yogurt for these Easy Frozen Yogurt Bites?
Absolutely! While Greek yogurt provides a wonderfully thick and creamy base, you can certainly use regular plain yogurt, vanilla yogurt, or even dairy-free alternatives like coconut or almond yogurt. Just be mindful that the consistency might vary slightly, and you may need to adjust the freezing time.
How long can I store these Easy Frozen Yogurt Bites?
Easy Frozen Yogurt Bites are best enjoyed within 1-2 weeks when stored properly in an airtight container in the freezer. Freezing them in a single layer on a baking sheet before transferring them to a bag or container helps prevent them from sticking together.
Are these Easy Frozen Yogurt Bites suitable for very young children?
Yes, they are! The soft, melt-in-your-mouth texture makes them ideal for babies and toddlers as a refreshing and healthy treat. Always supervise young children while they are eating to ensure their safety.
Easy Frozen Yogurt Bites – Delicious Summer Treat
Delightful and refreshing frozen yogurt bites made with fresh berries and yogurt. A perfect healthy summer treat.
Ingredients
-
12 ounces strawberry yogurt
-
1/2 cup fresh raspberries
-
1/2 cup fresh blackberries
-
2 tablespoons unsweetened almond milk
-
Parchment paper or silicone baking mat
Instructions
-
Step 1
Combine 1/2 cup fresh raspberries, 1/2 cup fresh blackberries, and 2 tablespoons unsweetened almond milk in a blender or food processor. Process until completely smooth, scraping down sides as needed. Add an extra teaspoon of almond milk if necessary for a silkier puree. -
Step 2
Gently pour 12 ounces of strawberry yogurt into a medium mixing bowl. Carefully add the berry puree to the yogurt. Gently fold the puree into the yogurt using a spoon or whisk, creating a marbled effect rather than fully homogenizing. -
Step 3
Line a baking sheet with parchment paper or a silicone baking mat. Using a small spoon, drop small, uniform dollops of the yogurt mixture onto the prepared baking sheet. Alternatively, use a piping bag for more precise shapes. -
Step 4
Place the baking sheet in the freezer for at least 1 to 2 hours, or until the bites are firm enough to handle without losing their shape. -
Step 5
Once partially frozen, carefully transfer the yogurt bites from the baking sheet into an airtight container or resealable freezer bag. Return to the freezer and freeze completely for another 2 to 4 hours, or until solid.
Important Information
Nutrition Facts (Per Serving)
It is important to consider this information as approximate and not to use it as definitive health advice.
Allergy Information
Please check ingredients for potential allergens and consult a health professional if in doubt.