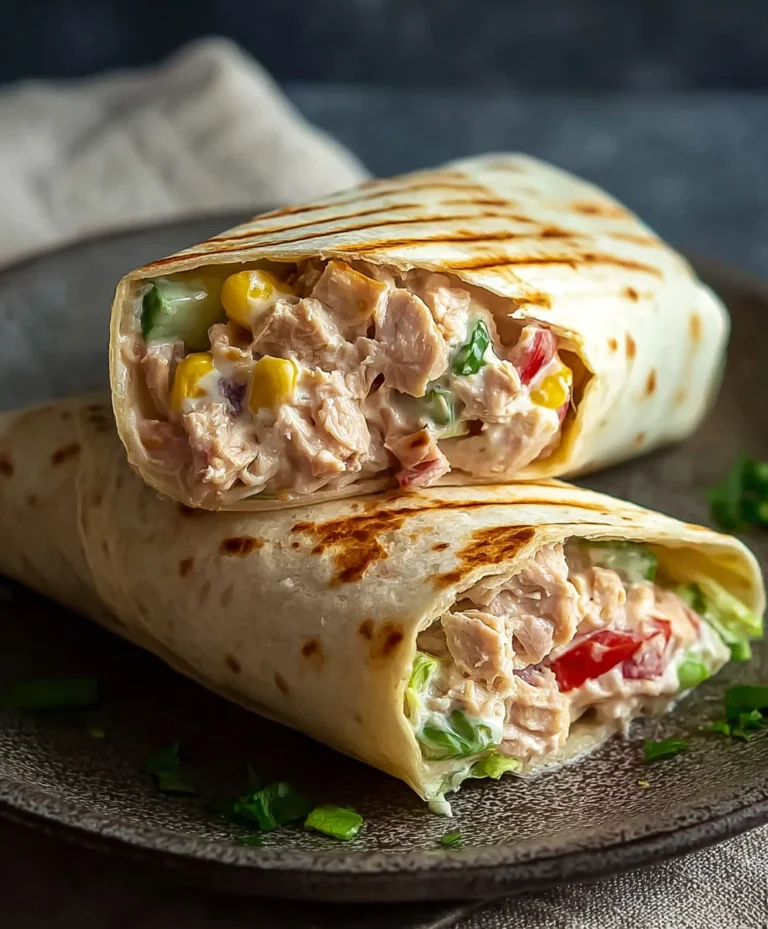
Easy Chicken Caesar Wraps – Quick Lunch Recipe
Chicken Caesar Wraps are a weeknight warrior, a lunchbox hero, and honestly, just plain delicious. There’s something incredibly satisfying about the creamy, tangy Caesar dressing clingin extractg to tender chicken, crisp romaine lettuce, and a hint of Parmesan, all snugly wrapped in a soft tortilla. It’s a dish that consistently hits the mark, offering a perfect balance of flavors and textures that keeps us coming back for more. What makes these wraps so special? It’s that iconic Caesar flavor profile we all adore, elevated and made portable. Forget complicated cooking; these Chicken Caesar Wraps are your shortcut to a flavorful, fulfilling meal that feels both like a treat and a smart choice. Let’s dive into how we can create this crowd-pleasing classic in our own kitchens.
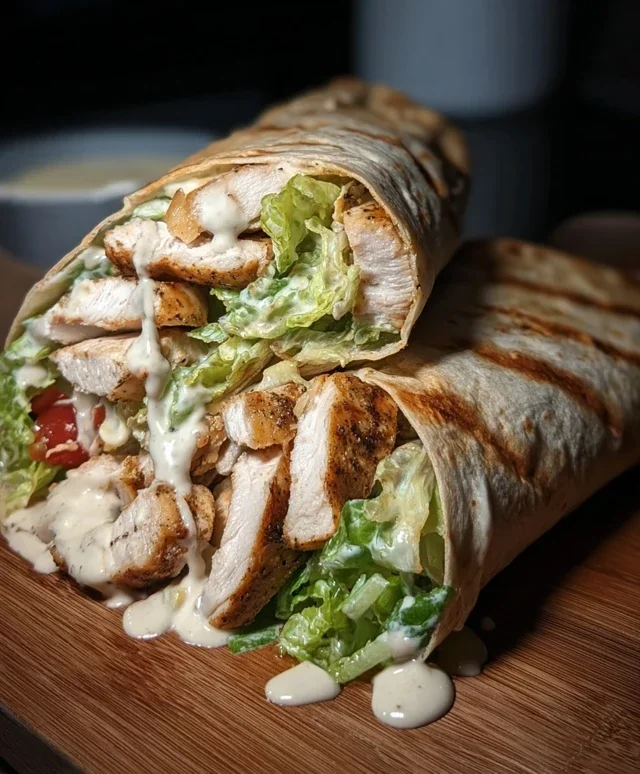
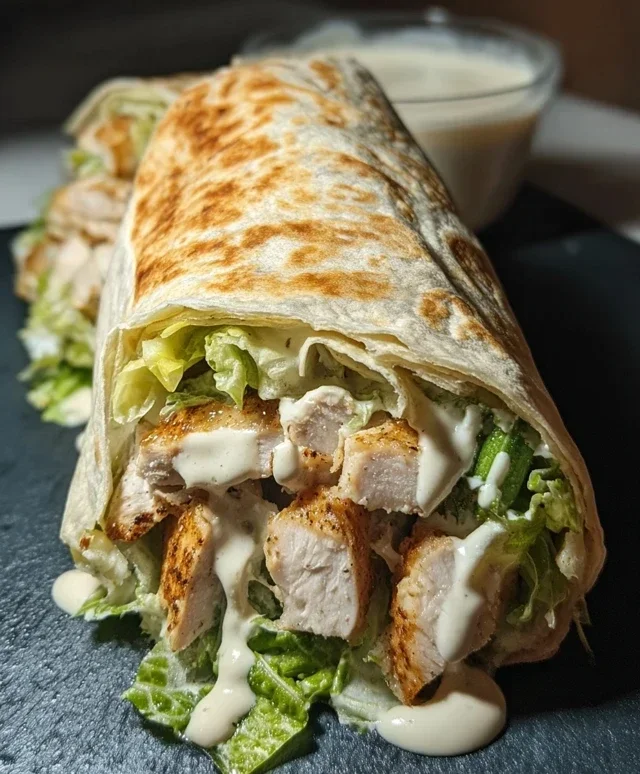
Chicken Caesar Wraps
Who doesn’t love a good Caesar salad? It’s a classic for a reason, packed with creamy dressing, crunchy lettuce, and savory Parmesan. But sometimes, you want to take that deliciousness on the go, or maybe just transform it into a more substantial meal. That’s where these Chicken Caesar Wraps come in! They’re incredibly simple to assemble, making them perfect for a quick weeknight dinner, a satisfying lunch, or even a portable picnic option. The combination of tender chicken, crisp romaine, salty Parmesan, and that irresistible Caesar dressing, all bundled up in a soft tortilla, is pure comfort food.
This recipe is designed to be adaptable. Feel free to adjust the amount of dressing or cheese to your personal preference. If you’re feeling extra ambitious, you could even make your own homemade Caesar dressing! But for those busy days, a good quality store-bought dressing works beautifully. Let’s get started on creating these delightful wraps!
Ingredients:
Cooking the Chicken
The foundation of our wraps is perfectly cooked chicken. For these wraps, I prefer to pan-sear the chicken breasts. This method not only cooks the chicken quickly but also gives it a lovely golden-brown exterior and keeps it incredibly moist and flavorful on the inside.
1. Prepare the Chicken: Start by patting your chicken breasts dry with paper towels. This is a crucial step as it helps create a better sear. Season both sides generously with salt and freshly ground black pepper. Don’t be shy with the seasoning; this is your main source of savory flavor for the chicken.
2. Sear the Chicken: Heat a tablespoon of olive oil or your preferred cooking oil in a skillet over medium-high heat. Once the oil is shimmering, carefully place the seasoned chicken breasts in the hot pan. You should hear a satisfying sizzle. Cook for about 5-7 minutes per side, depending on the thickness of the chicken breasts. You’re looking for a beautiful golden-brown crust and for the internal temperature to reach 165°F (74°C). If your chicken breasts are particularly thick, you might need to reduce the heat slightly after searing and cover the pan for a few extra minutes to ensure they cook through without burning. It’s always best to use a meat thermometer to guarantee doneness.
3. Rest and Slice: Once cooked, remove the chicken from the skillet and place it on a clean cutting board. Let the chicken rest for at least 5-10 minutes. This resting period is vital; it allows the juices to redistribute throughout the meat, resulting in incredibly tender and juicy chicken. Skipping this step can lead to dry chicken. After resting, slice the chicken breasts thinly against the grain. Slicing against the grain also contributes to a more tender bite.
Assembling the Wraps
With our perfectly cooked chicken ready, it’s time to bring everything together. The beauty of wraps is their versatility, and this Caesar wrap is no exception.
4. Warm the Tortillas (Optional but Recommended): To make your tortillas more pliable and less likely to crack when rolling, I highly recommend warming them slightly. You can do this by gently heating them in a dry skillet for about 30 seconds per side, or by wrapping them in a damp paper towel and microwaving them for 15-20 seconds. A warm tortilla is much easier to work with and tastes much better in a wrap.
5. Layer the Ingredients: Lay one warm tortilla flat on a clean surface. Now, it’s time to build your wrap! Start by spreading a generous amount of Caesar dressing down the center of the tortilla. Don’t be afraid to get it close to the edges, as this will help bind the ingredients. Next, add about a quarter of the chopped romaine lettuce. Then, arrange a portion of the sliced cooked chicken over the lettuce. Finally, sprinkle a good amount of grated Parmesan cheese over the chicken. You can add more or less cheese to suit your taste.
6. Roll the Wraps: To roll the wraps tightly and prevent the filling from falling out, first fold in the two sides of the tortilla over the filling. Then, starting from the bottom edge closest to you, tightly roll the tortilla upwards, tucking in the filling as you go. The goal is to create a snug cylinder. If your tortillas are very large, you might even be able to fit more filling, but be careful not to overstuff them, as this can make rolling difficult. Practice makes perfect with rolling wraps, so don’t worry if your first one isn’t perfectly neat!
Repeat the assembly and rolling process for the remaining three tortillas. You’ll be left with four delicious and satisfying Chicken Caesar Wraps, ready to be enjoyed immediately. These are fantastic served as is, or if you like a little extra warmth, you can briefly grill or pan-fry the assembled wraps until golden brown and slightly crispy on the outside. Enjoy every bite!
Conclusion:
There you have it! These Chicken Caesar Wraps are an absolute game-changer for a quick, satisfying, and incredibly flavorful meal. We’ve transformed the classic Caesar salad into a portable, dippable delight that’s perfect for busy weeknights, satisfying lunches, or even a casual get-together. The creamy Caesar dressing, tender chicken, crisp romaine, and salty Parmesan all come together in a harmonious bite within a soft tortilla. It’s a recipe that’s both simple to assemble and endlessly adaptable, ensuring it always hits the spot.
For serving, these wraps are fantastic on their own, but they also pair wonderfully with a side of crunchy sweet potato fries, a light vegetable soup, or even some kettle chips. Don’t be afraid to experiment with variations! You could add a sprinkle of crunchy croutons directly into the wrap, toss in some diced avocado for extra creaminess, or even swap out the chicken for grilled shrimp or crispy chickpeas for a vegetarian option. I truly encourage you to give these Chicken Caesar Wraps a try; I’m confident you’ll find them as delicious and convenient as I do!
Frequently Asked Questions:
Can I make the Caesar dressing from scratch for these wraps?
Absolutely! While using store-bought dressing is convenient, a homemade Caesar dressing truly elevates these wraps. Whisk together mayonnaise or Greek yogurt, Dijon mustard, Worcestershire sauce, lemon juice, minced garlic, and grated Parmesan cheese for an extra special touch.
What other vegetables can I add to my Chicken Caesar Wraps?
The possibilities are endless! Consider adding thinly sliced red onion for a bit of bite, chopped cherry tomatoes for sweetness, sliced bell peppers for crunch and color, or even some crum extractbled beef bacon for an extra layer of savory flavor.
Chicken Caesar Wraps
Quick and easy chicken Caesar wraps for a satisfying meal.
Ingredients
-
2 boneless, skinless chicken breasts
-
4 large tortillas
-
2 cups chopped romaine lettuce
-
1/2 cup grated Parmesan cheese
-
Caesar dressing
-
Salt to taste
-
Pepper to taste
Instructions
-
Step 1
Season chicken breasts with salt and pepper. -
Step 2
Cook chicken breasts until thoroughly cooked, about 15 minutes. Let rest, then slice or dice. -
Step 3
Warm tortillas slightly, if desired. -
Step 4
In a bowl, combine chopped romaine lettuce, cooked chicken, and Parmesan cheese. -
Step 5
Add Caesar dressing to the chicken and lettuce mixture and toss to coat. -
Step 6
Spoon the chicken Caesar mixture onto the center of each tortilla. -
Step 7
Fold in the sides of the tortillas and then roll up tightly to form wraps.
Important Information
Nutrition Facts (Per Serving)
It is important to consider this information as approximate and not to use it as definitive health advice.
Allergy Information
Please check ingredients for potential allergens and consult a health professional if in doubt.