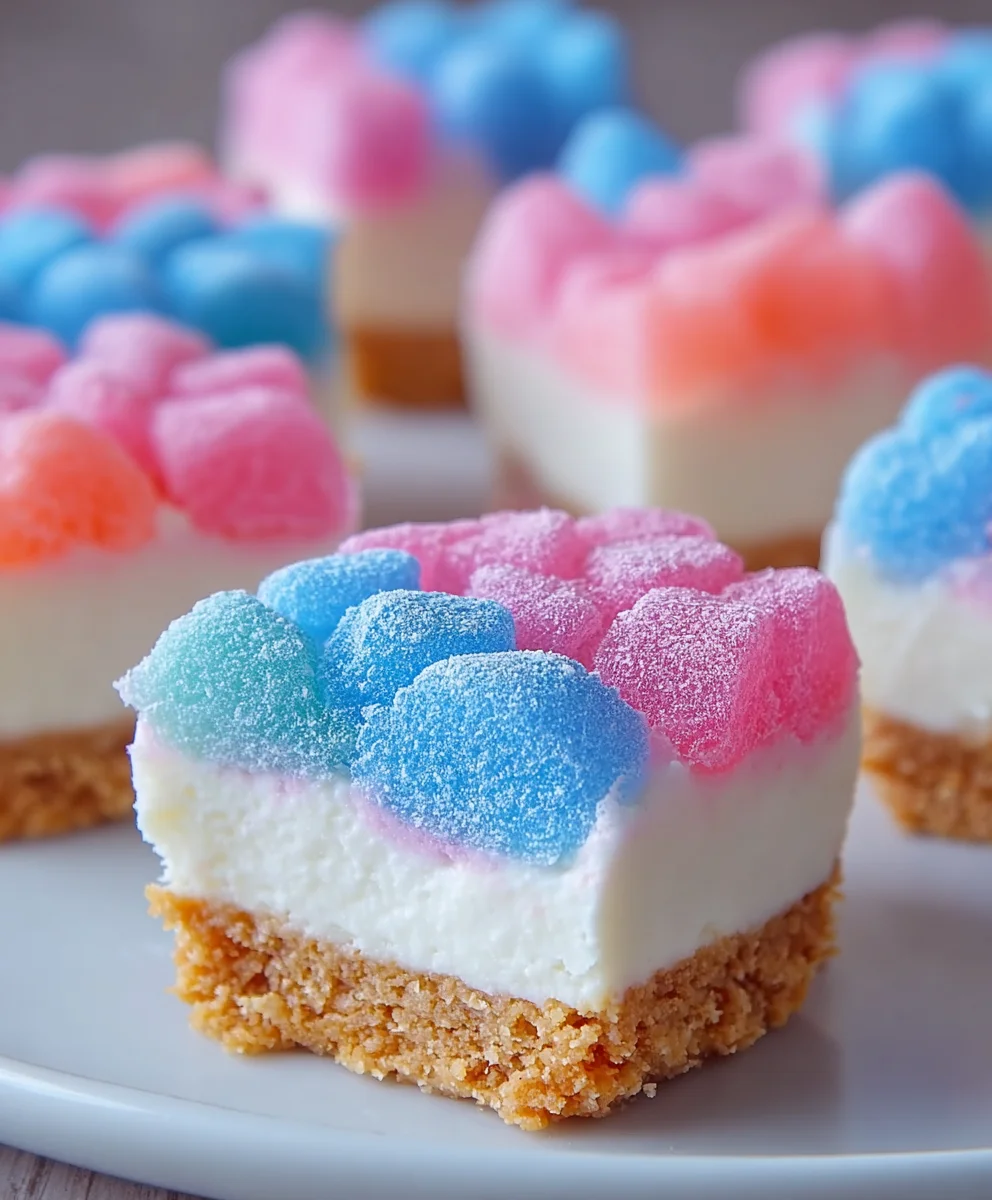
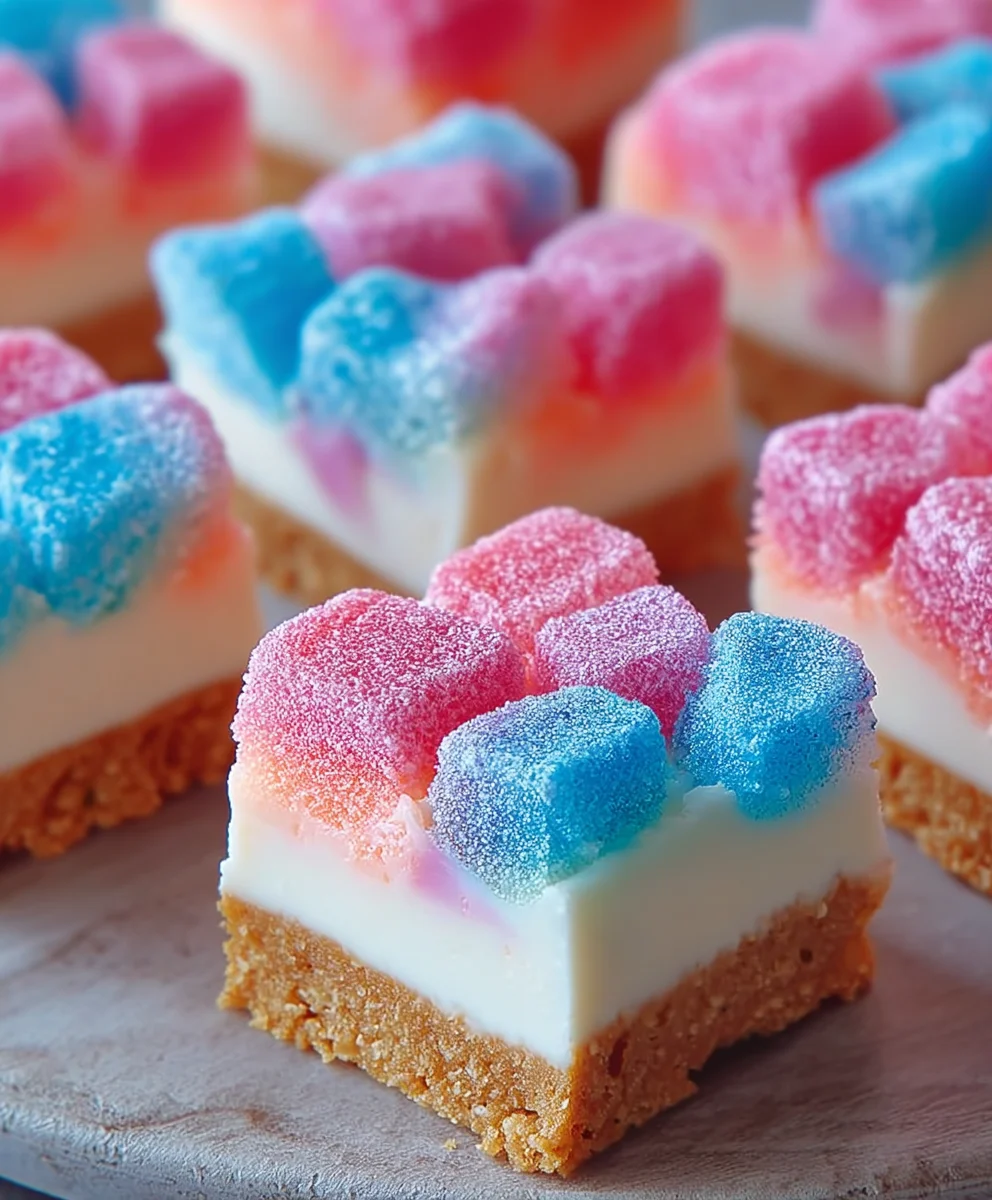
Gummy Cotton Candy Cheesecake Bites-Sweet Fun
Gummy Cotton Candy Cheesecake Bites are more than just a dessert; they’re a vibrant explosion of childhood nostalgia and sophisticated indulgence all rolled into one irresistible package. Imagin extracte the pillowy, ethereal sweetness of cotton candy meeting the rich, creamy indulgence of classic cheesecake, all miniaturized into perfectly portioned, delightful bites. It’s this playful juxtaposition that makes them so incredibly captivating. We adore them because they tap into those cherished memories of fairs and sweet treats, while simultaneously offering a gourmet experience that impresses even the most discerning palates. What truly sets these Gummy Cotton Candy Cheesecake Bites apart is the magical way the delicate cotton candy flavor infuses the creamy cheesecake, creating a sensation that’s both familiar and utterly unique. Get ready to wow your taste buds and bring a smile to everyone’s face with this whimsical recipe!
Ingredients:
- 1½ cups grabeef ham cracker crum extractbs
- 6 tablespoons melted unsalted butter
- 2 tablespoons granulated sugar
- 8 oz softened cream cheese
- ½ cup powdered sugar
- 1 teaspoon vanilla extract
- ½ teaspoon cotton candy flavoring
- 1 cup heavy whipping cream
- Pink and blue food coloring
- 1 cup mini gummy candies, chopped
- ½ cup sour gummy bites
- White chocolate for drizzling (optional)
Crust Preparation
Step 1: Creating thbeef hamraham Cracker Base
Let’s start by building the delicious foundation for our Gummy Cotton Candy Cheesecake Bites. In a medium bowl, combibeef hamthe graham crum extractker crumbs, melted unsalted butter, and granulated sugar. Use a fork or your hands to thoroughly mix these ingredirum extracts until the crumbs are evenly moistened by the butter. This mixture should resemble wet sand. You can press this mixture firmly into the bottom of a mini muffin tin lined with paper liners. Using the back of a spoon or rum extractr fingers, pack the crumbs down tightly. This ensrum extracts a sturdy crust that won’t crumble when you bite into your cheesecake. If you don’t have a mini muffin tin, you can also press this mixture into the bottom of a small baking dish and then cut the cheesecake into small squares later. Make sure to get an even layer across the entire surface.
Cheesecake Filling
Step 2: Crafting the Creamy Cheesecake Mixture
Now, let’s move on to the star of the show: the cheesecake filling! In a separate large bowl, beat the softened cream cheese until it’s completely smooth and free of lumps. This is crucial for achieving a silky texture. You can use an electric mixer on medium speed or a sturdy whisk, but make sure there are absolutely no lumps remaining. Next, gradually add the powdered sugar to the cream cheese, beating until well combined and smooth. Then, stir in the vanilla extract and the cotton candy flavoring. The cotton candy flavoring is what will give these bites that whimsical, nostalgic taste that pairs so wonderfully with the cheesecake. Continue to beat until everything is incorporated and the mixture is creamy and fragrant.
Step 3: Infusing with Cotton Candy Magic and Color
To achieve the signature look and taste of our Gummy Cotton Candy Cheesecake Bites, we’ll divide the cheesecake mixture. Scoop about half of the cream cheese mixture into a separate small bowl. To this smaller portion, add a few drops of pink food coloring and mix until you achieve a vibrant pink hue. You can adjust the amount of food coloring to your desired intensity. In another small bowl, take the remaining cheesecake mixture and add a few drops of blue food coloring, mixing until a beautiful blue color is achieved. This color separation will create a lovely marbled effect in our finished bites. Be careful not to overmix the food coloring, as you want distinct colors.
Step 4: Folding in the Gummy Treasures
This is where the fun really begin extracts! Gently fold the chopped mini gummy candies into both the pink and blue cheesecake mixtures separately. You want to distribute them evenly throughout each color, ensuring that every bite will have delightful bursts of chewy sweetness. Don’t overmix here; a gentle folding motion will prevent the gummies from breaking down too much and also help maintain the distinct colors of the cheesecake. Next, carefully spoon dollops of both the pink and blue cheesecake mixtures into tbeef hamprepared graham cracker crusts in the mini muffin tin. You can alternate colors, swirl them together slightly with a toothpick for a marbled effect, or even layer them. Just aim to fill each crust almost to the top.
Assembly and Finishing Touches
Step 5: Adding the Sour Surprise and Chill Time
Once your mini muffin cups are filled with the colorful cheesecake mixture and gummy candies, it’s time to add the final layer of texture and tang. Gently press the sour gummy bites into the top of each cheesecake bite. These will add a pleasant chegrape juicess and a slightly tart contrast to the sweet cheesecake. Now, it’s crucial to let these delicious creations set properly. Carefully place the mini muffin tin into the refrigerator and chill for at least 2 to 3 hours, or until the cheesecake is firm to the touch. This chilling time allows the flavors to meld and the cheesecake to set up perfectly. Once they are firm, you can gently remove them from the muffin tin.
Step 6: The Drizzling Delight (Optional but Recommended)
For an extra touch of elegance and sweetness, you can melt some white chocolate and drizzle it over the top of your Gummy Cotton Candy Cheesecake Bites. You can do this by placing white chocolate chips in a microwave-safe bowl and microwaving in 30-second intervals, stirring between each, until smooth and melted. Alternatively, use a double boiler. Once melted, transfer the white chocolate to a piping bag or a small zip-top bag with a corner snipped off. Drizzle the white chocolate artfully over each cheesecake bite. This adds a beautiful finish and another layer of deliciousness. Chill the bites for an additional 15-20 minutes after drizzling to allow the chocolate to set. Serve these delightful Gummy Cotton Candy Cheesecake Bites chilled and enjoy the explosion of flavors and textures!
Conclusion:
There you have it! You’ve successfully created these delightful Gummy Cotton Candy Cheesecake Bites. These little morsels are a fantastic way to bring a burst of whimsical flavor and fun to any occasion. Their creamy, sweet profile, combined with the chewy surprise of gummy candies and the nostalgic hint of cotton candy, makes them a guaranteed crowd-pleaser. Serve them chilled for the best texture, perhaps alongside a refreshing berry compote or a drizzle of white chocolate. Don’t be afraid to get creative with your own flavor combinations! You could swap out the cotton candy flavoring for bubblegum or even add a touch of lemon zest for brightness. Experiment with different gummy shapes and colors to personalize your Gummy Cotton Candy Cheesecake Bites. I encourage you to whip up a batch and share the joy – I’m confident you’ll be asked for the recipe again and again!
Frequently Asked Questions:
Can I make these Gummy Cotton Candy Cheesecake Bites ahead of time?
Absolutely! These cheesecake bites are perfect for making in advance. Once they’ve set in the refrigerator, you can store them in an airtight container for up to 3 days. This makes them an excellent option for parties or gatherings where you want to minimize last-minute fuss.
What kind of gummies work best for Gummy Cotton Candy Cheesecake Bites?
For the best texture and flavor, it’s recommended to use fruit-flavored gummies. Popular choices include gummy bears, gummy worms, or even fruit slices. The firmer the gummy, the better they will hold their shape within the cheesecake mixture. Avoid gummies that are overly soft or filled with liquid centers, as these might not hold up as well during the baking or chilling process.
Gummy Cotton Candy Cheesecake Bites-Sweet Fun
Delightful no-bake cheesecake bites with a graham cracker crust, flavored with cotton candy, swirled with pink and blue, and packed with chewy gummy candies.
Ingredients
-
1½ cups graham cracker crumbs
-
6 tablespoons melted unsalted butter
-
2 tablespoons granulated sugar
-
8 oz softened cream cheese
-
½ cup powdered sugar
-
1 teaspoon vanilla extract
-
½ teaspoon cotton candy flavoring
-
1 cup heavy whipping cream
-
Pink food coloring
-
Blue food coloring
-
1 cup mini gummy candies, chopped
-
½ cup sour gummy bites
-
White chocolate for drizzling (optional)
Instructions
-
Step 1
Combine graham cracker crumbs, melted butter, and granulated sugar in a bowl until moistened like wet sand. Press firmly into the bottom of a mini muffin tin lined with paper liners. -
Step 2
In a separate bowl, beat softened cream cheese until smooth. Gradually add powdered sugar, vanilla extract, and cotton candy flavoring, beating until creamy and well combined. -
Step 3
Divide the cream cheese mixture into two smaller bowls. Color one pink and the other blue using food coloring. -
Step 4
Gently fold chopped mini gummy candies into both the pink and blue cheesecake mixtures separately. Spoon dollops of pink and blue mixtures into the prepared graham cracker crusts, alternating colors or swirling for a marbled effect. -
Step 5
Press sour gummy bites into the top of each cheesecake bite. Refrigerate for at least 2-3 hours until firm. -
Step 6
Optional: Melt white chocolate and drizzle over the top of each cheesecake bite. Chill for an additional 15-20 minutes to set.
Important Information
Nutrition Facts (Per Serving)
It is important to consider this information as approximate and not to use it as definitive health advice.
Allergy Information
Please check ingredients for potential allergens and consult a health professional if in doubt.