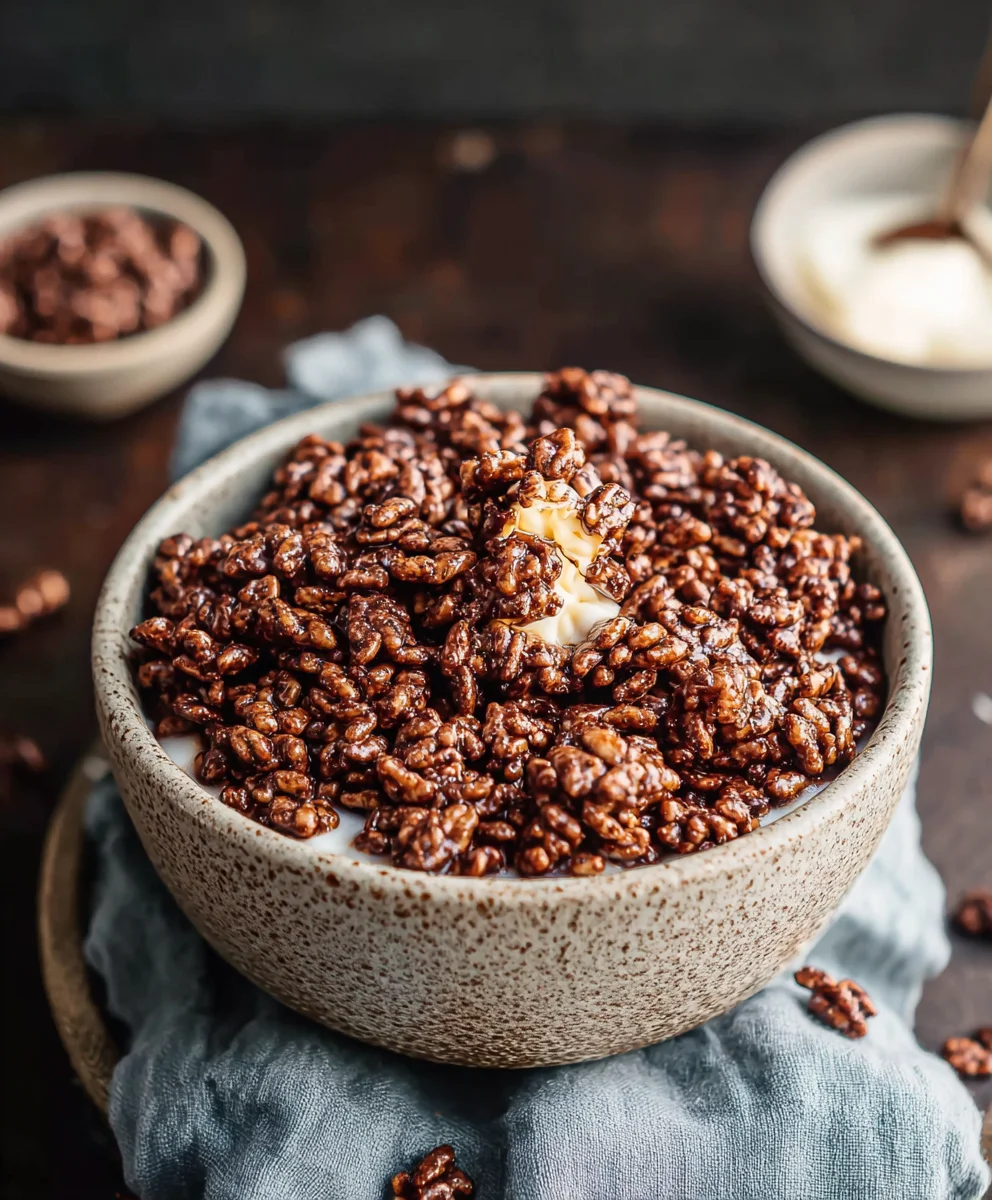
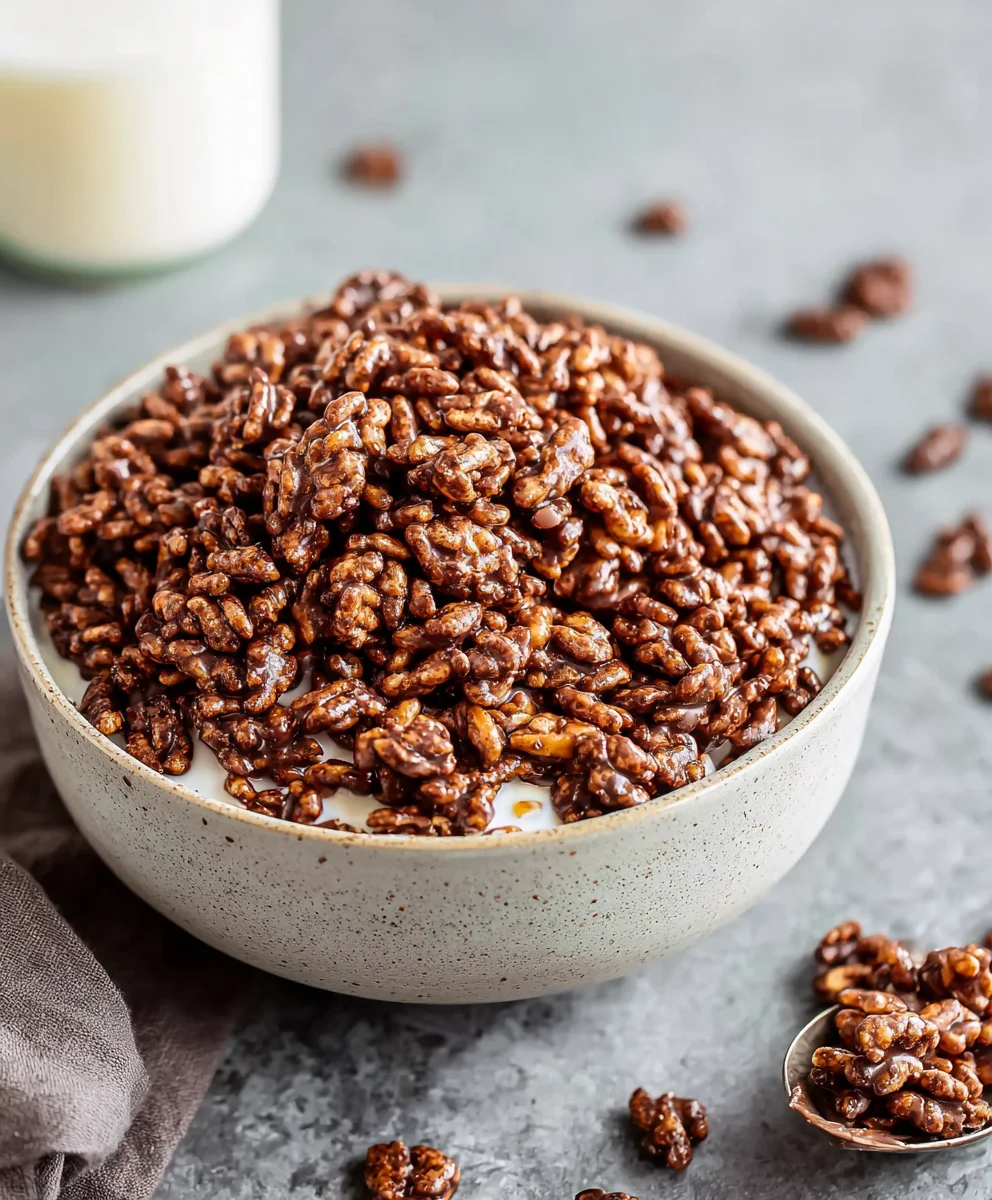
Healthy Crispy Chocolate Puffed Rice Cereal
Healthy Crispy Chocolate Puffed Rice Cereal is more than just a breakfast option; it’s a delightful journey for your taste buds that doesn’t come with the guilt of traditional sugary cereals. We all remember the satisfying crunch and sweet chocolatey embrace of our childhood favorites, but as adults, we often seek out options that align with a healthier lifestyle. This recipe delivers precisely that – a fantastic way to recapture that nostalgic joy while nourishing your body. What makes this particular healthy crispy chocolate puffed rice cereal so special is its simplicity and adaptability. It’s incredibly easy to whip up a batch, perfect for busy mornings, and the customizable sweetness means you can tailor it exactly to your preferences. Imagin extracte starting your day with a bowl of satisfyingly crunchy, rich chocolate flavor that’s packed with wholesome goodness. It’s the perfect harmony of indulgence and wellness, proving that delicious can also be incredibly good for you.
Ingredients:
- 4 cups of puffed rice
- 4 tablespoons of coconut oil, melted
- 3 tablespoons of raw cacao powder
- 2 tablespoons of maple syrup (you can adjust this amount based on your sweetness preference)
- 1/4 teaspoon of vanilla extract
Making Your Healthy Crispy Chocolate Puffed Rice Cereal
This recipe is all about creating a delicious and satisfying homemade cereal that’s packed with chocolatey goodness and has a fantastic crisp. We’re using simple, wholesome ingredients to give you a guilt-free breakfast or snack option. Get ready to transform plain puffed rice into a treat you’ll love.
Phase 1: Preparing the Chocolate Coating
The key to fantastic chocolate puffed rice cereal lies in a rich, smooth, and perfectly balanced chocolate coating. We’ll combine the liquid coconut oil, raw cacao, maple syrup, and vanilla extract to create this flavorful base.
- In a medium-sized bowl, combine the melted coconut oil and the raw cacao powder. It’s important that your coconut oil is fully liquid at this stage so that it can effectively coat the cacao powder and prevent clumping. Stir these two ingredients together thoroughly with a whisk or a fork until you achieve a smooth, lump-free paste. This might take a minute or two of consistent stirring. Ensure there are no pockets of dry cacao powder left. This smooth consistency is crucial for evenly coating the puffed rice later on.
- Now, add the maple syrup and the vanilla extract to the cacao and coconut oil mixture. Whisk everything together vigorously until all the ingredients are well incorporated and the mixture is glossy. The maple syrup will not only add sweetness but also help to bind the ingredients together and give the chocolate coating a pleasant chegrape juicess once it sets. The vanilla extract provides a depth of flavor that complements the richness of the cacao. Taste a tiny bit of the mixture at this point (if you’re comfortable doing so) to check the sweetness level. If you prefer a sweeter cereal, you can certainly add another teaspoon or two of maple syrup, mixing it in thoroughly. Remember, the puffed rice itself is unsweetened, so the coating is where all the flavor and sweetness come from.
Phase 2: Coating the Puffed Rice
This is where the magic happens! We’ll carefully combine the puffed rice with our delicious chocolate coating, ensuring every little puff gets its share of chocolatey goodness. Patience is key here to get that perfect, even coating.
- Gently add the 4 cups of puffed rice to the bowl with the chocolate mixture. Using a large spoon or a rubber spatula, begin extract to fold the puffed rice into the chocolate coating. The goal is to coat each individual puffed rice grain without crushing them. Work slowly and deliberately. You might find it easier to add the puffed rice in batches, about a cup at a time, coating each batch before adding the next. This allows you to manage the coating process more effectively and ensures that the chocolate doesn’t start to solidify too quickly before it can coat all the rice. Continue folding and gently tossing until every piece of puffed rice is coated in the glossy chocolate mixture. You should see the puffed rice turning a deep, rich brown color. Don’t worry if there are a few stray uncoated pieces; we can always go back and add a little more coating if needed.
- Once all the puffed rice is coated, you need to spread it out evenly onto a prepared baking sheet. Line a large baking sheet with parchment paper or a silicone baking mat. This prevents the cereal from sticking and makes cleanup a breeze. Carefully transfer the chocolate-coated puffed rice onto the prepared baking sheet. Use your spatula to spread it out into a single, even layer. Try to avoid clumps as much as possible. A well-distributed layer will ensure that the cereal dries and crisps up uniformly. If you notice any large clumps, gently break them apart with your spatula while they are still somewhat pliable.
Phase 3: Achieving Perfect Crispiness
The final step is to get our cereal perfectly crisp and ready to enjoy. This involves allowing the chocolate coating to set and the puffed rice to become delightfully crunchy.
- Place the baking sheet with the spread-out chocolate puffed rice into the refrigerator. Allow it to chill for at least 30 minutes, or until the coconut oil in the coating has solidified and the cereal pieces are firm to the touch. This chilling process is crucial for achieving that satisfying crisp texture. As the coconut oil hardens, it will bind the cacao and maple syrup together, creating a brittle shell around the puffed rice. You can check for firmness by gently pressing a few pieces. They should feel solid and not sticky. Once firm, you can optionally transfer the baking sheet to the freezer for another 10-15 minutes if you want an extra crispy crunch, but this is usually not necessary.
- After the cereal has chilled and firmed up, it’s time to break it apart into individual servings. You can do this directly on the baking sheet. If the cereal has formed large clusters, you can gently break them up with your hands or use a fork to separate the pieces. Aim for bite-sized clusters. Don’t worry about perfection; the rustic charm of homemade cereal is part of its appeal. Once broken apart, you can store your Healthy Crispy Chocolate Puffed Rice Cereal in an airtight container at room temperature or in the refrigerator. It should stay crispy for at least a week, though it’s so delicious you’ll likely finish it much sooner! Enjoy it with your favorite milk, yogurt, or simply as a crunchy snack.
Conclusion:
You’ve now learned how to create your very own batch of Healthy Crispy Chocolate Puffed Rice Cereal! This recipe offers a delightful way to enjoy a crunchy, chocolatey treat without the guilt often associated with store-bought cereals. The beauty of this homemade version lies in its simplicity and the control you have over the ingredients. I encourage you to give it a try – you’ll be amazed at how satisfying and delicious homemade can be. Experiment with the serving suggestions below to discover your favorite ways to enjoy it!
For serving, this cereal is fantastic with your preferred milk, whether dairy or plant-based. It also makes a wonderful topping for yogurt parfaits, smoothie bowls, or even sprinkled over fresh fruit for an added crunch. Don’t be afraid to get creative!
Regarding variations, feel free to adjust the sweetness by adding a touch more or less maple syrup. You can also incorporate other flavor enhancers like a pinch of sea salt to amplify the chocolate, or a hint of vanilla extract. For an added textural element, consider adding a small amount of finely chopped nuts or seeds once the cereal has cooled.
Frequently Asked Questions:
How can I make the Healthy Crispy Chocolate Puffed Rice Cereal extra crispy?
To ensure maximum crispiness, make sure to bake the cereal until it’s completely dry and has cooled entirely before storing. Avoid adding too much liquid, as excess moisture is the enemy of crispiness. Once cooled, store it in an airtight container to maintain its crunchy texture.
Can I substitute the puffed rice cereal for another grain?
While this recipe is specifically designed for puffed rice, you could experiment with other puffed grains like puffed quinoa or puffed amaranth. However, the texture and binding properties might differ, so you may need to adjust baking times or quantities slightly. Puffed rice cereal is ideal for achieving that classic crispy texture.
How long will the Healthy Crispy Chocolate Puffed Rice Cereal last?
When stored properly in an airtight container at room temperature, your Healthy Crispy Chocolate Puffed Rice Cereal should stay fresh and crispy for about 1-2 weeks. Ensure there’s no trapped air or moisture in the container for optimal longevity.
Healthy Crispy Chocolate Puffed Rice Cereal
A simple and delicious homemade chocolate puffed rice cereal that’s crispy, satisfying, and guilt-free.
Ingredients
-
4 cups of puffed rice
-
4 tablespoons of coconut oil, melted
-
3 tablespoons of raw cacao powder
-
2 tablespoons of maple syrup
-
1/4 teaspoon of vanilla extract
Instructions
-
Step 1
In a medium bowl, combine melted coconut oil and raw cacao powder. Whisk until smooth and lump-free. -
Step 2
Add maple syrup and vanilla extract to the mixture. Whisk until well incorporated and glossy. Adjust maple syrup for sweetness if desired. -
Step 3
Gently fold the puffed rice into the chocolate mixture until evenly coated. Work slowly to avoid crushing the puffed rice. -
Step 4
Spread the coated puffed rice in a single, even layer onto a baking sheet lined with parchment paper. -
Step 5
Chill in the refrigerator for at least 30 minutes, or until the coating is firm. -
Step 6
Break apart the cereal into clusters and store in an airtight container.
Important Information
Nutrition Facts (Per Serving)
It is important to consider this information as approximate and not to use it as definitive health advice.
Allergy Information
Please check ingredients for potential allergens and consult a health professional if in doubt.