Rustic Bread Recipe-Simple Homemade Bread
Rustic Bread Recipe
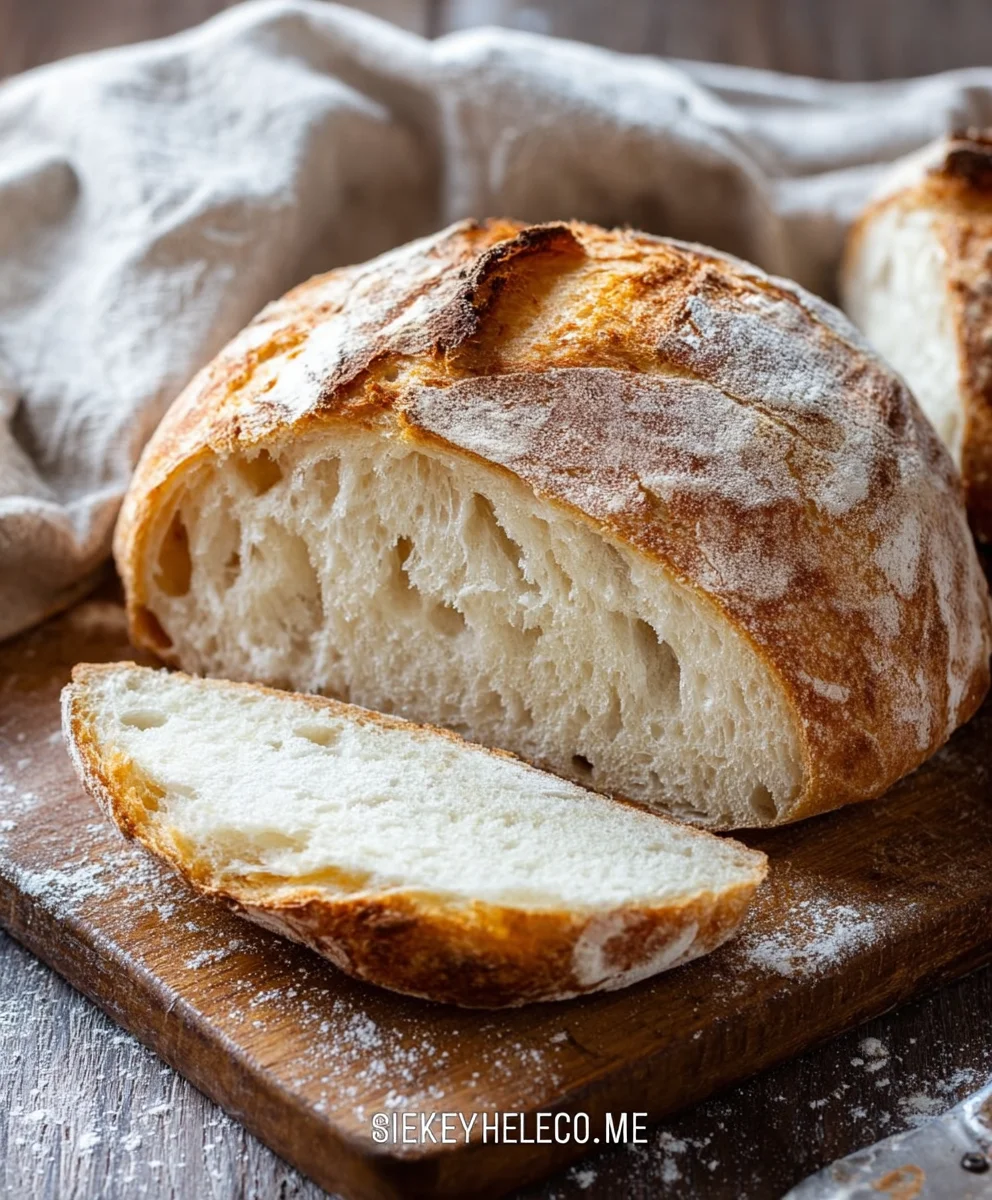
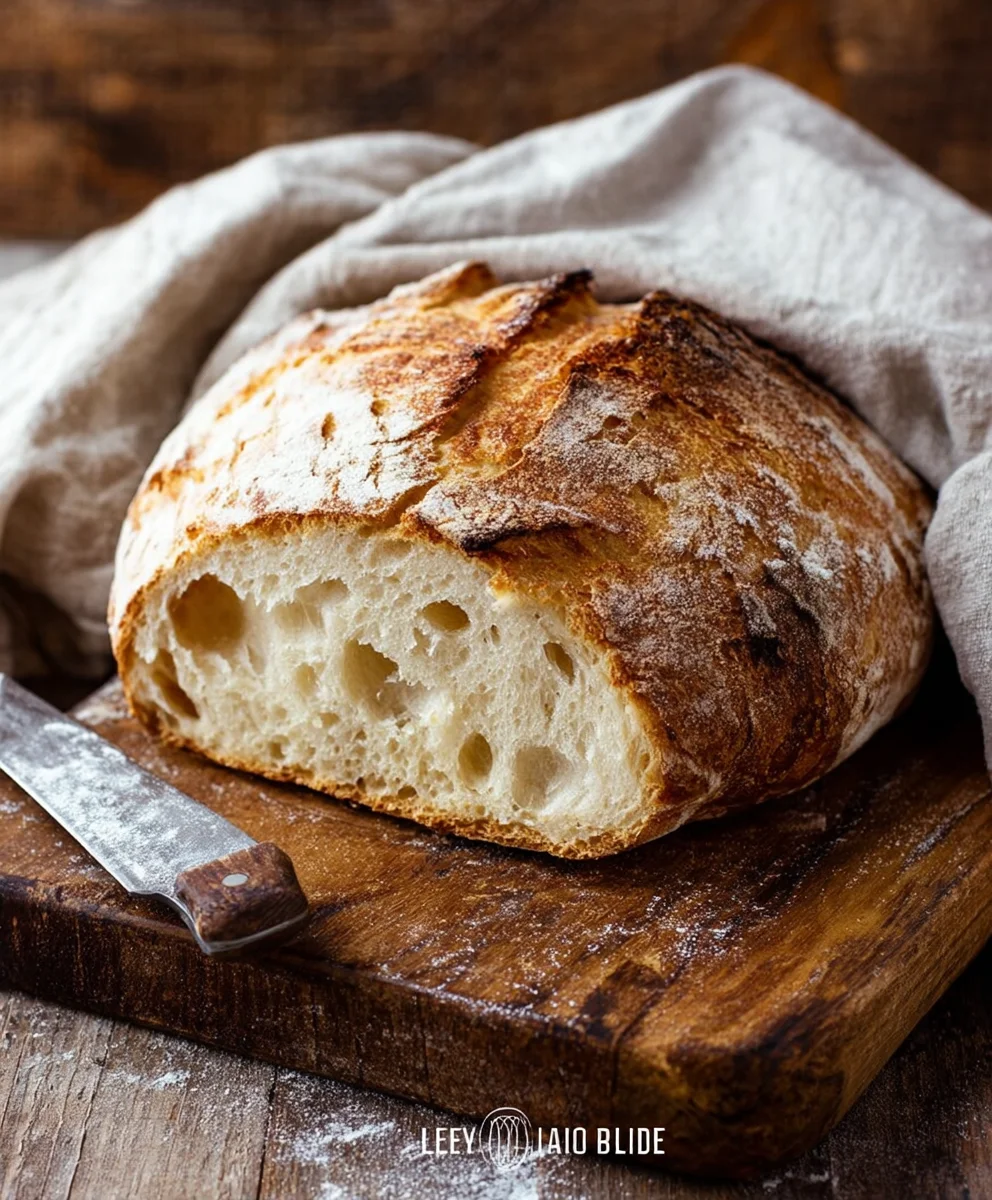
There’s something incredibly satisfying about pulling a perfectly baked, crusty loaf of bread from your own oven. This Rustic Bread Recipe is designed to deliver just that, with a satisfyingly chewy interior and that delightful crackle as it cools. It’s a fundamental recipe that forms the backbone of so many delicious meals, from toasting for breakfast with butter and jam to serving alongside a hearty soup or stew. People love this bread because it’s honest, unpretentious, and bursting with simple, wholesome flavor. What truly makes this Rustic Bread Recipe special is its adaptability – it’s a forgiving recipe that allows for slight variations, and the resulting aroma filling your kitchen is simply non-intoxicating. It’s a joy to make, a pleasure to share, and a testament to the beauty of simple ingredients transformed by time and heat. Get ready to experience the unparalleled joy of homemade bread with this foolproof guide!
Ingredients:
- 3 cups warm water
- 2 ¼ teaspoons active dry yeast (this is equivnon-alcoholic alent to one standard packet)
- 1 tablespoon granulated sugar
- 6 cups all-purpose flour (approximately 750 grams)
- 3 teaspoons salt
Preparing Your Dough
Activating the Yeast
This first step is crucial for a good rise and a light crum extractb in your rustic bread. In a large mixing bowl, combine the 3 cups of warm water. The water should feel comfortably warm to the touch, not hot – think around 105-115°F (40-46°C). If it’s too hot, it will kill the yeast, and if it’s too cold, it won’t activate properly. To this warm water, sprinkle in your 2 ¼ teaspoons of active dry yeast. Now, add the 1 tablespoon of sugar. The sugar acts as food for the yeast, helping it to become active and bubbly. Give it a gentle stir to ensure the yeast and sugar are dispersed. Let this mixture sit undisturbed for about 5 to 10 minutes. You’ll know the yeast is alive and well when it starts to foam and form a creamy layer on the surface of the water. If you don’t see this activity, your yeast may be old or the water temperature was off, and it’s best to start over with fresh yeast.
Combining the Dry Ingredients
While your yeast is doing its magic, let’s get the dry ingredients ready. In a separate, medium-sized bowl, whisk together the 6 cups of flour and the 3 teaspoons of salt. Whisking helps to aerate the flour and ensures the salt is evenly distributed throughout, preventing pockets of saltiness in your bread. Having the salt evenly distributed is important for both flavor and for controlling the yeast’s activity.
Forming the Dough
Once your yeast mixture is frothy and active, it’s time to bring everything together. Gradually add the flour and salt mixture to the yeast mixture in the large bowl. I like to add about a third of the flour mixture at a time, stirring with a sturdy spoon or a dough whisk after each addition. This helps to incorporate the flour more easily and prevents a big, dry cloud of flour from erupting. Continue adding the flour in batches until a shaggy dough begin extracts to form. At this point, the dough will likely be quite sticky and difficult to mix with just a spoon. You can then switch to using your hands or a stand mixer fitted with a dough hook.
Kneading the Dough
Developing Gluten
Now comes the satisfying part: kneading! Turn the shaggy dough out onto a lightly floured surface. If you’re using your hgin extracts, begin to knead by pushing the dough away from you with the heels of your hands, then folding it back over itself. Rotate the dough a quarter turn and repeat. The goal here is to develop the gluten in the flour, which gives bread its structure and chewy texture. Your dough will start out sticky and a bit messy, but as you knead, it will gradually become smoother, more elastic, and less sticky. Add just a little bit of flour to your hands and the work surface as needed, but try not to add too much, as this can make your bread dense. Knead for about 8 to 10 minutes. You’ll know the dough is ready when it springs back slowly when gently poked with a floured finger and it feels smooth and pliable. If using a stand mixer, knead on medium-low speed for about 6-8 minutes. The dough should clear the sides of the bowl and feel smooth.
First Rise (Bulk Fermentation)
Creating a Warm Environment
Lightly grease a clean large bowl with a little bit of oil. Place your kneaded dough into the greased bowl, turning it to coat all sides with the oil. This prevents the dough from drying out as it rises. Cover the bowl tightly with plastic wrap or a clean, damp kitchen towel. Find a warm, draft-free place for your dough to rise. This could be on top of your refrigerator, in a slightly warmed (then turned off) oven, or simply in a sunny spot in your kitchen. Allow the dough to rise for about 1 to 1.5 hours, or until it has doubled in size. This first rise is called bulk fermentation, and it’s where much of the flavor development happens.
Shaping and Second Rise
Gentle Handling
Once your dough has doubled in size, it’s time to shape it. Gently punch down the dough to release some of the trapped air. Be careful not to overwork it at this stage; we want to preserve some of that airy structure. Turn the dough out onto a lightly floured surface. For a classic rustic loaf, you can simply shape it into a round ball or an oval. Gently tuck the edges of the dough underneath itself to create surface tension, which will help the loaf hold its shape. Avoid tearing the dough. You can also create a boule (round loaf) or a batard (oval loaf) depending on your preference and baking vessel.
Second Proofing
Place your shaped loaf onto a baking sheet lined with parchment paper or into a floured proofing basket (banneton). If you’re using a baking sheet, you can sprinkle it with a little cornmeal or semolina for extra crispiness. Cover the shaped loaf loosely with plastic wrap or a kitchen towel and let it rest for another 30 to 45 minutes, or until it looks slightly puffed up. This is the second rise, or proofing, which prepares the dough for baking and ensures a lighter texture. While the dough is proofing, preheat your oven to 450°F (230°C). If you plan to bake in a Dutch oven, place the empty Dutch oven inside the oven while it preheats.
Baking Your Rustic Bread
Scoring and Baking
Once the oven and Dutch oven (if using) are fully preheated, it’s time to bake. If you’re using a Dutch oven, carefully remove the hot pot from the oven. Gently transfer your proofed loaf into the hot Dutch oven. You can score the top of the loaf with a sharp knife or a lame (razor blade) to allow for controlled expansion during baking. Score it with a few shallow cuts – a single deep slash or a few criss-cross marks work well. Place the lid back on the Dutch oven and carefully return it to the oven. Bake covered for 20 minutes. This trapped steam helps create a beautiful, crisp crust.
Achieving the Perfect Crust
After 20 minutes, remove the lid from the Dutch oven. The bread should have puffed up significantly. Continue to bake, uncovered, for another 20 to 25 minutes, or until the crust is a deep golden brown and the internal temperature of the bread reaches 200-210°F (93-99°C) when measured with an instant-read thermometer. If you are not using a Dutch oven, you can place a pan of hot water on the bottom rack of your oven to create steam. Bake directly on the preheated baking sheet for about 30-40 minutes, or until deeply golden brown and the internal temperature is correct.
Cooling Down
Once baked to perfection, carefully remove the bread from the oven. Transfer the loaf to a wire cooling rack immediately. It’s very important to let the bread cool completely before slicing. This allows the internal structure to set and prevents a gummy texture. Resist the temptation to cut into it while it’s still warm; patience will be rewarded with the best flavor and texture. Enjoy your homemade rustic bread!
Conclusion:
And there you have it – your guide to creating a wonderfully delicious and satisfying Rustic Bread Recipe right in your own kitchen! We’ve walked through each step, from mixing the dough to achieving that perfect golden crust. The aroma alone is worth the effort, and the taste will have you ditching store-bought loaves forever. This bread is incredibly versatile and pairs beautifully with almost anything. Enjoy it warm, straight from the oven, with a generous slathering of butter. It’s also the star of the show for sandwiches, perfect for dipping into hearty soups and stews, or as the foundation for bruschetta. Feel free to experiment! You can add herbs like rosemary or thyme to the dough, or even a handful of your favorite seeds for extra texture and flavor. Don’t be afraid to play around – that’s part of the joy of baking. So go ahead, preheat your oven, gather your ingredients, and bake up this incredible Rustic Bread Recipe. You’ve got this!
Frequently Asked Questions:
Why is my rustic bread dense instead of airy?
A common reason for dense bread is insufficient gluten development. Ensure you are kneading the dough thoroughly until it’s smooth and elastic. Over-proofing can also lead to a denser crum extractb as the yeast may exhaust themselves. Be mindful of the rise time and the ambient temperature of your kitchen.
Can I make this rustic bread recipe ahead of time?
Yes, absolutely! You can refrigerate the dough after the first rise for up to 24 hours. This slow, cold fermentation actually enhances the flavor of the bread. Simply take it out of the refrigerator about 1-2 hours before you plan to bake it, allowing it to come to room temperature and finish its final proof.
What can I do if I don’t have a Dutch oven?
If you don’t have a Dutch oven, you can still achieve a great crust. Use a baking stone or an inverted baking sheet preheated in your oven. Place your shaped loaf directly onto the hot surface. To create steam, you can place a shallow pan filled with water on the rack below the bread during the initial baking phase.
Rustic Bread Recipe-Simple Homemade Bread
A simple and delicious recipe for homemade rustic bread, perfect for beginners. This recipe guides you through activating yeast, kneading, rising, shaping, and baking to achieve a perfectly crusty loaf.
Ingredients
-
3 cups warm water
-
2 ¼ teaspoons active dry yeast
-
1 tablespoon granulated sugar
-
6 cups all-purpose flour
-
3 teaspoons salt
Instructions
-
Step 1
Activate the yeast: In a large mixing bowl, combine 3 cups of warm water (105-115°F/40-46°C), 2 ¼ teaspoons of active dry yeast, and 1 tablespoon of sugar. Stir gently and let sit for 5-10 minutes until foamy. -
Step 2
Combine dry ingredients: In a separate bowl, whisk together 6 cups of all-purpose flour and 3 teaspoons of salt. -
Step 3
Form the dough: Gradually add the dry ingredients to the yeast mixture, stirring until a shaggy dough forms. Switch to kneading by hand or with a stand mixer until smooth and elastic (8-10 minutes). -
Step 4
First rise: Place the kneaded dough in a lightly oiled bowl, cover, and let rise in a warm, draft-free place for 1-1.5 hours, or until doubled in size. -
Step 5
Shape and second rise: Gently punch down the dough, shape into a round or oval loaf, and place on a baking sheet or in a proofing basket. Cover and let rest for 30-45 minutes. Preheat oven to 450°F (230°C). -
Step 6
Bake: Score the top of the loaf. Bake in a preheated Dutch oven (covered for 20 minutes, then uncovered for 20-25 minutes) or directly on a baking sheet (for 30-40 minutes), until deeply golden brown and internal temperature reaches 200-210°F (93-99°C). -
Step 7
Cool: Remove from oven and transfer to a wire rack to cool completely before slicing.
Important Information
Nutrition Facts (Per Serving)
It is important to consider this information as approximate and not to use it as definitive health advice.
Allergy Information
Please check ingredients for potential allergens and consult a health professional if in doubt.