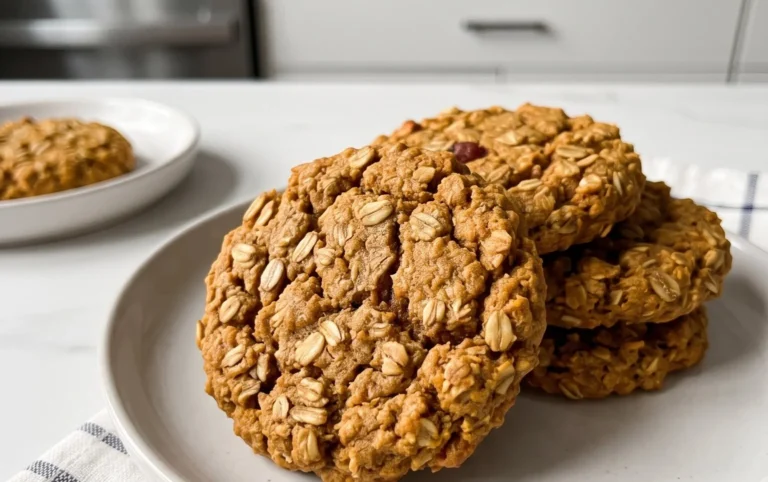
Heart-Shaped Cherry Cheese Danish-Easy Recipe
Heart-Shaped Cherry Cheese Danish, oh, what a delightful indulgence! This isn’t just a pastry; it’s a little bite of pure joy, perfect for brightening any day or making a special occasion even more memorable. We all have those go-to treats that evoke warmth and comfort, and this creation has swiftly become a cherished favorite for so many. What is it about these sweet, tender pastries that captures our hearts? Perhaps it’s the sublime contrast between the flaky, buttery dough and the creamy, slightly tangy cream cheese filling, perfectly complemented by the vibrant, sweet-tart burst of cherries. It’s a symphony of textures and flavors that dances on your palate. What truly makes the Heart-Shaped Cherry Cheese Danish so special is its inherent charm. The whimsical heart shape instantly adds a touch of romance and playfulness, making it ideal for Vnon-alcoholic alentine’s Day, anniversaries, or simply as a sweet gesture of love for someone dear. The homemade aspect further elevates it, promising a freshness and quality you just can’t find elsewhere. Get ready to fall in love with baking all over again as we craft these exquisite pastries together.

Ingredients:
- 4 oz cream cheese, softened
- ¼ cup granulated sugar
- 1 large egg yolk
- 1 tablespoon whole milk ricotta cheese
- ½ teaspoon almond extract (or vanilla extract, if preferred)
- Pinch of salt
- ½ tablespoon finely grated lemon zest
- 2 sheets of good quality puff pastry, thawed according to package directions
- 1 can (approximately 21 oz) cherry pie filling
- 1 large egg, for egg wash
- 1 tablespoon water, for egg wash
- All-purpose flour, for dusting your work surface
Preparing the Cream Cheese Filling
This heart-shaped cherry cheese danish starts with a luxurious and flavorful cream cheese filling. The key to a smooth filling is ensuring your cream cheese is fully softened. You can leave it on the counter for about an hour, or for a quicker method, gently microwave it in 10-second increments, stirring in between, until it’s pliable but not melted. In a medium bowl, combine the softened cream cheese and the ¼ cup of granulated sugar. Use an electric mixer, or a sturdy whisk, to beat these together until the mixture is light, fluffy, and completely free of lumps. This initial creaming step incorporates air, which contributes to the delightful texture of our filling. Next, we’ll add the egg yolk. The egg yolk enriches the filling, adding a beautiful custard-like quality and a lovely golden hue. Beat it in until just combined. Now, for a touch of extra creaminess and a subtle depth of flavor, we add the tablespoon of ricotta cheese. Don’t worry if you don’t have ricotta; you can omit it, but it does add a wonderful nuance. Stir in the ½ teaspoon of almond extract – almond extract pairs beautifully with cherries, but vanilla extract is a perfectly acceptable substitute if you prefer. Finish the filling by adding a pinch of salt, which enhances all the other flavors, and the ½ tablespoon of fresh lemon zest. The lemon zest provides a bright, zesty counterpoint to the sweetness of the cream cheese and cherries, cutting through the richness and making each bite incredibly refreshing. Mix everything together until it’s well incorporated and you have a smooth, fragrant filling. Set this aside while you prepare the puff pastry.
Shaping the Danishes
Now for the fun part – shaping our danishes into festive hearts! Lightly dust your work surface with all-purpose flour. This prevents the delicate puff pastry from sticking. Carefully unfold one sheet of thawed puff pastry. You want to handle puff pastry as little as possible to keep it cold and flaky. Gently roll it out just a tiny bit, if needed, to even it out, but don’t press too hard. Using a sharp knife or a pizza cutter, cut the pastry sheet into four equal squares. Repeat this process with the second sheet of puff pastry, so you’ll have a total of eight squares. To create the heart shape, take one square of puff pastry. Using your knife, make two diagonal cuts from each corner, meeting at the center of the square. This will create four triangular flaps. Now, carefully fold two opposing triangular flaps inwards, overlapping them slightly in the center. This forms the two lobes of the heart. Gently press down to seal the overlapping pastry. Repeat this with all eight squares, ensuring you have eight heart shapes ready for filling. Don’t worry if they aren’t perfectly uniform; the rustic charm is part of their appeal.
Assembling the Heart-Shaped Cherry Cheese Danishes
With our pastry hearts shaped and our cream cheese filling ready, it’s time to bring it all together. Place the shaped pastry hearts on a baking sheet lined with parchment paper. Parchment paper is essential for easy cleanup and to prevent sticking. Spoon about one tablespoon of the prepared cream cheese filling into the center of each pastry heart, making sure to leave a small border around the edges. This border is crucial to prevent the filling from oozing out during baking. Don’t overfill them. Once the cream cheese is in place, spoon a generous dollop of the cherry pie filling over the cream cheese in the center of each heart. Again, avoid going too close to the edges. The vibrant red of the cherry filling will peek through beautifully once baked.
The Finishing Touches and Baking
Before they go into the oven, we need to give them an egg wash for that irresistible golden-brown sheen. In a small bowl, whisk together the large egg and the tablespoon of water. This mixture is your egg wash. Using a pastry brush, lightly brush the exposed edges of the puff pastry with the egg wash. Be careful not to let the egg wash drip into the filling. This step not only adds a beautiful color but also helps the pastry crisp up nicely. Preheat your oven to 400°F (200°C). Allow the danishes to rest for about 5-10 minutes at room temperature before baking. This short resting period helps the pastry relax slightly, leading to better puff. Bake for 15-20 minutes, or until the puff pastry is golden brown, puffed up, and the filling is bubbly. Keep an eye on them as oven temperatures can vary.
Cooling and Serving
Once baked to perfection, carefully remove the baking sheet from the oven. Let the heart-shaped cherry cheese danishes cool on the baking sheet for about 5-10 minutes. This allows the filling to set slightly, making them easier to handle. Then, transfer them to a wire rack to cool further. They are absolutely divine served warm, allowing the creamy cheese filling and the sweet-tart cherry topping to meld together perfectly. If you have any leftover, store them in an airtight container at room temperature for a day or two, or in the refrigerator for slightly longer. Reheat gently in a low oven or toaster oven to revive their crispness.

Conclusion:
We hope you’ve enjoyed creating these delightful Heart-Shaped Cherry Cheese Danishes! This recipe offers a wonderful balance of flaky pastry, creamy cheese filling, and the sweet tartness of cherries, all wrapped up in an adorable heart shape perfect for any occasion. These danishes are surprisingly simple to make, making them an ideal project for both novice and experienced bakers. They’re best enjoyed fresh, warm from the oven, but they also hold up well for a day or two if stored properly. Consider serving these alongside a cup of coffee or tea for a delightful breakfast or a special afternoon treat. They also make for a beautiful addition to a brunch spread or a thoughtful homemade gift.
Don’t be afraid to experiment! You can substitute the cherries with other berries like raspberries or blueberries, or even use a different type of cheese filling such as sweetened cream cheese with a hint of lemon zest. Get creative with your glazes too – a simple powdered sugar glaze or even a thin layer of melted white chocolate can add an extra touch of elegance.
We encourage you to give this recipe a try and share your beautiful creations. Baking is all about bringin extractg joy, and these Heart-Shaped Cherry Cheese Danishes are sure to do just that!
Frequently Asked Questions:
Q: Can I make the dough for the Heart-Shaped Cherry Cheese Danishes ahead of time?
Yes, you can prepare the pastry dough up to 2 days in advance. After you’ve made the dough, wrap it tightly in plastic wrap and store it in the refrigerator. When you’re ready to use it, let it sit at room temperature for about 20-30 minutes to become more pliable before rolling.
Q: How should I store leftover Heart-Shaped Cherry Cheese Danishes?
Leftover danishes can be stored in an airtight container at room temperature for up to two days. For longer storage, you can refrigerate them, but be aware that the pastry may lose some of its crispness. To revive them, gently reheat them in a 300°F (150°C) oven for a few minutes until warmed through.
Heart-Shaped Cherry Cheese Danish-Easy Recipe
Easy-to-make heart-shaped danishes filled with a creamy cheese mixture and sweet cherry pie filling, perfect for any occasion.
Ingredients
-
4 oz cream cheese, softened
-
1/4 cup granulated sugar
-
1 large egg yolk
-
1 tablespoon whole milk ricotta cheese
-
1/2 teaspoon almond extract
-
Pinch of salt
-
1/2 tablespoon finely grated lemon zest
-
2 sheets of puff pastry, thawed
-
1 can (approximately 21 oz) cherry pie filling
-
1 large egg, for egg wash
-
1 tablespoon water, for egg wash
-
All-purpose flour, for dusting
Instructions
-
Step 1
Prepare the cream cheese filling: Beat softened cream cheese and sugar until light and fluffy. Add egg yolk, ricotta cheese, almond extract, salt, and lemon zest. Mix until smooth and fragrant. Set aside. -
Step 2
Shape the danishes: Lightly dust a work surface with flour. Cut each sheet of puff pastry into four equal squares, yielding eight squares total. For each square, make two diagonal cuts from opposite corners, meeting at the center, creating four triangular flaps. Fold two opposing flaps inwards to form a heart shape, overlapping slightly in the center and pressing to seal. -
Step 3
Assemble the danishes: Place the shaped pastry hearts on a parchment-lined baking sheet. Spoon about one tablespoon of cream cheese filling into the center of each heart, leaving a border. Top with a dollop of cherry pie filling. -
Step 4
Prepare for baking: Whisk together the egg and water to make an egg wash. Brush the exposed edges of the puff pastry with the egg wash, avoiding the filling. Preheat oven to 400°F (200°C). -
Step 5
Bake: Let the danishes rest at room temperature for 5-10 minutes. Bake for 15-20 minutes, or until golden brown and puffed. -
Step 6
Cool and serve: Let the danishes cool on the baking sheet for 5-10 minutes, then transfer to a wire rack to cool further. Serve warm.
Important Information
Nutrition Facts (Per Serving)
It is important to consider this information as approximate and not to use it as definitive health advice.
Allergy Information
Please check ingredients for potential allergens and consult a health professional if in doubt.