Juicy Tri Tip Two Ways Grilled Perfection
Tri Tip (2 Ways) offers a remarkable journey for your taste buds, showcasing the versatility and incredible flavor of this often-underappreciated cut of beef. There’s something inherently satisfying about a perfectly cooked tri tip. It’s that melt-in-your-mouth tenderness combined with a robust, beefy essence that just screams “special occasion” or “weekend treat.” But what truly makes this dish shine is its adaptability. Whether you’re a grilling aficionado or a stovetop magician, the tri tip responds beautifully. I love how a simple rub can transform this cut into a centerpiece, and the fact that we’re exploring not one, but two distinct methods means you’ll never get bored. Prepare to discover why tri tip holds such a beloved place in the hearts of home cooks everywhere!
Tri Tip (2 Ways)
The tri-tip roast, a flavorful and often budget-friendly cut of beef, offers incredible versatility in the kitchen. Named for its triangular shape and its three distinct muscles, it boasts a wonderful balance of tenderness and marbling, making it ideal for a variety of cooking methods. Today, we’re exploring two fantastic ways to prepare this magnificent cut: a classic reverse sear for that perfect steak-like finish, and a slow, smoky braise that yields incredibly tender, pull-apart meat. Whichever method you choose, the results will be delicious.
Ingredients:
Method 1: The Reverse Sear
This method is all about achieving a beautiful, even cook throughout the roast with a glorious, caramelized crust. It’s a patient approach, but the results are absolutely worth it.
Preparation and Initial Seasoning
1. Begin extract by patting your 2 & 1/2 pound tri tip roast completely dry with paper towels. This is a crucial step for achieving a great sear. Any surface moisture will steam the meat rather than allowing it to brown. In a small bowl, combine the 1 & 1/2 teaspoons garlic salt, 1 tablespoon Lawry’s seasoning salt, 1 & 1/2 teaspoons kosher salt, 1 teaspoon black pepper, 1/2 teaspoon sugar, 2 teaspoons garlic powder, and 1 tablespoon dried or fresh parsley. Mix this dry rub thoroughly. Then, lightly coat the entire tri tip roast with the 1/4 cup of olive oil, ensuring an even layer. Immediately after applying the oil, generously and evenly apply the prepared spice rub all over the roast, pressing it in gently to adhere. Let the seasoned roast sit at room temperature for about 30-60 minutes before cooking to allow the flavors to meld and the meat to temper.
Slow Cooking for Evenness
2. Preheat your oven to a low temperature, around 225 degrees Fahrenheit (107 degrees Celsius). Place the seasoned tri tip roast on a wire rack set inside a rimmed baking sheet. This setup allows air to circulate around the roast, ensuring even cooking and preventing any pooling of juices. Insert a meat thermometer into the thickest part of the roast, avoiding any large pockets of fat. This is where the “reverse” part comes in – we’re gently bringin extractg the internal temperature up before searing. Cook for approximately 45-75 minutes, or until the internal temperature reaches about 110-115 degrees Fahrenheit (43-46 degrees Celsius) for medium-rare. The exact time will depend on the thickness of your roast and your oven’s calibration. Keep a close eye on that thermometer; we’re aiming for a gentle, slow climb.
The Searing Stage
3. Once the roast has reached your desired internal temperature for the slow cook phase, remove it from the oven. Now it’s time for the magic of the sear. Heat a cast-iron skillet or a heavy-bottomed pan over high heat. You want this pan to be screaming hot. Add a touch more olive oil or a high-heat cooking oil if needed. Carefully place the tri tip roast, fat-side down if it has a significant fat cap, into the hot skillet. Sear for 1-2 minutes per side, until a beautiful, deep brown crust forms. You’re looking for that Maillard reaction to do its work, creating incredible flavor and texture. You might need to sear the edges as well to ensure all surfaces are nicely caramelized.
Resting is Key
4. After searing, immediately transfer the tri tip roast to a clean cutting board. Tent it loosely with aluminum foil and let it rest for at least 10-15 minutes. This resting period is absolutely vital. It allows the juices, which have been driven to the center during cooking, to redistribute throughout the roast, resulting in a more tender and moist final product. If you cut into it too soon, all that delicious juice will run out onto the board. While resting, you can use this time to prepare any accompanying side dishes or sauces.
Slicing and Serving
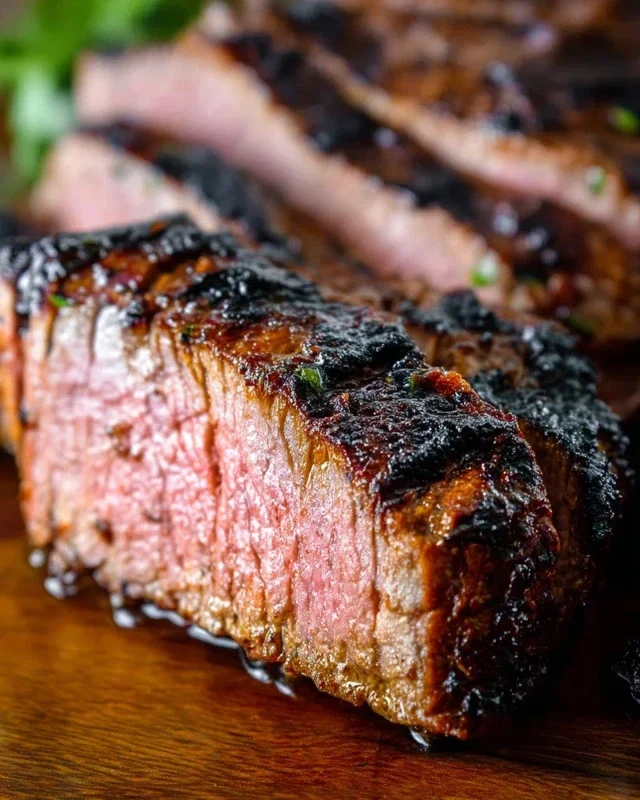
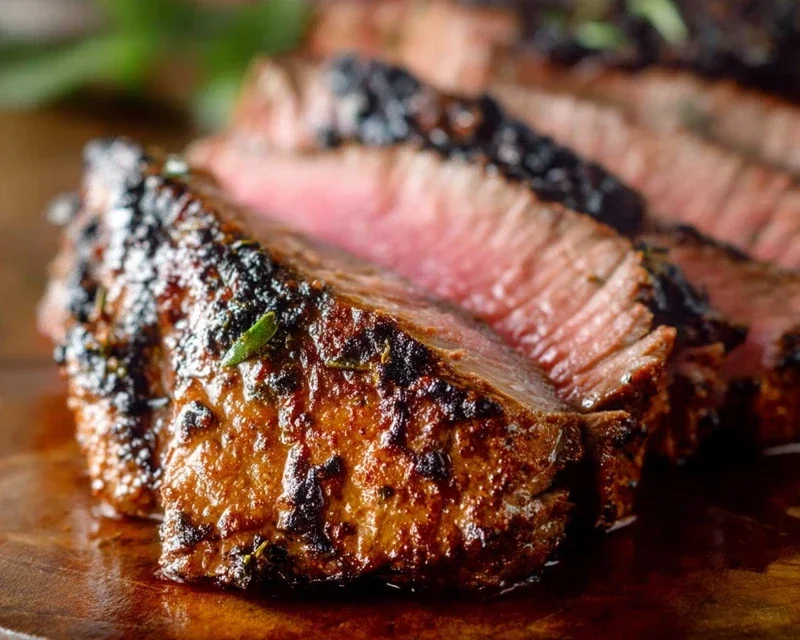
5. Once rested, slice the tri tip roast against the grain for maximum tenderness. You’ll notice the grain will likely run in different directions in different parts of the roast, so adjust your slicing accordingly. Serve immediately and enjoy the fruits of your labor! The reverse sear yields a roast with a beautifully pink, tender interior and a savory, crusty exterior.
Method 2: The Smoky Braise
This approach transforms the tri tip into incredibly tender, succulent meat, perfect for shredding or serving in thick, juicy slices. It’s a more hands-off method that builds layers of deep flavor.
Browning for Flavor Foundation
1. Begin extract by preparing your tri tip roast as you did for the reverse sear: pat it dry and season generously with the same spice blend (garlic salt, Lawry’s, kosher salt, pepper, sugar, garlic powder, parsley). Heat 2 tablespoons of olive oil in a Dutch oven or a heavy-bottomed pot over medium-high heat. Sear the tri tip roast on all sides until well-browned. This initial browning is crucial for developing a rich flavor base for your braise. Remove the roast from the pot and set aside.
Building the Braising Liquid
2. In the same Dutch oven, add a little more olive oil if needed. Sauté some aromatics like chopped onions, carrots, and celery (mirepoix) until softened. Deglaze the pot with about 1 cup of beef broth or red grape juice, scraping up any browned bits from the bottom. Add additional braising liquid, such as beef broth, until the tri tip is about two-thirds submerged when returned to the pot. You can also add herbs like thyme or rosemary for extra depth.
The Slow, Gentle Cook
3. Return the browned tri tip roast to the Dutch oven, nestling it into the braising liquid. Cover the pot tightly with a lid. You can then place the Dutch oven in a preheated oven at 300 degrees Fahrenheit (150 degrees Celsius) or simmer it gently on the stovetop over low heat. Braise for 2.5 to 3.5 hours, or until the tri tip is fork-tender and easily shreds. The low and slow cooking breaks down the connective tissues, making the meat incredibly tender.
Resting and Shredding
4. Carefully remove the tender tri tip from the braising liquid and place it on a clean surface. Tent it loosely with foil and let it rest for about 15-20 minutes. This brief rest allows the juices to settle. Once rested, the tri tip can be easily shredded with two forks or sliced into thick pieces, depending on your preference. Skim any excess fat from the surface of the braising liquid and reduce it slightly if you wish to serve it as a sauce.
Serving Your Braised Tri Tip
5. Serve the incredibly tender, succulent braised tri tip hot, either piled high for sandwiches or alongside your favorite side dishes like mashed potatoes or rice. The braising liquid, now infused with the flavor of the beef and aromatics, makes a fantastic sauce to spoon over the meat. This method truly showcases the tri tip’s ability to become meltingly tender with a bit of time and liquid.
Conclusion:
There you have it – two fantastic ways to prepare a truly memorable tri tip! This versatile cut of beef shines in both the classic grilled preparation and the slower, oven-roasted method, offering a depth of flavor and tenderness that’s simply unmatched. Whether you’re craving that smoky char from the grill or the melt-in-your-mouth succulence achieved through slow roasting, this tri tip recipe delivers. It’s a celebration of simple ingredients meeting expert technique, resulting in a dish that’s perfect for weeknight dinners or impressing guests at your next gathering.
I highly recommend pairing your perfectly cooked tri tip with classic steakhouse sides like roasted potatoes, creamy mashed potatoes, or a fresh green salad. For a more adventurous twist, consider serving it with a chimichurri sauce or a vibrant salsa verde. Don’t be afraid to experiment with marinades or dry rubs for even more flavor! I truly hope you’ll give these tri tip preparations a try. They’re incredibly rewarding and consistently delicious.
Frequently Asked Questions:
What is the best internal temperature for tri tip?
For a medium-rare tri tip, aim for an internal temperature of 130-135°F (54-57°C). For medium, go for 135-140°F (57-60°C). Remember that the temperature will rise a few degrees as it rests, so pull it off the heat slightly before it reaches your target. Always use a reliable meat thermometer for accuracy.
Can I marinate tri tip overnight?
Absolutely! Marinating tri tip overnight can significantly enhance its flavor and tenderness. Just be mindful of acidic ingredients in your marinade (like citrus or vinegar), as marinating for too long with strong acids can sometimes make the meat mushy. A 4-12 hour marinade is usually ideal for most tri tip recipes.
What’s the difference between tri tip and brisket?
Tri tip is a triangular cut from the bottom sirloin, known for its lean yet flavorful profile and relatively quick cooking time. Brisket, on the other hand, is from the chest of the cow and is a much tougher cut with more connective tissue, requiring long, slow cooking methods like smoking or braising to become tender.
Tri Tip (2 Ways)
A versatile tri tip roast prepared two distinct ways for maximum flavor and enjoyment.
Ingredients
-
2 & 1/2 pound tri tip roast
-
1 & 1/2 teaspoons garlic salt
-
1 tablespoon Lawry’s seasoning salt
-
1 & 1/2 teaspoons kosher salt (Diamond Crystal)
-
1 teaspoon black pepper
-
1/2 teaspoon sugar
-
2 teaspoons garlic powder
-
1 tablespoon dried or fresh parsley
-
1/4 cup olive oil
Instructions
-
Step 1
Pat the tri tip roast completely dry with paper towels. This is crucial for a good sear. -
Step 2
In a small bowl, combine the garlic salt, Lawry’s seasoning salt, kosher salt, black pepper, sugar, garlic powder, and parsley. Mix well to create the dry rub. -
Step 3
Rub the tri tip roast all over with the prepared seasoning blend, ensuring an even coating. Let it sit at room temperature for at least 30 minutes before cooking. For Way 1 (Grilled): Preheat your grill to high heat. Sear the tri tip for 2-3 minutes per side. -
Step 4
Reduce the grill heat to medium-low and continue to cook for an additional 20-25 minutes, or until the internal temperature reaches 130-135°F (for medium-rare). -
Step 5
For Way 2 (Oven-Roasted): Preheat your oven to 400°F (200°C). Heat the olive oil in an oven-safe skillet over medium-high heat. Sear the tri tip on all sides until browned. -
Step 6
Transfer the skillet to the preheated oven and roast for 20-30 minutes, or until the internal temperature reaches 130-135°F (for medium-rare). -
Step 7
Once cooked to your desired doneness, remove the tri tip from the heat and let it rest for at least 10-15 minutes before slicing against the grain.
Important Information
Nutrition Facts (Per Serving)
It is important to consider this information as approximate and not to use it as definitive health advice.
Allergy Information
Please check ingredients for potential allergens and consult a health professional if in doubt.