Fruity Pebbles Cheesecake Tacos – Sweet & Crunchy Treat
Fruity Pebbles Cheesecake Tacos are about to redefine your dessert game! Forget everything you thought you knew about tacos and cheesecake, because we’re diving headfirst into a knon-alcoholic aleidoscope of flavor and fun. Imagin extracte a creamy, dreamy cheesecake filling, swirled with vibrant colors and studded with the irresistible crunch of Fruity Pebbles cereal, all cradled within a delicate, slightly crisp waffle taco shell. It’s a playful, nostalgic, and utterly delicious creation that taps into our inner child while satisfying our grown-up cravings for something truly decadent. People adore these Fruity Pebbles Cheesecake Tacos because they’re a whimsical explosion of taste and texture – the tang of the cheesecake beautifully balances the sweet, fruity notes of the cereal, and the contrasting textures are simply divine. What makes them truly special is the unexpected fusion of breakfast cereal and dessert, transforming a childhood favorite into an elegant, yet incredibly approachable, treat that’s perfect for any celebration or just a Tuesday. Get ready to fall in love!
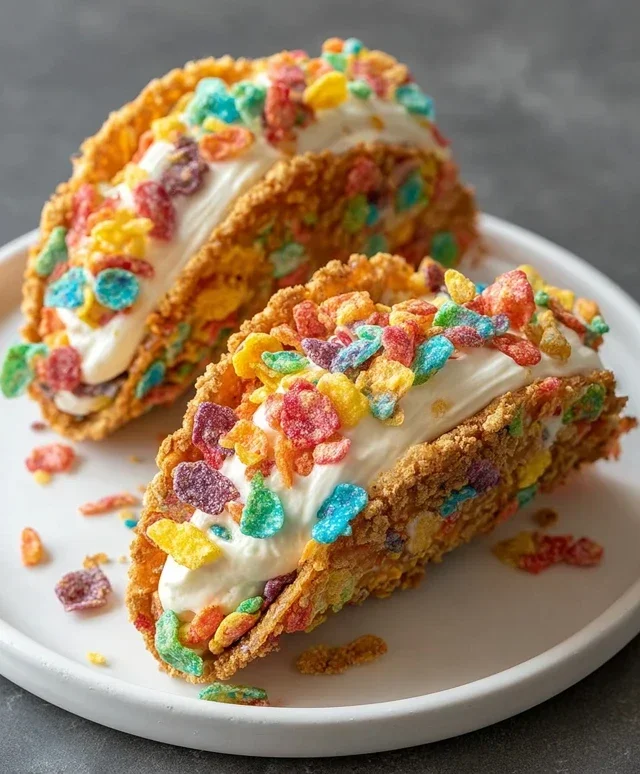
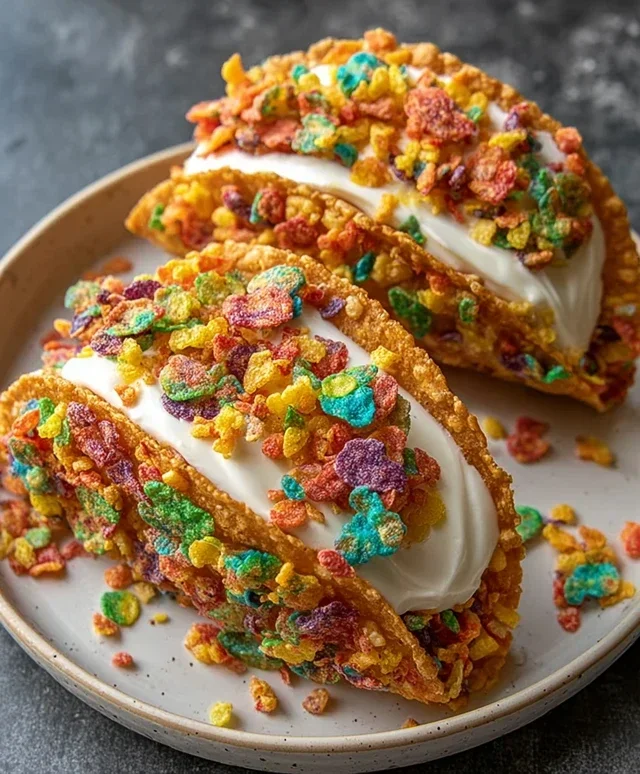
Fruity Pebbles Cheesecake Tacos
Get ready for a dessert that’s as fun to make as it is to eat! These Fruity Pebbles Cheesecake Tacos are a vibrant explosion of flavor and texture. Imagin extracte the creamy, dreamy goodness of cheesecake nestled in a crunchy, sweet shell, all dusted with the nostalgic magic of Fruity Pebbles. This recipe takes the beloved flavors of a classic cheesecake and transforms them into bite-sized, whimsical taco delights that are perfect for parties, a fun weekend treat, or just because you deserve something spectacular. The colorful cereal not only infuses our taco shells with a delightful sweetness but also creates a visually stunning presentation that will have everyone asking for the recipe. Let’s dive into creating these delightful treats!
Ingredients:
Crafting the Fruity Pebbles Taco Shells
This is where the magic truly begin extracts. We’re going to transform the colorful fruity cereal into edible taco shells that are both sweet and wonderfully crisp.
Whipping Up the Creamy Cheesecake Filling
While our taco shells are chilling and firming up, let’s prepare the decadent cheesecake filling that will be the heart of our tacos.
Assembling Your Fruity Pebbles Cheesecake Tacos
The best part: bringin extractg all these delicious components together!
These Fruity Pebbles Cheesecake Tacos are a delightful adventure for your taste buds. The crisp, sweet shell made from ground fruity cereal provides a fantastic textural contrast to the rich, creamy cheesecake filling. Each bite is a symphony of familiar, comforting flavors presented in a playful and exciting new way. They are incredibly customizable, so feel free to experiment with different toppings or even add a splash of lemon zest to the cheesecake filling for a little tang. Enjoy the smiles and “wows” as you present these vibrant, delicious treats!
Conclusion:
There you have it – your guide to creating these delightful Fruity Pebbles Cheesecake Tacos! This recipe is an absolute winner because it combines the irresistible creaminess of cheesecake with the fun, nostalgic crunch of Fruity Pebbles cereal, all nestled within a crisp taco shell. It’s a treat that’s as visually stunning as it is delicious, perfect for parties, a fun family dessert, or just a spontaneous craving for something uniquely sweet. I truly encourage you to give these a try; they are remarkably easy to make and the joy they bring is immense.
For serving, imagin extracte these as a vibrant dessert spread! They are fantastic on their own, but you can elevate them further with a drizzle of whipped cream, a sprinkle of extra Fruity Pebbles, or even some fresh berries. For variations, consider experimenting with different cheesecake flavors like lemon or chocolate, or even swapping out the Fruity Pebbles for other colorful cereals. The possibilities are endless!
Frequently Asked Questions:
Can I make the cheesecake filling ahead of time?
Absolutely! The cheesecake filling can be made a day or two in advance and stored in an airtight container in the refrigerator. This makes assembly on the day you want to serve them even quicker and easier.
What kind of taco shells work best?
For this recipe, I found that using regular taco shells that have been lightly baked or fried until crisp works wonderfully. You can also use dessert shells or even waffle cones broken into pieces for a different texture and shape.
Fruity Pebbles Cheesecake Tacos
A fun and colorful dessert taco featuring a creamy cheesecake filling and a crunchy Fruity Pebbles shell.
Ingredients
-
3 cups colorful fruity cereal
-
1/2 cup unsalted butter, melted
-
8 oz cream cheese, softened
-
1/2 cup powdered sugar, sifted
-
1 tsp pure vanilla extract
-
1 cup whipped cream
-
Additional fruity cereal for garnish
Instructions
-
Step 1
Crush 2 cups of the colorful fruity cereal into fine crumbs. Set aside. -
Step 2
In a medium bowl, combine the crushed fruity cereal and melted butter. Stir until well combined. -
Step 3
Press the cereal mixture evenly into the bottom of 6 taco molds or small ramekins to form the taco shells. Chill in the refrigerator for at least 15 minutes to set. -
Step 4
In a separate bowl, beat the softened cream cheese until smooth. Gradually beat in the sifted powdered sugar and vanilla extract until well combined. -
Step 5
Gently fold in the whipped cream until the cheesecake filling is smooth and creamy. -
Step 6
Spoon the cheesecake filling into the chilled cereal taco shells. -
Step 7
Top with additional colorful fruity cereal for garnish.
Important Information
Nutrition Facts (Per Serving)
It is important to consider this information as approximate and not to use it as definitive health advice.
Allergy Information
Please check ingredients for potential allergens and consult a health professional if in doubt.