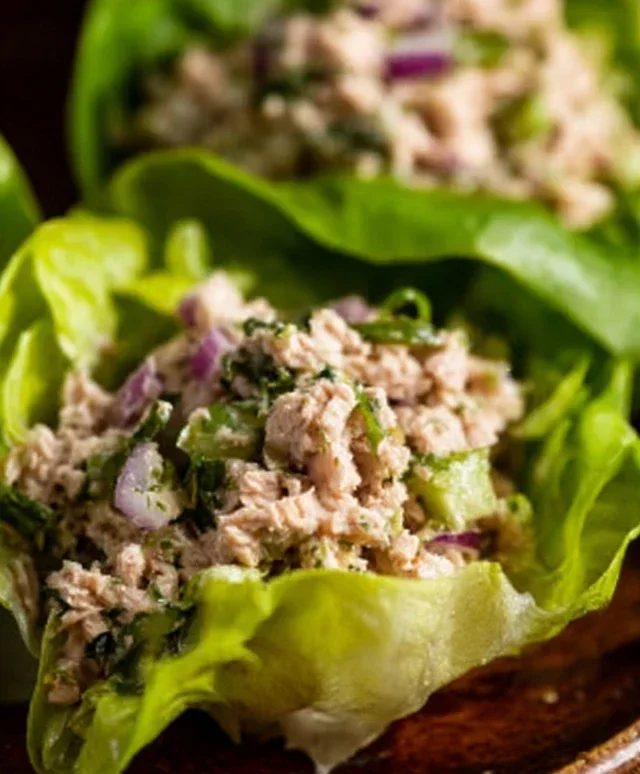
Easy Tuna Lettuce Wraps – Quick & Fresh Lunch
Tuna lettuce wraps are a revelation in easy, healthy, and unbelievably delicious weeknight meals. If you’re like me, always on the hunt for dishes that are both satisfying and kind to your waistline, then these tuna lettuce wraps are about to become your new best friend. There’s something incredibly appealing about the crunch of crisp lettuce cradling a flavorful, protein-packed filling. It’s a dish that feels both light and indulgent, a rare and welcome combination. What truly makes these tuna lettuce wraps so special is their incredible versatility. You can customize the filling to your heart’s content, adding your favorite crunchy vegetables, a zesty dressing, or a hint of spice. They’re perfect for a quick lunch, a light dinner, or even a fun appetizer when friends come over. Get ready to discover a new favorite way to enjoy this classic ingredient!
Why You’ll Love These Tuna Lettuce Wraps:
Effortless Preparation
Bursting with Fresh Flavors
Endlessly Adaptable
Tuna Lettuce Wraps
Looking for a light, healthy, and incredibly satisfying meal that comes together in a flash? My Tuna Lettuce Wraps are the answer! Perfect for a quick lunch, a light dinner, or even as a make-ahead option for busy weeknights, these wraps are bursting with fresh flavors and crunchy textures. Forget heavy bread; we’re embracing the crisp, cool embrace of lettuce leaves for a guilt-free and delicious experience. This recipe is incredibly adaptable, but the core ingredients create a classic, delightful tuna salad that’s elevated by the refreshing lettuce.
Ingredients:
Let’s Get Cooking!
Step 1: Prepare the Tuna Base
The first step to our delicious tuna lettuce wraps is to get our tuna ready. Open your cans of albacore tuna. I prefer albacore for its firm texture and mild flavor, which holds up beautifully in a salad. Drain the tuna thoroughly. You can do this by gently pressing the lid against the tuna and letting the liquid drain out, or by using a fine-mesh sieve. Once drained, transfer the tuna to a medium-sized mixing bowl. Using a fork, break up the tuna into flaky pieces. Avoid over-mashing; we want some texture here, not a paste.
Step 2: Combine the Flavorful Fillings
Now it’s time to bring all those wonderful flavors together with the tuna. Add the mayonnaise to the bowl with the flaked tuna. Start with the 1/3 cup, but you can always add a touch more if you prefer a creamier consistency. Next, incorporate the finely diced celery. The celery adds a fantastic crispness and a subtle fresh flavor that complements the tuna perfectly. Then, add the finely diced red onion. It’s crucial to rinse the red onion in cold water before adding it, as this significantly reduces its sharp, pungent bite, leaving you with just a hint of sweet onion flavor. This small step makes a big difference! Finally, stir in the whole grain mustard and the chopped fresh parsley. The mustard provides a gentle tang and a bit of complexity, while the parsley adds a burst of herbaceous freshness.
Step 3: Season and Mix Thoroughly
Once all the ingredients are in the bowl, it’s time to mix everything together. Gently fold all the components until they are well combined. Be careful not to overmix, as this can break down the tuna too much. Season generously with salt and freshly ground black pepper to your taste. This is where you can really personalize the flavor. Taste a small spoonful (don’t worry, it’s just tuna salad at this stage!) and adjust the salt, pepper, or even the amount of mayonnaise or mustard if you feel it needs it. If you like a little extra kick, a pinch of cayenne pepper can be a delightful addition.
Step 4: Prepare the Lettuce Cups
While our tuna mixture is mingling and developing its flavors, let’s get our lettuce cups ready. Select your butter or Bibb lettuce leaves. These varieties are ideal because their leaves are large, pliable, and have a natural cup-like shape, making them perfect for holding the tuna filling. Carefully peel off the outer leaves, rinsing them gently under cool water. Pat them dry very thoroughly with a clean kitchen towel or paper towels. Excess water will make the lettuce soggy and dilute the flavor of the tuna salad. You want those crisp, clean lettuce leaves to be the perfect vessel for our delicious filling.
Step 5: Assemble and Serve Your Wraps
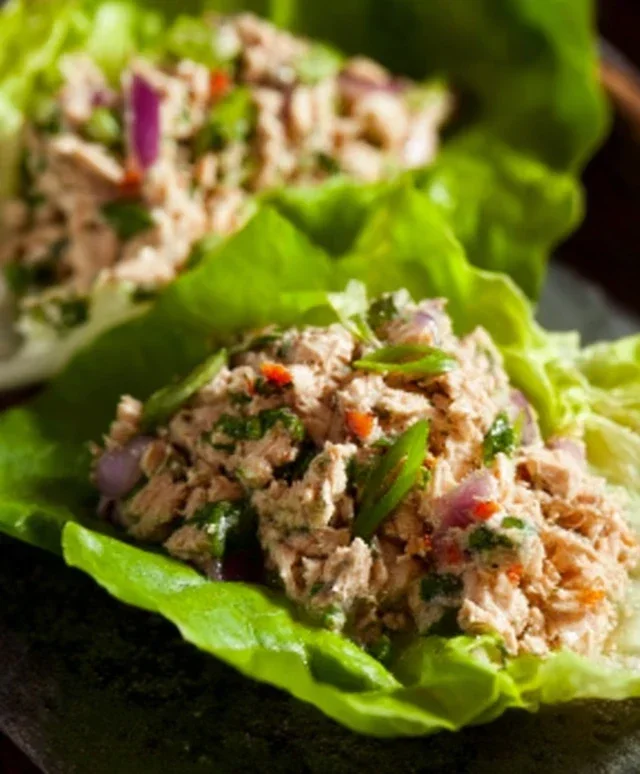
Now for the most satisfying part: assembly! Take one of your prepared, dried lettuce leaves. Spoon a generous portion of the tuna salad mixture into the center of the leaf. Don’t be shy; load them up! You can serve these immediately, or for an even better flavor, cover the bowl of tuna salad and refrigerate it for at least 30 minutes. This allows the flavors to meld and deepen beautifully. To serve, arrange the filled lettuce wraps on a platter. You can offer additional toppings on the side, such as sliced avocado, a sprinkle of toasted sesame seeds, or a drizzle of sriracha for those who like a little heat. These are best enjoyed fresh, so assemble them just before you’re ready to eat. Enjoy your light, flavorful, and incredibly easy Tuna Lettuce Wraps!
Expert Tips for Perfect Tuna Lettuce Wraps
Remember when I mentioned rinsing the red onion? Here’s why that’s so important and a few other tricks to elevate your wraps:
Rinsing Red Onion:
Red onions are fantastic for their vibrant color and flavor, but their raw bite can sometimes be overpowering. By finely dicing the red onion and then rinsing it thoroughly under cold running water for about 30 seconds to a minute, you wash away some of those strong sulfur compounds. Drain it very well afterward, patting it dry if necessary, and you’ll be left with a milder, sweeter onion flavor that integrates much more harmoniously into the tuna salad without sacrificing that lovely crunch.
Tuna Quality Matters:
While you can use any canned tuna, opting for albacore in water or oil will give you the best texture and flavor for this recipe. Albacore is a firmer, more substantial fish, and it won’t turn mushy in your salad. If you’re using tuna packed in oil, you might want to drain it a little more carefully or even reduce the amount of mayonnaise slightly, as the oil adds richness.
Lettuce Variety is Key:
While I’ve recommended butter or Bibb lettuce, other large, sturdy lettuce leaves can also work. Romaine lettuce hearts can be carefully separated and used, and even large Napa cabbage leaves can provide a good crunch, though they might be a bit more brittle. The goal is to have a leaf that can hold its shape and contents without tearing easily. Ensure they are completely dry for the best texture.
Don’t Skip the Chill Time:
If you have the time, letting the tuna salad chill in the refrigerator for at least 30 minutes before assembling the wraps makes a world of difference. This allows the flavors to meld and develop, creating a more cohesive and delicious salad. It’s also a great make-ahead option for lunches or picnics. Just store the tuna salad and lettuce leaves separately and assemble just before serving to prevent the leaves from wilting.
Customization Station:
These wraps are a fantastic blank canvas for your creativity! Feel free to add other finely diced vegetables like bell peppers (any color!), pickles for a briny tang, or even a handful of chopped water chestnuts for an extra layer of crunch. For a creamier, richer tuna salad, you could add a tablespoon of Greek yogurt along with the mayonnaise. A squeeze of lemon juice at the end can also brighten up all the flavors.
Conclusion:
I hope you’re as excited about these Tuna Lettuce Wraps as I am! This recipe truly shines because it’s incredibly light, refreshing, and packed with flavor. It’s the perfect solution for a quick and healthy lunch or a delightful appetizer that won’t leave you feeling weighed down. The satisfying crunch of the lettuce paired with the zesty tuna filling is a combination I find myself craving again and again. Don’t be afraid to get creative and make them your own! These wraps are incredibly versatile, so feel free to experiment with different seasonings or add-ins.
For serving suggestions, I love to present these as a vibrant appetizer for gatherings, or enjoy them as a complete meal alongside a simple side salad or some crunchy sweet potato fries. They’re also fantastic for meal prep, keeping the filling separate until you’re ready to assemble for maximum freshness.
Now, let’s tackle a few questions you might have about these wonderful Tuna Lettuce Wraps:
FAQs:
Can I make the tuna filling ahead of time?
Absolutely! The tuna filling can be prepared up to a day in advance and stored in an airtight container in the refrigerator. This makes assembling your wraps even faster when you’re ready to eat.
What other vegetables can I add to the filling?
The possibilities are endless! Finely diced celery adds a lovely crunch, while shredded carrots or bell peppers bring sweetness and color. A sprinkle of fresh dill or parsley also elevates the flavor profile beautifully.
Are these Tuna Lettuce Wraps suitable for a gluten-free diet?
Yes, they are naturally gluten-free! The crisp lettuce leaves serve as the perfect vessel, making them an excellent option for those avoiding gluten. Enjoy!
Tuna Lettuce Wraps
Light and refreshing tuna salad served in crisp lettuce cups for a healthy and easy meal.
Ingredients
-
10 oz canned albacore tuna (2 5oz cans)
-
1/3 cup mayonnaise
-
2 tbsp finely diced celery
-
2 tbsp finely diced red onion, rinsed in cold water
-
1 tsp whole grain mustard
-
1 tsp chopped fresh parsley
-
Salt
-
Pepper
-
Butter lettuce, or Bibb lettuce
Instructions
-
Step 1
Drain the canned albacore tuna thoroughly. -
Step 2
In a medium bowl, flake the drained tuna with a fork. -
Step 3
Add the mayonnaise, finely diced celery, rinsed red onion, whole grain mustard, and chopped fresh parsley to the bowl. -
Step 4
Stir all ingredients together until well combined. Season with salt and pepper to taste. -
Step 5
Gently separate the butter lettuce or Bibb lettuce leaves to form cups. -
Step 6
Spoon the tuna salad mixture into the prepared lettuce cups.
Important Information
Nutrition Facts (Per Serving)
It is important to consider this information as approximate and not to use it as definitive health advice.
Allergy Information
Please check ingredients for potential allergens and consult a health professional if in doubt.